9
IMPORTANT: It is advised to read each step entirely before starting assembly on instructions. Do not
tighten screws completely until all screws for that step have been installed, or unless otherwise
mentioned.
ASSEMBLY PREPARATION
ASSEMBLY INSTRUCTIONS
1.
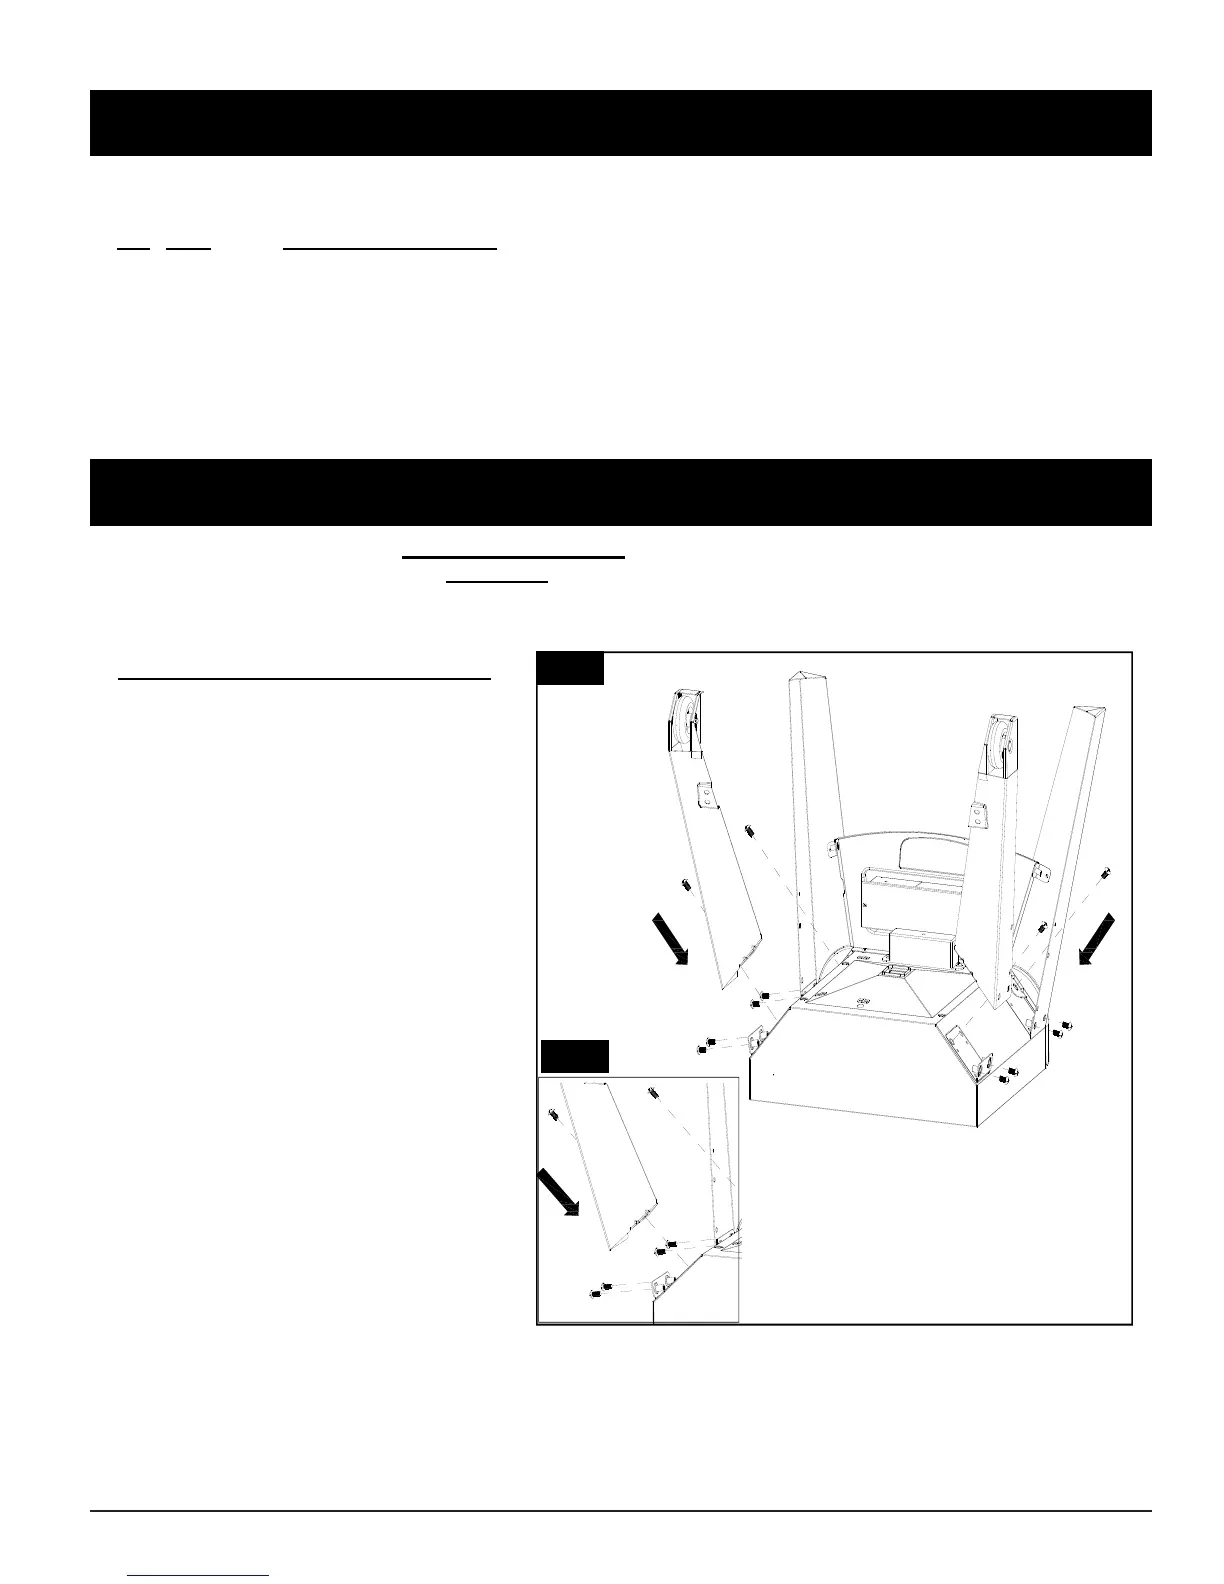
MOUNTING THE LEGS TO LOWER
SMOKER CABINET ASSEMBLY
Parts Required:
1 x Lower Smoker Cabinet with Control Panel
Assembly (#14)
1 x Right Front Leg (#22)
1 x Left Front Leg (#19)
1 x Right Rear Leg with Wheel Assembly (#17)
1 x Left Rear Leg with Wheel Assembly (#18)
12 x 1/4-20*1/2”Screw (#B)
Installation:
• Place a piece of cardboard on the floor to
prevent scratching the unit.
Remove the Door Assembly (#8) and set
aside. Lay the Lower Smoker Cabinet
with Control Panel Assembly on up side down
on the cardboard as Fig.1 shown.
• Mount Right Front Leg (#22),Left Front Leg
(#19), Right Rear Leg with Wheel Assembly
(#17) and Left Rear Leg with Wheel Assembly
(#18) to the Lower Smoker Cabinet with
Control Panel Assembly (#14) using 12
x1/4-20*1/2”Screws (#B)as Fig.1 & Fig.1.1
shown, tighten inside screws only, but do not
tighten all outside screws yet as Fig. 1 shown.
Fig.1.0
#19 #22
#18 -----------
#17 --------
-------
-------
#14
------------
Inside
screws
Outside screws
-------------
-------------
--------------
------
Fig.1.1
Parts are located throughout the shipping carton, including inside the electric smoker. Inspect the
unit, parts, and hardware blister pack after removing from the protective shipping carton. Before
assembly of product, review all parts and reference the parts list. If any part is missing or
damaged, do not attempt to assemble. Shipping damage is not covered under warranty. Contact your
dealer or Pit Boss Customer Service for parts.
Tools required for assembly: screwdriver and wrench. Tools is not included.