Gripper Assembly
Locate the gripper assembly parts bag. The gripper assembly must be assembled and properly
adjusted to function. This part should not be disassembled by students in the normal operation in this
activity.
Use the four longer screws to attach the servo to the gripper plate. Use only the shorter, self-tapping
screws included in the gripper assembly package. Substituting longer screws will damage your TETRIX
PRIME gripper. Do not overtighten the screws as damage might result.
Locate and attach a standard servo to the gripper plate. Use the four longer screws provided.
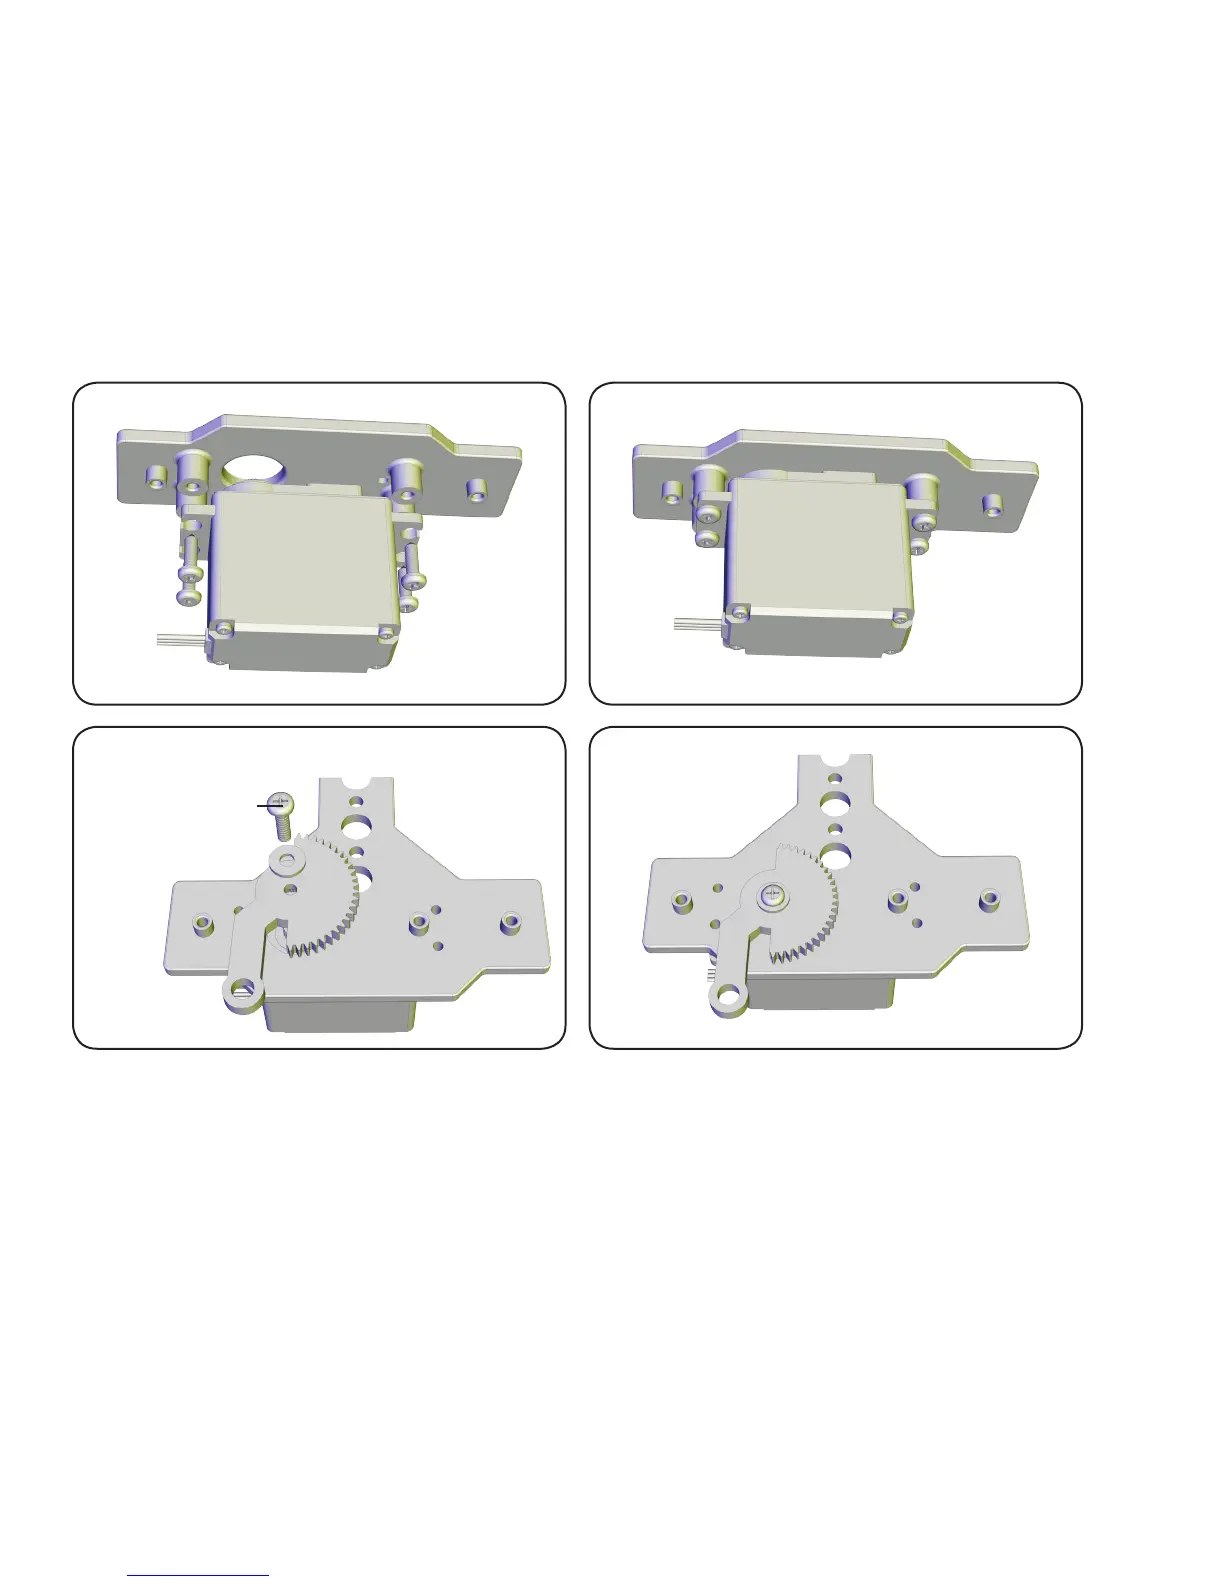
Step 1 Step 2
Step 3 Step 4
Attach the gripper gear arms next, beginning
with the servo side. Before attaching the gripper
gear arms, the servo motor must be in the
neutral position. To do this, the servo will need
to be plugged into a battery and the receiver.
The transmitter should be powered on and
the joysticks and trimmer wheels placed in the
center, or neutral, position. Align the right gripper
gear arm to be perpendicular to the front edge of
the gripper plate. Align the splines on the servo
and the gear, and press the gear onto the servo.
Use a washer and the servo horn screw, included
with the servo, to attach the gear.
Servo Horn Screw
16
 Loading...
