TETRIX Ardublockly Introduction
Software Basics:
This is the main interface you will use when you open the software. On the far-left
side is the tool palette. To hide the tool palette, click the eye icon on the top of the
bar. This tool palette contains two different types of blocks. These are blocks that
were specifically created for use with the PULSE controller. The Arduino blocks can
also be used for additional functions and programming.
In the middle is the programming space. This is where you will place your blocks
to create your program. On the bottom right of the programming space, there is a
trash can where you can place blocks to delete them. Also, the plus and minus signs
allow you to zoom in and out of the programming space. The bull’s-eye will center
the programming space to where your blocks are placed.
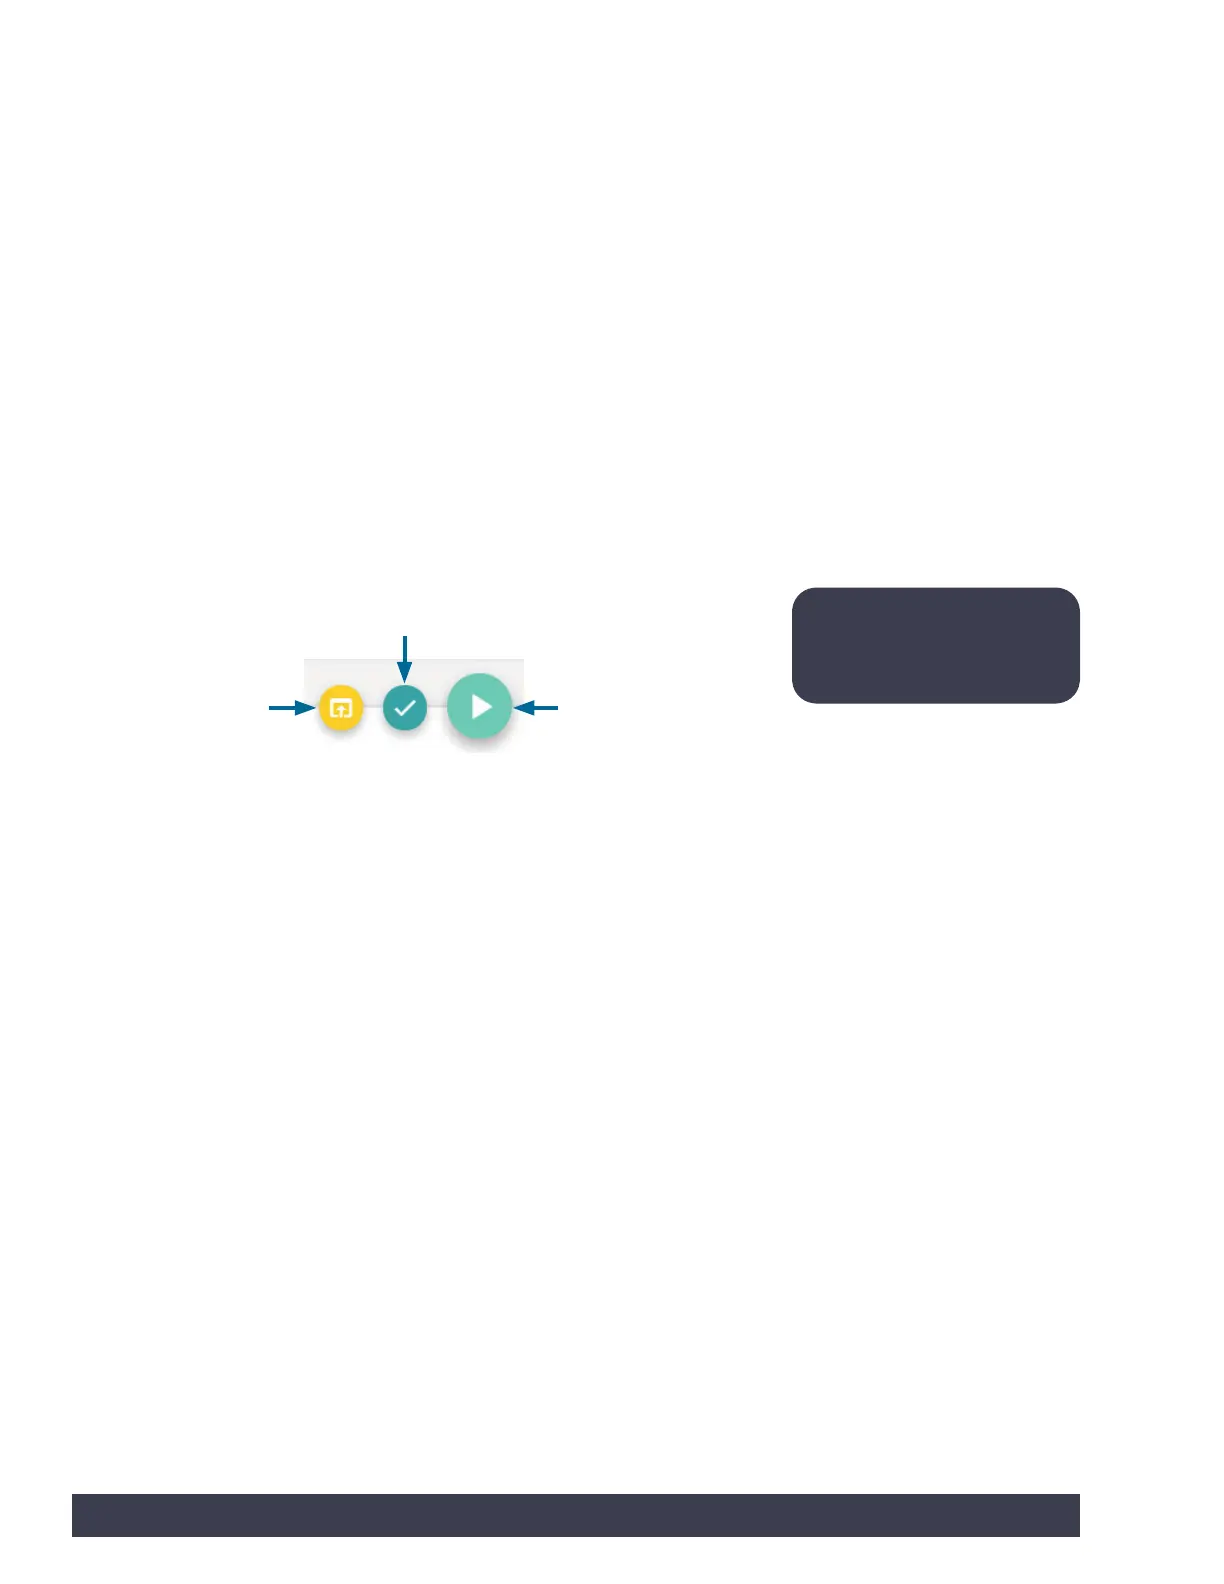
On the top right of the programming space, there are three buttons. One button is
Open Sketch, which allows you to open your sketch in the Arduino Software (IDE).
Your program will be opened in syntax format. You can edit the syntax code within
Arduino Software (IDE) if desired. This process will not be covered in this guide. The
Verify button allows you to check your sketch to ensure that your program has no
errors. The final button is Upload. This is the button that transfers your program to
the PULSE controller (Figure 17).
The far-right side shows the text-based Arduino source code. You can’t edit the
source code. You can hide the source code bar if desired.
On the very bottom of the screen, there is the Arduino IDE output command bar. It
defaults to being hidden. If you click anywhere along the bottom bar, it will open
the status bar. This provides real-time information on the status of an upload.
To name your program, click where it says Sketch_Name and type in your file
name. You must click Save to keep a copy of the program you create. If you are
opening an existing file, you can click Open.
Figure 17
Note: These buttons will
change order to show the
last button action chosen.
Open Sketch Upload Sketch
Verify
20 Getting Started