8
4. FOX Coil Shocks
Spec rates should match the average rider for the frame size but some riders may need a lighter or heaver spring to achieve the
recommended 30% sag. Listed below are the recommended spring rates based on rider weight as well as coil length and spring
stroke specifications for the spring required to run on FOX and Marzocchi coil-over shocks used on the Mach 6.
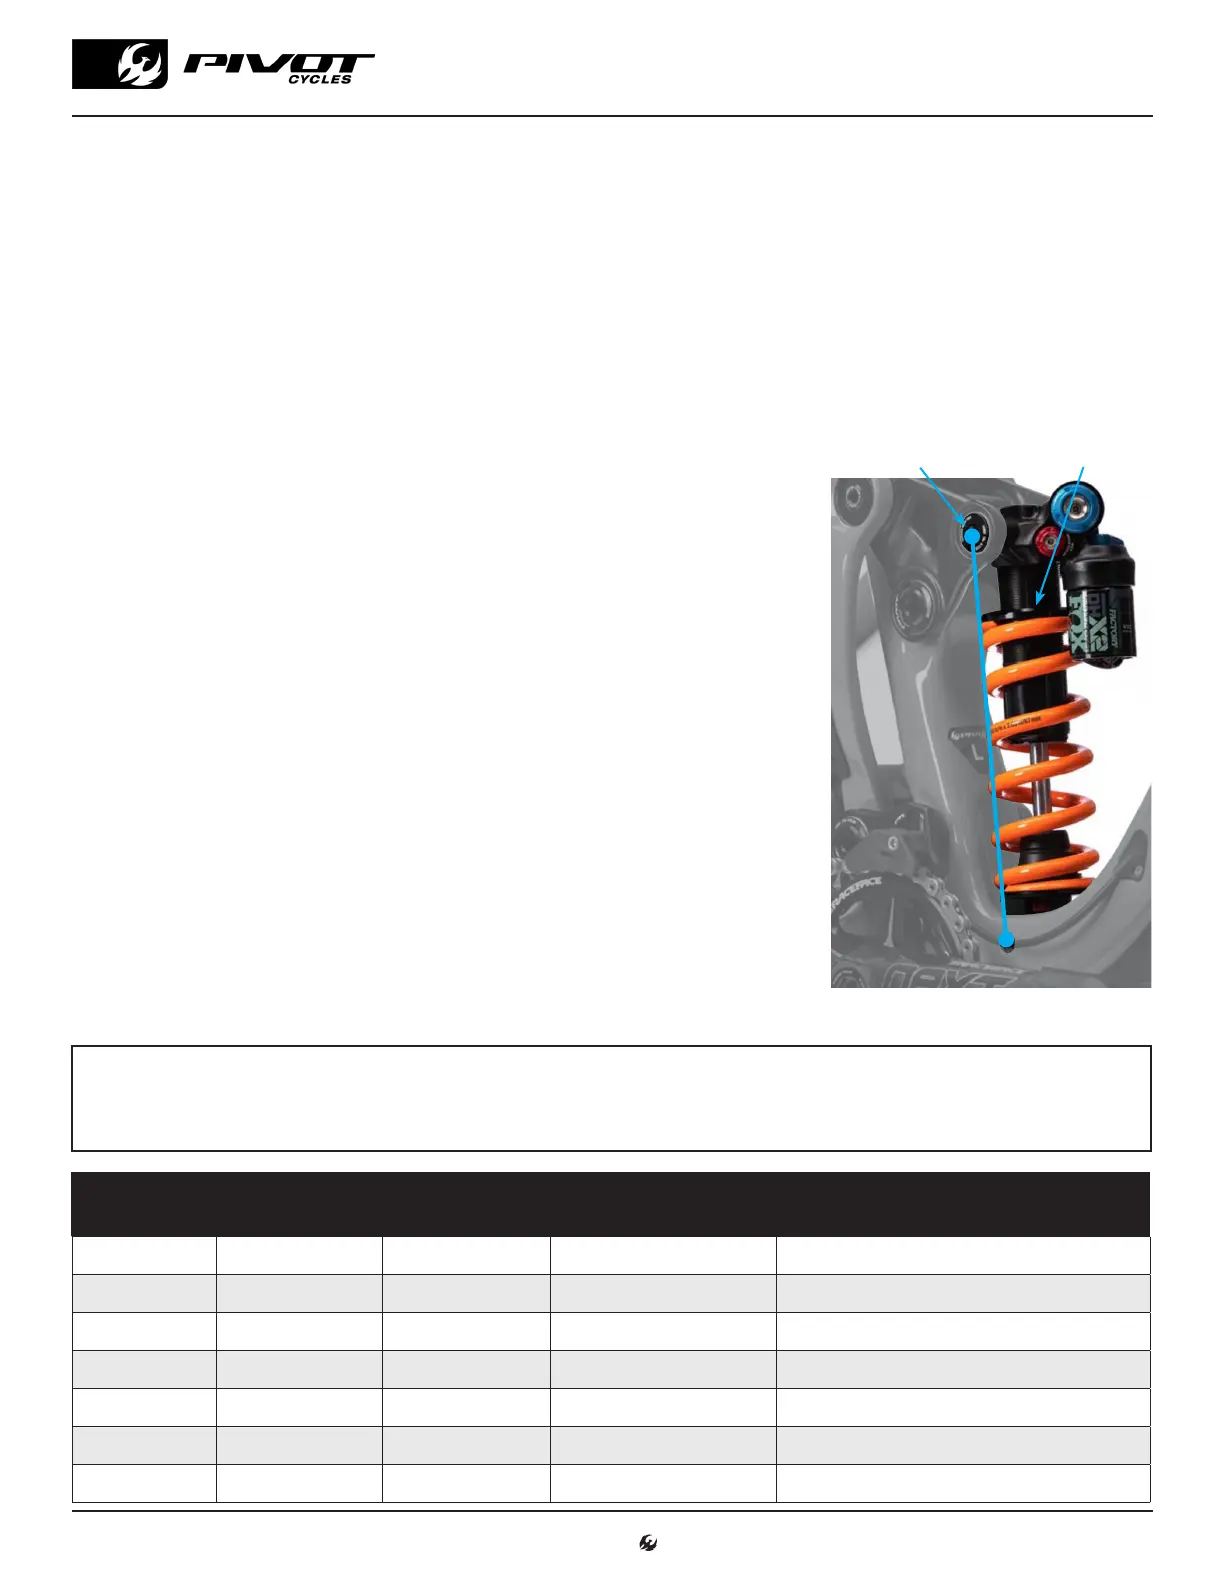
Setting Sag on FOX Coil Shock
To set sag on a coil shock you will want to have a friend and a tape measure that has millimeters on it. You will need to measure the
eye-to-eye distance on your bike. This is the distance between the two shock mounting bolts. On the Mach 6 and Firebird this distance
is 205mm. The correct amount of sag for the Mach 6 or Firebird is 18-20mm. When you are seated on the bike with all your weight after
completing the steps for sag setup the distance from shock bolt to shock bolt should measure 187-185mm.
1. Always set sag with the blue compression lever to the open position.
2. If your shock has additional compression and rebound adjustments ensure they are adjusted to be fully open, compression in the
softest setting, and rebound to its fastest setting.
3. After installing the coil spring, set the preload adjuster to where it just contacts the coil spring applying a small amount of tension.
On Fox shocks this should be about 8 clicks of the preload adjuster.
4. Find a level surface and something to steady yourself while mounted on the bike so you
can be on the pedals in a seated position. It may be easier to have a partner hold your
bike steady from the front by the handlebars while you are in your riding position.
5. While standing on the pedals, sit down hard into the saddle to cycle the suspension well
into the stroke. This will ensure the bike comes to a rest at the natural sag setting with
the rider in the saddle.
6. While in the saddle and not moving or unweighting the shock, have your friend measure
the eye-to-eye distance. Subtract this number from the beginning eye-to-eye to get
your sag measurement.
7. If the sag measurement is less than the recommended sag of 18-20mm you will need
to change out the spring for a lower spring rate.
8. If the sag measurement is more than the recommended 18-20mm then you can turn
the spring preload adjuster up to 26 clicks from where it just contacted the spring. If
you cannot achieve the recommended sag with 26 clicks you will need to change the
spring out for a higher spring rate.
9. Once you have achieved proper sag follow the recommended compression and rebound
settings to complete your suspension setup.
Preload Adjuster
Eye to Eye
SPRING
RATE
TOTAL
LENGTH
SPRING
TRAVEL
I.D. RIDER WEIGHT
350 lb. 4.85" 2.65" 1.385" < 130lb.(59kg)
400 lb. 5.14" 2.65" 1.385" 130lb.(59kg) – 150lb.(68kg)
450 lb. 5.11" 2.65" 1.385" 150lb.(68kg) – 170lb.(77kg)
500 lb. 5.32" 2.65" 1.385" 170lb.(77kg) – 190lb.(86kg)
550 lb. 5.38" 2.65" 1.385" 190lb.(86kg) – 210lb. (95kg)
600 lb. 5.47" 2.65" 1.385" 210lb. (95kg) – 230lb. (104kg)
650 lb. 5.6" 2.65" 1.385" > 230lb. (104kg)
www.pivotcycles.com 1.877.857.4868
SUSPENSION SETUP GUIDE