Press the timing plan start/stop button[ ]of the transmitter before
the timing plan executing completely, the transmitter and receiver
will stop regularly scheduled executing.
The transmitter indicator and LCD will run the timing plans, but
does not send control commands to the receiver, it’s only offer a
reference to understand the operation status of the receiver.
2 9
2 8
Shooting control
Shooting control
Press
Press
Press
Press
Interval
time
of
timing
plan
setting
Delay
time
of
timing
plan
setting
4. Press the set button, save and exit settings.
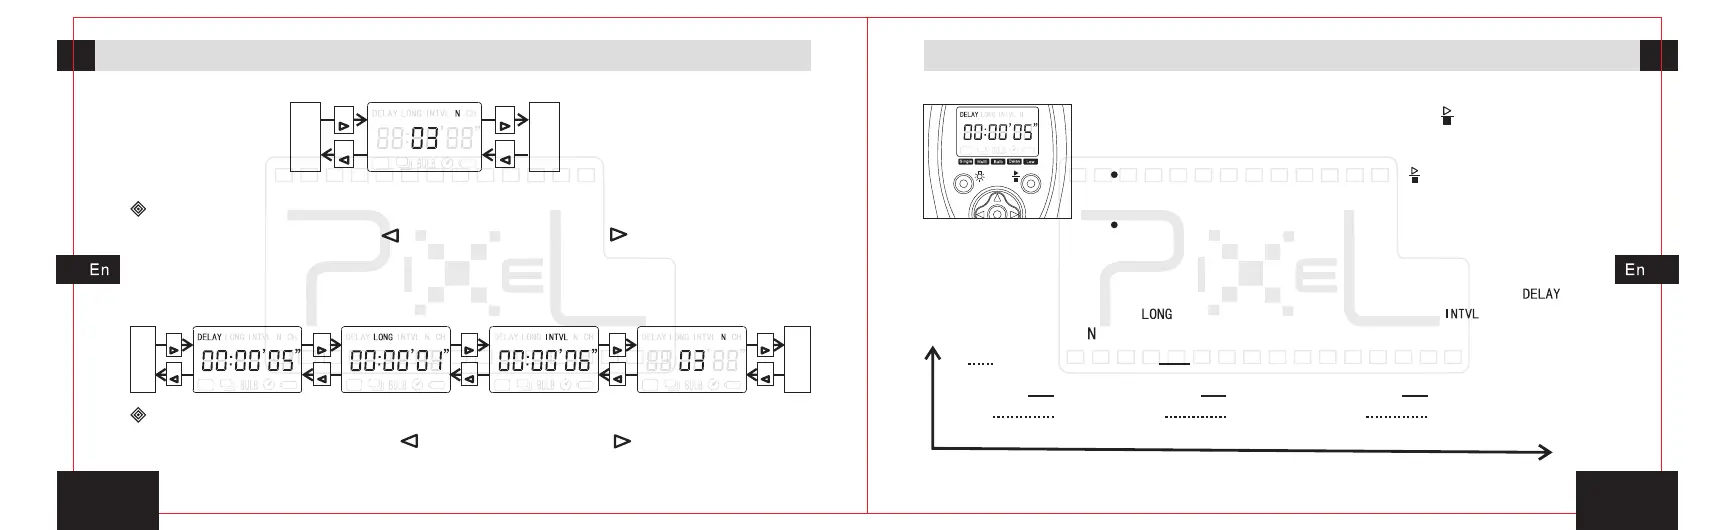
Search the timing plan
1. Press left move button[ ]or right move button[ ],move transmitter’s
activities icon to timing plan icon which can check the related timing project.
2. When check the related projects, if need adjust the parameters, only press
the set button to enter the relevant project settings, press the set button again
to exit and save your setting. Move the icons sequence showed as below.
Press
Press
Press
Press
Press
Press
Press
Press
Press
Press
Delay
shoot
-ing
function
Singl e
shoot
-ing
func tion
Execute timing plan
1. Press the left move button[ ]or right move button[ ], move the activities
icon to any icon among the timing plan shooting area.
2. Press the timing start/stop button[ ], the transmitter
will sent all information to the receiver. The timing plan will
run in the receiver, and output control signals to camera.
0 1 2 3 4 5 6 7 8 9 10 11 12 13 14 15 16 17 18 19 20 21 22 23
The following examples illustrate the timing plan running: delay time[ ] = 5
seconds, exposure time[ ] = 1 second, shooting interval[ ]= 6 seconds,
shooting number[ ] = 3.
Focusing output
Shooting output