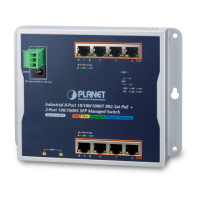
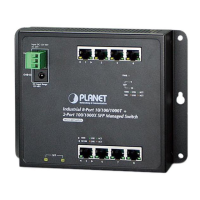
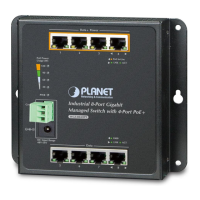
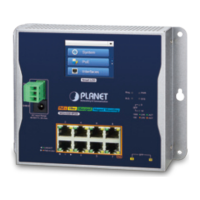
The PLANET WGS-4215-8HP2S is an Industrial Wall-mount Managed Gigabit Ethernet Switch designed for robust network deployments in demanding environments. This quick installation guide provides essential information for setting up and managing the device.
Function Description:
The WGS-4215-8HP2S functions as a managed Gigabit Ethernet switch, offering advanced network management capabilities suitable for industrial applications. Its wall-mount design makes it ideal for space-constrained installations. The "Managed" aspect indicates that the switch offers comprehensive control over network traffic, security, and performance through a web-based interface or command-line interface (CLI). As a "Gigabit Ethernet Switch," it supports high-speed data transmission at 10/100/1000Mbps, catering to bandwidth-intensive applications. The "Industrial" designation implies its rugged construction and ability to operate reliably in harsh conditions, such as extreme temperatures, vibrations, and electrical noise, often found in factory automation, transportation, and outdoor surveillance systems. The "8HP2S" in the model name likely refers to its port configuration: 8 high-power PoE++ (802.3bt) and PoE+ (802.3at) copper ports, and 2 SFP (Small Form-Factor Pluggable) fiber ports for long-distance connectivity. The switch is designed to enhance system uptime by incorporating a strong and convenient power input system, allowing for flexible power source integration into automation networks.
Important Technical Specifications:
- Model Name: WGS-4215-8HP2S
- Copper Ports: 8 x 10/100/1000T (Gigabit Ethernet)
- Supports 802.3bt PoE++ on some ports and 802.3at PoE+ on others, providing power to connected devices like IP cameras, wireless access points, and VoIP phones.
- Fiber Ports: 2 x 100/1000X SFP (Gigabit Fiber)
- These ports allow for flexible fiber optic connections, supporting both 100Mbps and 1000Mbps speeds, which is crucial for extending network reach over long distances or connecting to backbone networks.
- Power Input Range: DC 48-54V, 8A max
- This wide DC input range ensures compatibility with various industrial power supplies and provides redundancy options. The maximum power requirements are site-application dependent.
- Default IP Address: 192.168.0.100
- Default Username: admin
- Default Password: admin
- Subnet Mask: 255.255.255.0
Usage Features:
- Wall Mount Installation: The device supports two types of wall mounting:
- Wall Mount Installation: Involves drilling four 8mm diameter holes with specific horizontal (230mm) and vertical (124mm) distances. Four anchors are hammered into these holes, and then four screws are used to secure the switch.
- Wall Hanging Installation: Requires drilling two 8mm diameter holes (one on each side) 230mm apart horizontally. Two anchors are placed, and then two screws are partially screwed in, leaving a 2mm gap, allowing the switch to hang securely. It is crucial to ensure the equipment is securely wall-mounted to prevent damage from strong vibrations.
- Power Input Wiring: The switch utilizes a 3-pin spring terminal block for power input.
- Pinout: Ground, V-, V+.
- Wiring Procedure:
- Press a flat-blade screwdriver diagonally into the release hole.
- While holding the screwdriver, insert the positive and negative DC power wires into the V+ and V- contacts, respectively, ensuring the stripped portion is not visible to prevent shorting.
- Remove the screwdriver.
- Wire Gauge Recommendation: The wire gauge should be in the range of 12 to 16 AWG.
- Grounding: The device must be properly grounded for safe operation.
- Web-based Management (Web Login):
- The switch's management interface is accessible via a web browser (Internet Explorer 8.0 or above is recommended).
- To access, the manager PC must be configured with an IP address in the same subnet as the switch (e.g., 192.168.0.x, where x is not 100).
- Enter
https://192.168.0.100 in the browser.
- Login with the default username "admin" and password "admin."
- The web interface provides a comprehensive menu for managing system settings, switching functions, QoS, security, ring protocols, and PoE configurations.
- A "Help icon" is available on each web page for detailed descriptions of functions and parameters.
- SSH Login (Command-Line Interface - CLI):
- Supports SSHv2 for secure remote management.
- Requires SSH client software (e.g., Tera Term or PuTTY) on the workstation.
- Login with the default username "admin" and password "admin."
- Commands are entered at the "#" prompt.
- Only lowercase letters are accepted for commands in the console interface.
- The "help" command can be used in CLI for assistance with commands and parameters.
- IP Address Configuration:
- The current IP address can be displayed using the "show ip" command in CLI.
- To modify the IP address, use the "configure" command followed by "ip address [new IP] mask [new subnet mask]". For example:
ip address 192.168.1.100 mask 255.255.255.0.
- Changes to the IP address are applied immediately.
Maintenance Features:
- Saving Configuration:
- Via Web Interface: Click the "Save" icon on the top Switch Menu bar or navigate to "Maintenance" -> "Save Configuration." This saves the running configuration as the startup configuration, ensuring settings persist after a reboot.
- Via CLI: Use the command
copy running-config startup-config to save the current configuration.
- Recovering to Default Configuration (Reset Button):
- If the IP address has been changed or the admin password forgotten, the switch can be reset to its factory default settings.
- Press and hold the "Reset" button on the front panel for approximately 5 seconds.
- After the device reboots, the IP address will revert to 192.168.0.100, and the login credentials will be the default "admin/admin."
- Customer Support:
- PLANET provides online FAQ resources and User's Manuals on their website.
- Direct support can be obtained by contacting the PLANET switch support team via email.
- Specific links are provided for FAQs and the User's Manual for the WGS-4215-8HP2S.
- Firmware Upgrade: The web interface includes a "Upgrade Manager" under "Maintenance" for updating the switch's firmware.
- Backup Manager: The web interface also offers a "Backup Manager" for backing up and restoring switch configurations.
- Diagnostic Tools: Diagnostic features are available through the web interface ("Diagnostic" under "Maintenance") to assist in troubleshooting network issues.
- Security: For enhanced security, it is strongly recommended to change the default admin password immediately after the initial setup and to memorize the new password. The switch supports SSHv2 for secure remote management.