7
Connection of plasma torch
and ground wire
IMPORTANT: Before performing any operation regarding con-
nection of the torch and ground wire, disconnect the power to
the system.
IMPORTANT: Do not connect to the Plasma equipment any
other torch different from the standard supplied unes; the utili-
sation of other non suitable torches might be dangerous for
the operator.
To obtain elevated cutting quality, the torch must transform
the power generated by the machine into a high energy den-
sity plasma jet, so that it can efficiently melt metal and guar-
antee sufficient strength to remove the meted part from the
cutting zone, impeding the formation of burrs. The torch is this
a fundamental, indispensable component of the plasma cut-
ting machine.
The standard supplied Plasma torch has special CEA elec-
trical connections in the central adaptor. Before fitting a
new equipment, make sure that the torch central adaptor
electrical connectios are matching the ones of the Plas-
ma equipment.
The following plasma torches are supplied with the machine:
Torch
manual cutting mechanised cutting
SHARK 75 SK 75 SKM 75
SHARK 105 SK 125 SKM 125
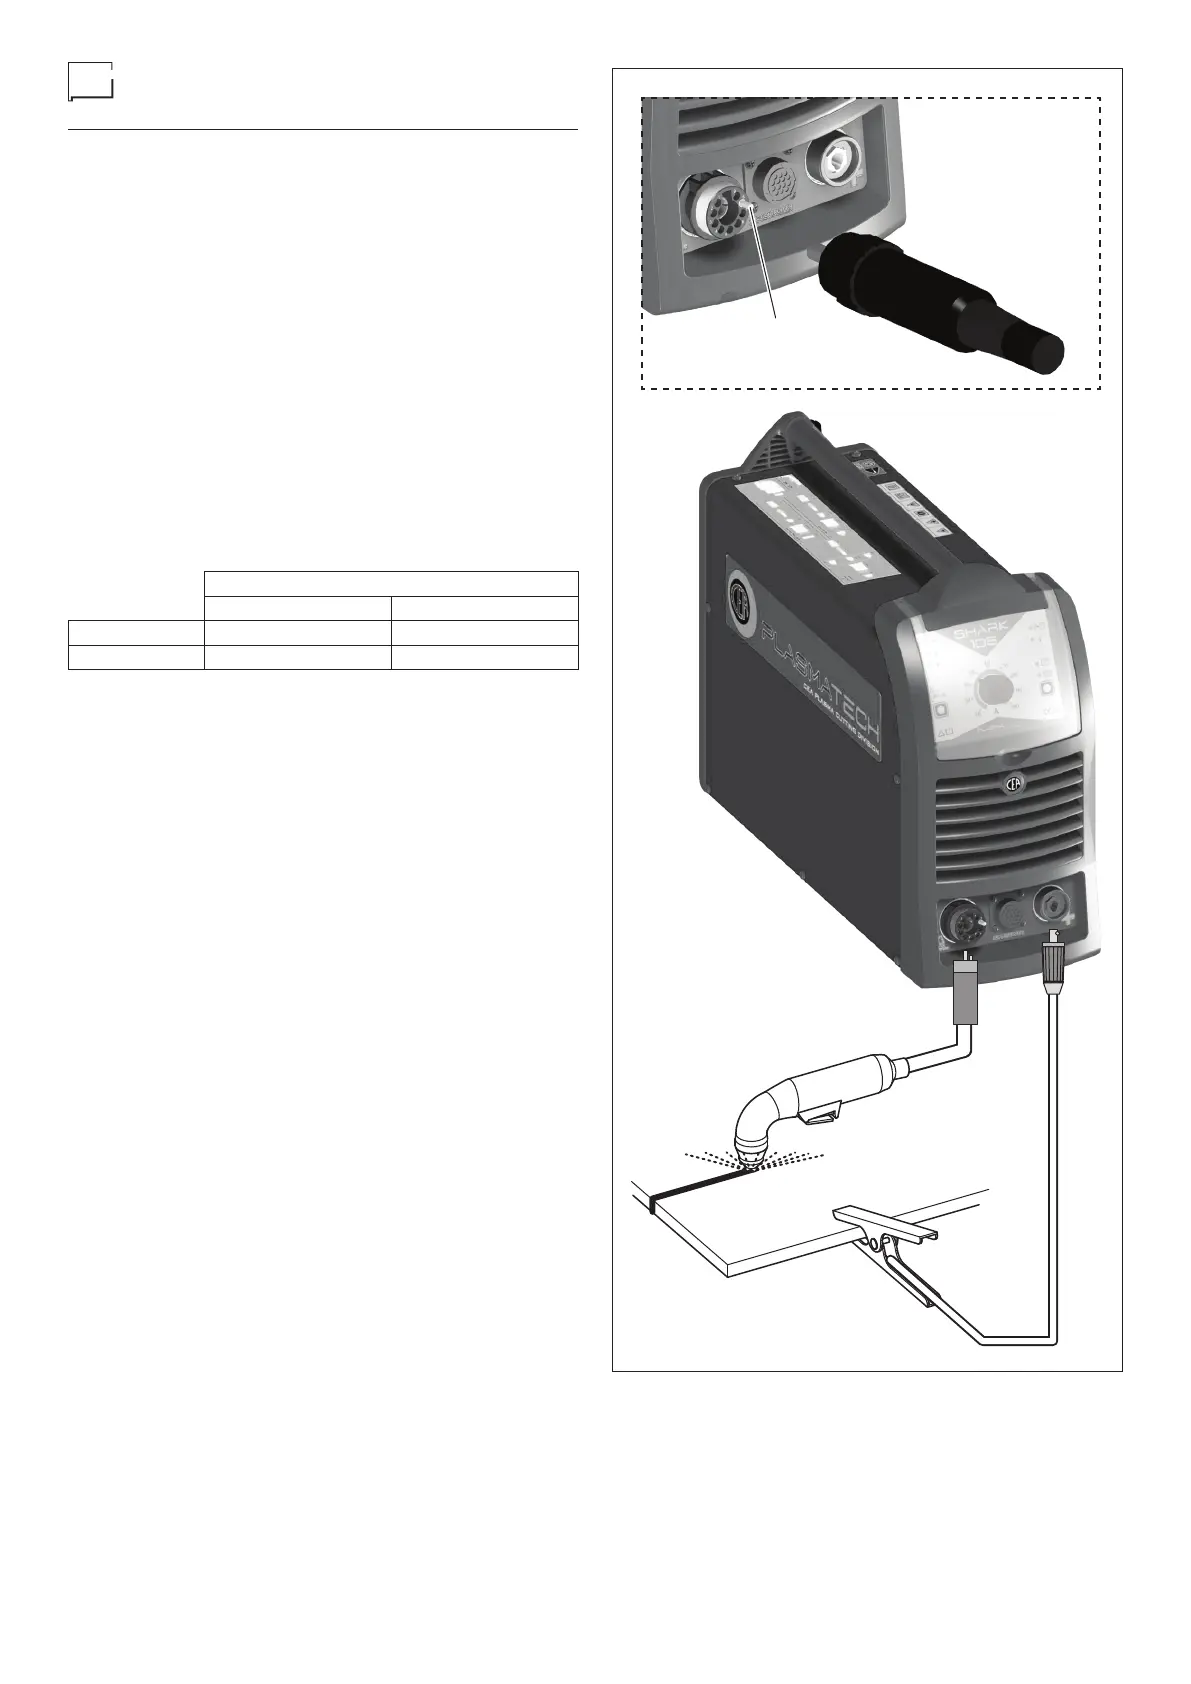
To assemble the plasma torch, proceed as follows:
•
Screw the male connection on the plasma torch clockwise all
the way into the corresponding centralised female connec-
tion, located on the front of the plant.
•
Align the male polarisation pin (n° 8) with the correspond-
ing pin (n° 8) on the plasma torch’s male coupling (Fig. C).
To disconnect the torch, proceed in the reverse order.
To assemble the earth cable, proceed as follows:
•
Connect the earth cable to the rapid coupling on the positive
pole as indicated in figure C.
•
The earth cable must be connected to the workpiece to be
cut, using the relevant terminal, so that the workpiece is ef-
fectively earthed along with the cutting bench.
To connect the earth cable correctly:
•
Make sure that the metal-to-metal contact between the earth
clamp and the steel plate is adequate. Remove any rust, dirt,
paint, coating or other debris, in order to ensure correct con-
tact between the generator and the steel plate.
•
In order to achieve an excellent quality cut, connect the earth
clamp as close as possible to the area to be cut.
•
Do not connect the earth clamp to the piece of material to
be removed.
n. 8
FIG. C