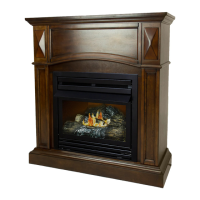
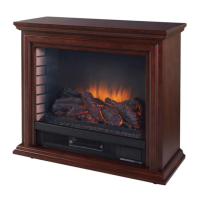
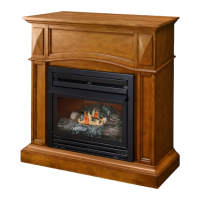
This document describes the Pleasant Hearth Bayside TV Stand with Electric Fireplace, Model #235-61-351.
Function Description
The Bayside TV Stand with Electric Fireplace is a household electrical appliance designed to provide both a TV stand and a heating element with a flame effect. It features a control panel and a remote control for operation. The unit includes a heater with a thermostat, flame brightness and speed functions, and a sleep timer. It is intended for indoor use only.
Important Technical Specifications
- Electrical Connection: Requires a 15-Amp, 120-volt, 60 Hz circuit with a properly grounded outlet. Preferably, the fireplace should be on a dedicated circuit to avoid tripping breakers or blowing fuses. The unit comes with a 6-ft. three-wire cord.
- Heater Thermostat Range: 82°F (32°C) to 65°F (15°C).
- Remote Control: Complies with Part 15 of FCC Rules. Operates on batteries (2 AAA dry cell batteries, not included).
- Dimensions (assembled): Not explicitly stated, but implied by the assembly instructions for a TV stand.
- Weight: Not specified.
- Materials: Wood furniture with an electric fireplace insert. Variations in wood color and finishes are natural characteristics.
Usage Features
Controls and Display
The unit features a control panel and a remote control. When the unit's power switch is ON, the control panel displays two dash lines (--). Pressing any control icon displays the current setting for that function. Pressing the icon again adjusts the setting. After 5 seconds of adjustment, the display reverts to showing the heater setting.
Power Function
- Turning On/Off: Press the POWER ICON on the control panel or remote to turn the unit ON or OFF.
- Initial Startup: When powered ON, the unit detects ambient temperature after the fan and heater run for 3 minutes. The control panel displays the heater setting.
- Memory Function: Functions stored in memory resume at the last setting when the unit is powered ON. If the last temperature setting was OFF, the unit automatically sets the temperature to ambient temperature.
- Cool-down Cycle: When powered OFF, the fan continues to blow for a 60-second cool-down cycle (countdown displayed) before shutting down completely.
Flame Brightness Function
- Displaying Setting: Press the FLAME BRIGHTNESS ICON to display the current flame brightness setting.
- Adjusting Setting: Press the FLAME BRIGHTNESS ICON again to cycle through settings: 5, 4, 3, 2, 1, and oF (OFF).
- Flame Speed Link: When flame brightness is set to OF (OFF), the flame speed also turns OFF.
Flame Speed Function
- Displaying Setting: Press the FLAME SPEED ICON to display the current flame speed setting.
- Adjusting Setting: Press the FLAME SPEED ICON again to cycle through settings: 5, 4, 3, 2, and 1.
Heater Function
- Displaying Setting: Press the HEATER ICON to display the current heater setting.
- Adjusting Setting: Press the HEATER ICON again to scroll through settings. Long-holding the icon allows for quick scrolling.
- Continuous Heat: Set the heater to "HI" (High) for continuous operation.
- Flame Only (No Heat): Set the heater to "OF" (OFF) to use flame functions without heat.
- Thermostat Control: The heater has a thermostat sensor to control ambient temperature. It cycles ON and OFF to maintain the selected temperature within the range of 82°F (32°C) to 65°F (15°C). Note that the thermostat reading may differ from a room thermostat due to sensor location.
Sleep Timer Function (Remote Control Only)
- Setting Timer: Press the TIMER ICON on the remote to display the current sleep timer setting.
- Adjusting Timer: Press the TIMER ICON again to cycle through settings: 30 (minutes), 1H, 2H, 3H, 4H, 5H, 6H, 7H, 8H, 9H, OF (OFF).
- Automatic Shutdown: When the timer reaches zero, the unit turns OFF its main power while retaining all other settings in memory.
Temperature Unit Switch
- Changing Unit: Press the switch twice in a row using a tiny needle to change the temperature unit (Fahrenheit or Celsius) shown on the display.
Heater Override
This feature prevents accidental or unintentional powering on of the heater, particularly useful for child safety.
- Engaging Override: First, turn the main power OFF. Press the FLAME BRIGHTNESS ICON; while the heater setting display is flashing, long-hold the FLAME BRIGHTNESS ICON for 20 seconds. The display will show "E3" to indicate the heater is disengaged.
- Disengaged State: Only the heater is disengaged; flame and timer functions operate normally.
- Re-engaging Heater: Repeat the same process. The "E3" symbol will change back to display the heater setting.
- Note: Heater override can only be set from the control panel, not the remote control.
- Combustible Materials: Keep combustible materials (furniture, pillows, bedding, papers, clothes, curtains) at least 3 feet away from the appliance.
- Cord Management: DO NOT run the cord under carpeting, throw rugs, runners, or similar coverings. Arrange the cord away from traffic areas to prevent tripping.
- Ventilation: DO NOT insert foreign objects into ventilation or exhaust openings. Keep air openings free of lint, hair, and similar debris.
- Flammable Vapors: DO NOT use in areas where gasoline, paint, or flammable vapors/liquids are used or stored.
- Grounding: Connect to a properly grounded outlet only. An adapter is available for two-slot receptacles, but a three-slot grounded receptacle is preferred.
- Extension Cords/Power Strips: ALWAYS plug heaters directly into a wall outlet/receptacle. NEVER use with an extension cord or relocatable power tap.
- Overheating: DO NOT place objects on top of the insert or block air intakes/vents, as this can cause overheating and fire.
- Tip Restraint Hardware: It is strongly recommended to attach the provided tip restraint hardware to the back of the cabinet and a wall stud to prevent accidents or damage.
Maintenance Features
General Cleaning
- Power Disconnection: ALWAYS unplug the appliance from the electrical outlet before cleaning or servicing.
- Fan/Heating Unit: Periodic cleaning/vacuuming of the fan/heating unit is recommended. Ensure the unit is OFF and unplugged.
- Metal Trim: Clean with a soft cloth, slightly dampened with citrus oil-based product, and buff with a clean soft cloth. DO NOT use brass polish or household cleaners, as these can damage the metal trim.
Battery Replacement (Remote Control)
- Battery Type: Uses 2 AAA dry cell batteries.
- Guidelines:
- DO NOT mix old and new batteries.
- DO NOT mix alkaline, standard (Carbon-Zinc), or rechargeable (Nickel-Cadmium) batteries.
- DO NOT use rechargeable silver oxide cell batteries.
- Always purchase the correct size and grade of battery.
- Replace all batteries of a set at the same time.
- Clean battery contacts and device contacts before installation.
- Install batteries correctly with regard to polarity (+ and -).
- Remove batteries from equipment not used for an extended period.
- Remove used batteries promptly.
- DO NOT dispose of batteries in fire; they may leak or explode.
Troubleshooting
The manual includes a troubleshooting guide for common issues such as error codes (E2, E3, E4, E5), no power, no flame effect, heater/blower issues, warm power cord, and remote control problems. Solutions range from unplugging and waiting, checking connections, replacing batteries, to contacting customer service.
Warranty
A One Year Limited Warranty covers defects in material or workmanship from the original purchase date. GHP Group, Inc. will replace or repair the item at their option, free of charge. The warranty does not cover defects from improper or abnormal use, misuse, accident, or alteration. Failure to follow instructions voids the warranty. For service, call 1-877-447-4768 (8:00 a.m. - 4:30 p.m. CST, Monday - Friday) or email customerservice@ghpgroupinc.com.
California Proposition 65 Warning
This product can expose users to chemicals including Diisononyl phthalate (DINP) and Di-isodecyl phthalates (DIDP), which are known to the State of California to cause cancer, birth defects, or other reproductive harm. More information is available at www.p65Warnings.ca.gov.

 Need help?
 General



 To Next Page