3
3
4
1
2
3
4
1
2
● When using the stand
Assembly of the stand See Page 3
* The stand may be an option.
* The printer may be an option.
Assembly of the printer table See Page 9
Printer installation See Page 11
Test print See Page 13
Wall mounting See Page 6
Assembly of the printer table See Page 9
Printer installation See Page 11
Test print See Page 13
● When mounting to a wall
(Please consult with a dealer or installation tradesman. Installation work should not be done by the customer.
The installation method will change depending on the type of installation. Please perform installation and assem-
bly according to the following procedures.
3. COPYBOARD INSTALLATION PROCEDURE
4. ASSEMBLY OF THE STAND
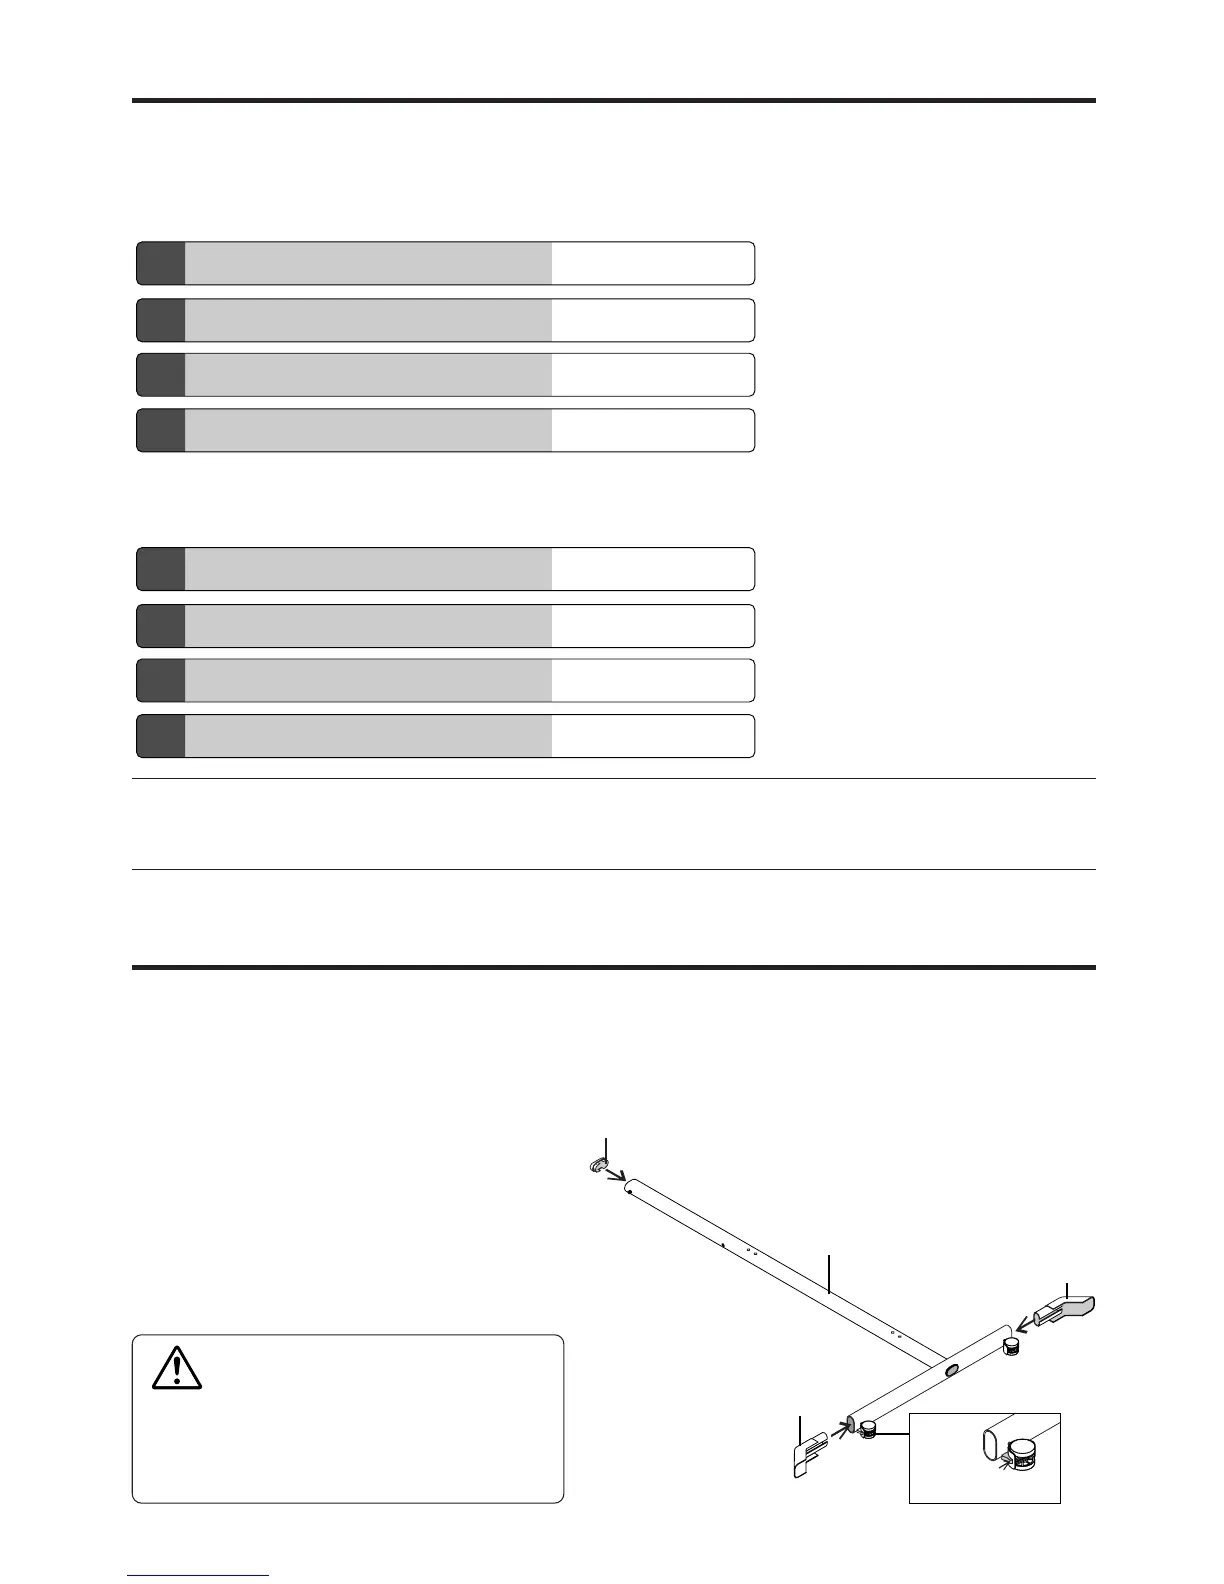
Frame Cap
Stabilizer
T-shape leg
Note
• Diagrams of printers that appear in this manual are representative illustrations.
The illustration will differ from the actual printer. Check the owner's manual of your printer for information about the names of the connectors
and their locations and use.
Caster
Stabilizer
Use the same method to assemble the left and right
sides of the stand.
(1) Press-fit the frame cap onto the top
of the T-shaped legs.
(2) Attach the stabilizers to the front and
back of the T-shaped legs.
Insert the stabilizers securely all the way in.
(3) Lock the caster stoppers.
Press the bottom portion of the stoppers to lock them.
CAUTION
To prevent toppling, be sure to install the stabilizers
at each of the 4 locations. The toppling of this ma-
chine could cause bodily injury or damage the ma-
chine.