9
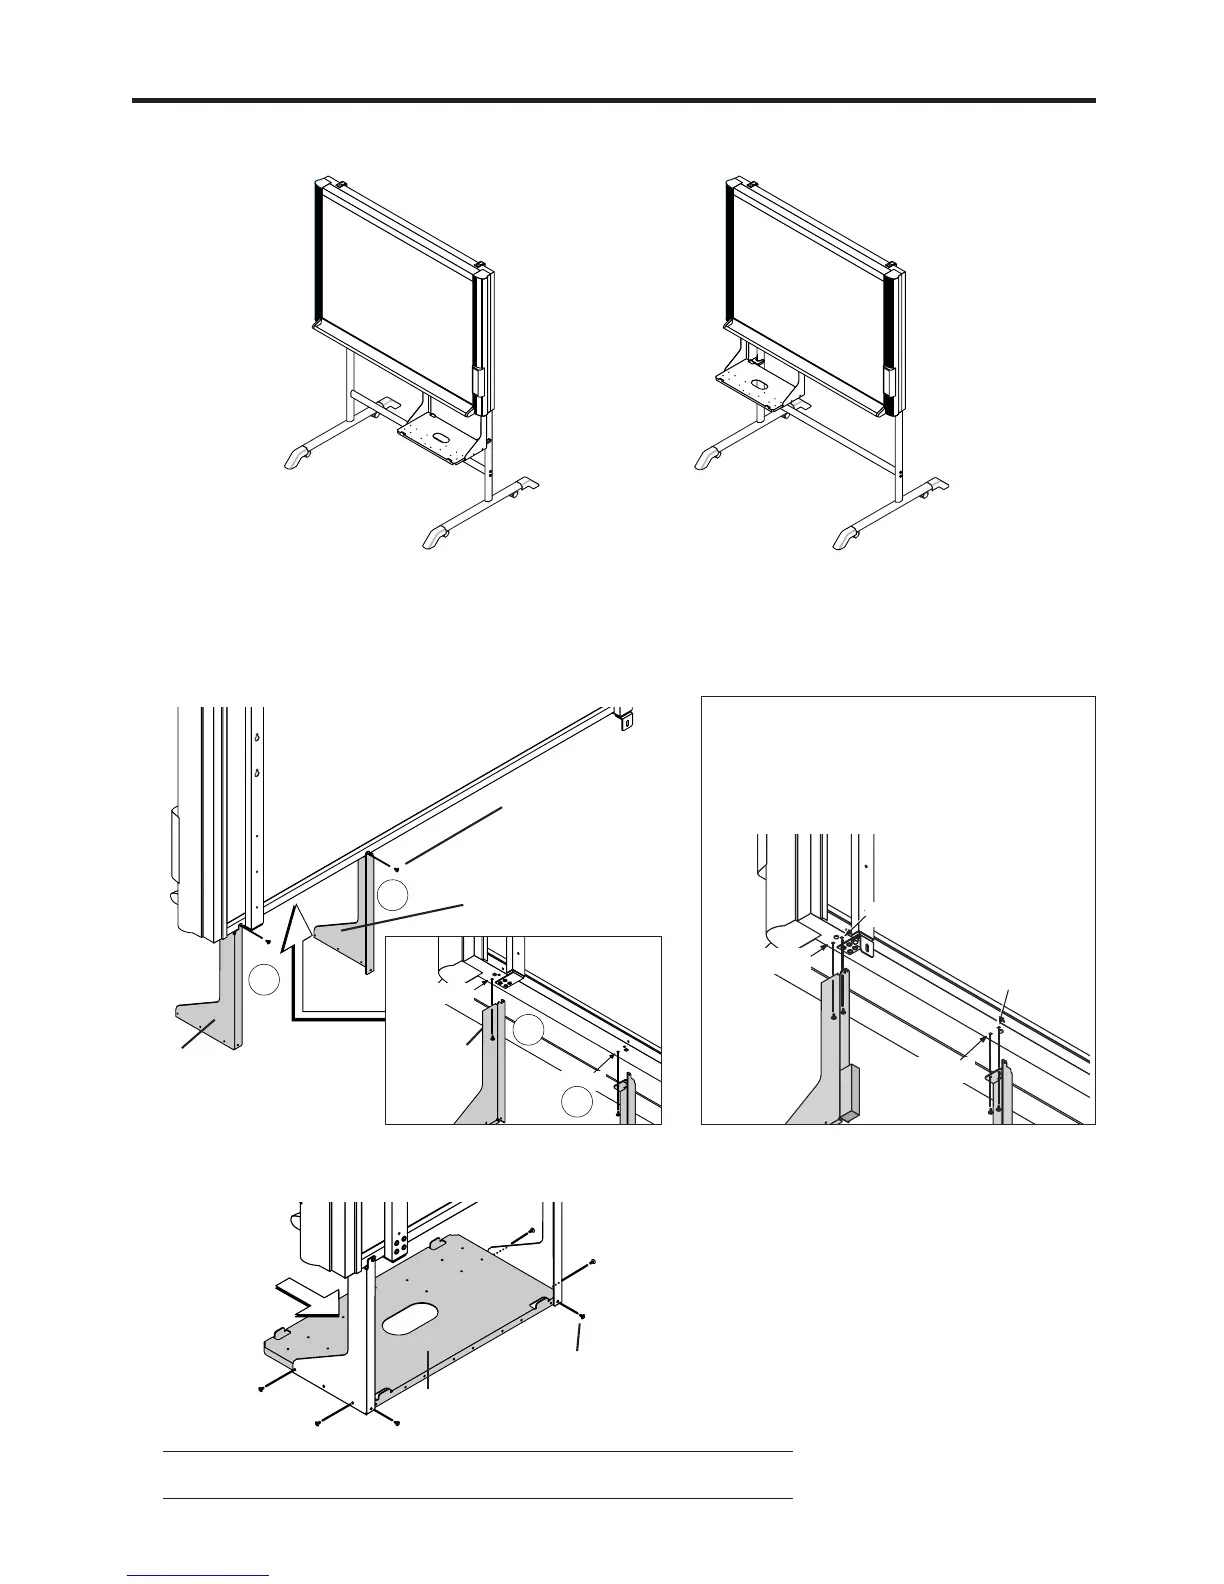
6. ASSEMBLY OF THE PRINTER TABLE
Printer Table Right-side Installa-
tion
Printer Table Left-side Installation
Note
If the printer is large, turn the printer table upside down when mounting.
The printer table can be installed at either the left or right side. The installation method is the same.
The method of assembling the printer table is the same for stand placement and for wall mounting. The assembly diagrams omit
the stand.
M4×8 screws
(1) Temporarily fasten the right and left brackets to the Copyboard using four M4×8 screws
in the order of Steps 햲 to 햵.
Right bracket
Left bracket
M4×8
screws
Front screw
hole
Front screw
hole
When mounting the printer table after
installing the main unit on a wall
Use four M4×8 screws to temporarily fasten the
left and right brackets to the four holes in the
bottom of the copyboard.
Screws hole
Screws hole
Screws hole
Screws hole
2
4
1
3
(2) Temporarily fasten the printer table to the brackets with six M3×6 screws.
M3×6 screw
Printer table