11
The locations of the connectors will differ depending on your printer*. Please see your printer manual. An example
of a printer installation is described below.
* Printer guide diagrams have been omitted. See Page 10 for printer guide installation.
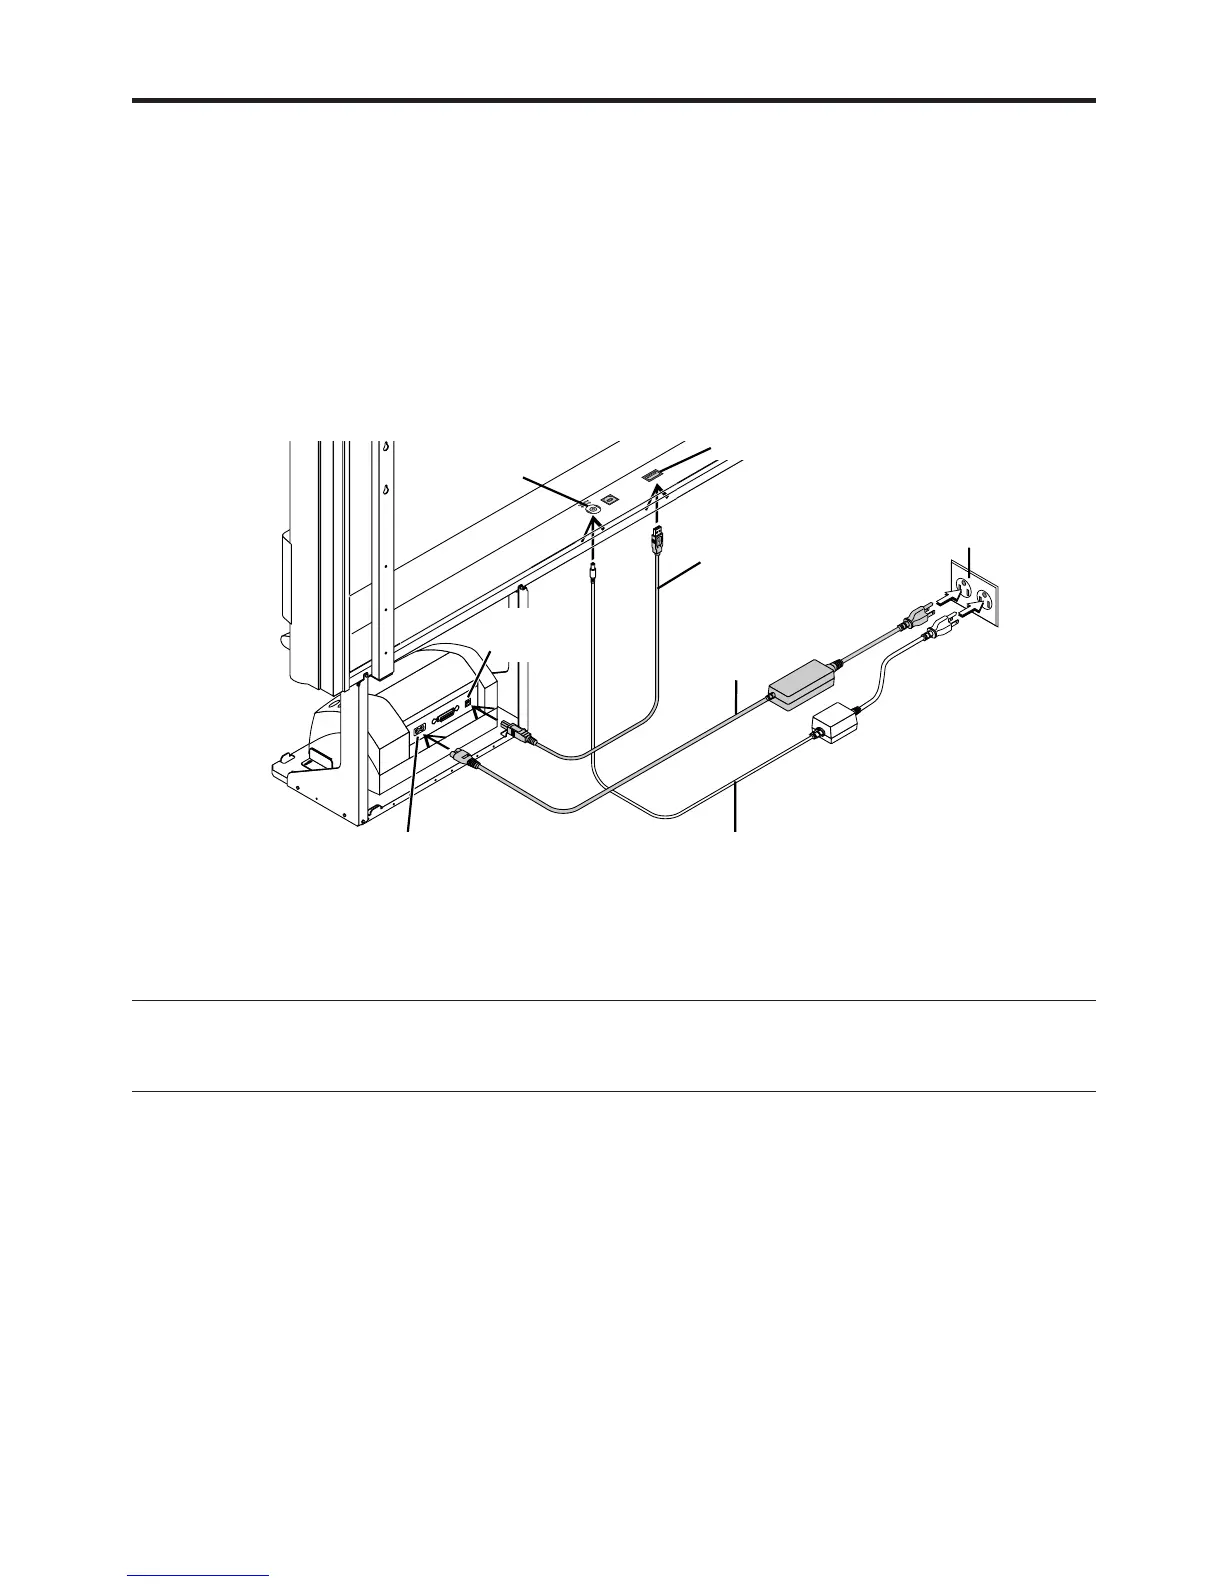
(1) Use the USB cable supplied with this unit to connect the printer connector of this unit
with the USB connector of the printer.
(2) Use the power cable supplied with the printer to connect the power connector of the
printer with the (100 V AC) wall power outlet.
(3) Connect the DC input jack of this unit with the DC plug of the AC power adapter. Next,
use the power cable supplied with this unit to connect the AC power adapter and the
wall AC power outlet (100 V).
7. PRINTER INSTALLATION
*The printer may be an option.
PRINTER
PC
(1)
(2)
(3)
DC INPUT connector
Printer connector
USB cable (supplied)
USB
connector
DC input connector
Power cable supplied
with the printer
AC power adapter
(supplied)
Wall power outlet
Note
When an AC power adapter is used with a printer that has been verified to be operational, although the printer type may differ from that of the
connection diagrams (e.g., a built-in type, or assembled type), the connections should be performed based on the same main points. (In
accordance with the printer specifications)