Using your
Connecting:
Connect a Plus III to your camera via the hot shoe. This will be your transmit-
ting radio. Connect a Plus III to each of your remote ashes using a connecting
cable (see PocketWizard.com/support/cable_nder). These will be your receiving
radios.
Powering On:
Install batteries noting the proper polarity. To turn on your Plus III, hold down the
Power On/Off and MODE Button < > for about two seconds. The Status LED
blinks green every few seconds to indicate normal operation. It will blink red in
sync with a trigger. Hold down the Power On/Off and MODE Button for about two
seconds to turn off your Plus III.
Channels & Zones:
Your Plus III needs to be on the same channel as other PocketWizard radios.
Channels can be set via the Plus III’s Channel Up/Down Buttons < >. Any
transmitting PocketWizard radio can trigger a receiving Plus III and a Plus III can
trigger any receiving PocketWizard radio. When using Channels 17-32, you can
specify Zones A, B, C, and D. See “Channels and Zones” section for more info.
Plus III Transceiver Basics
5
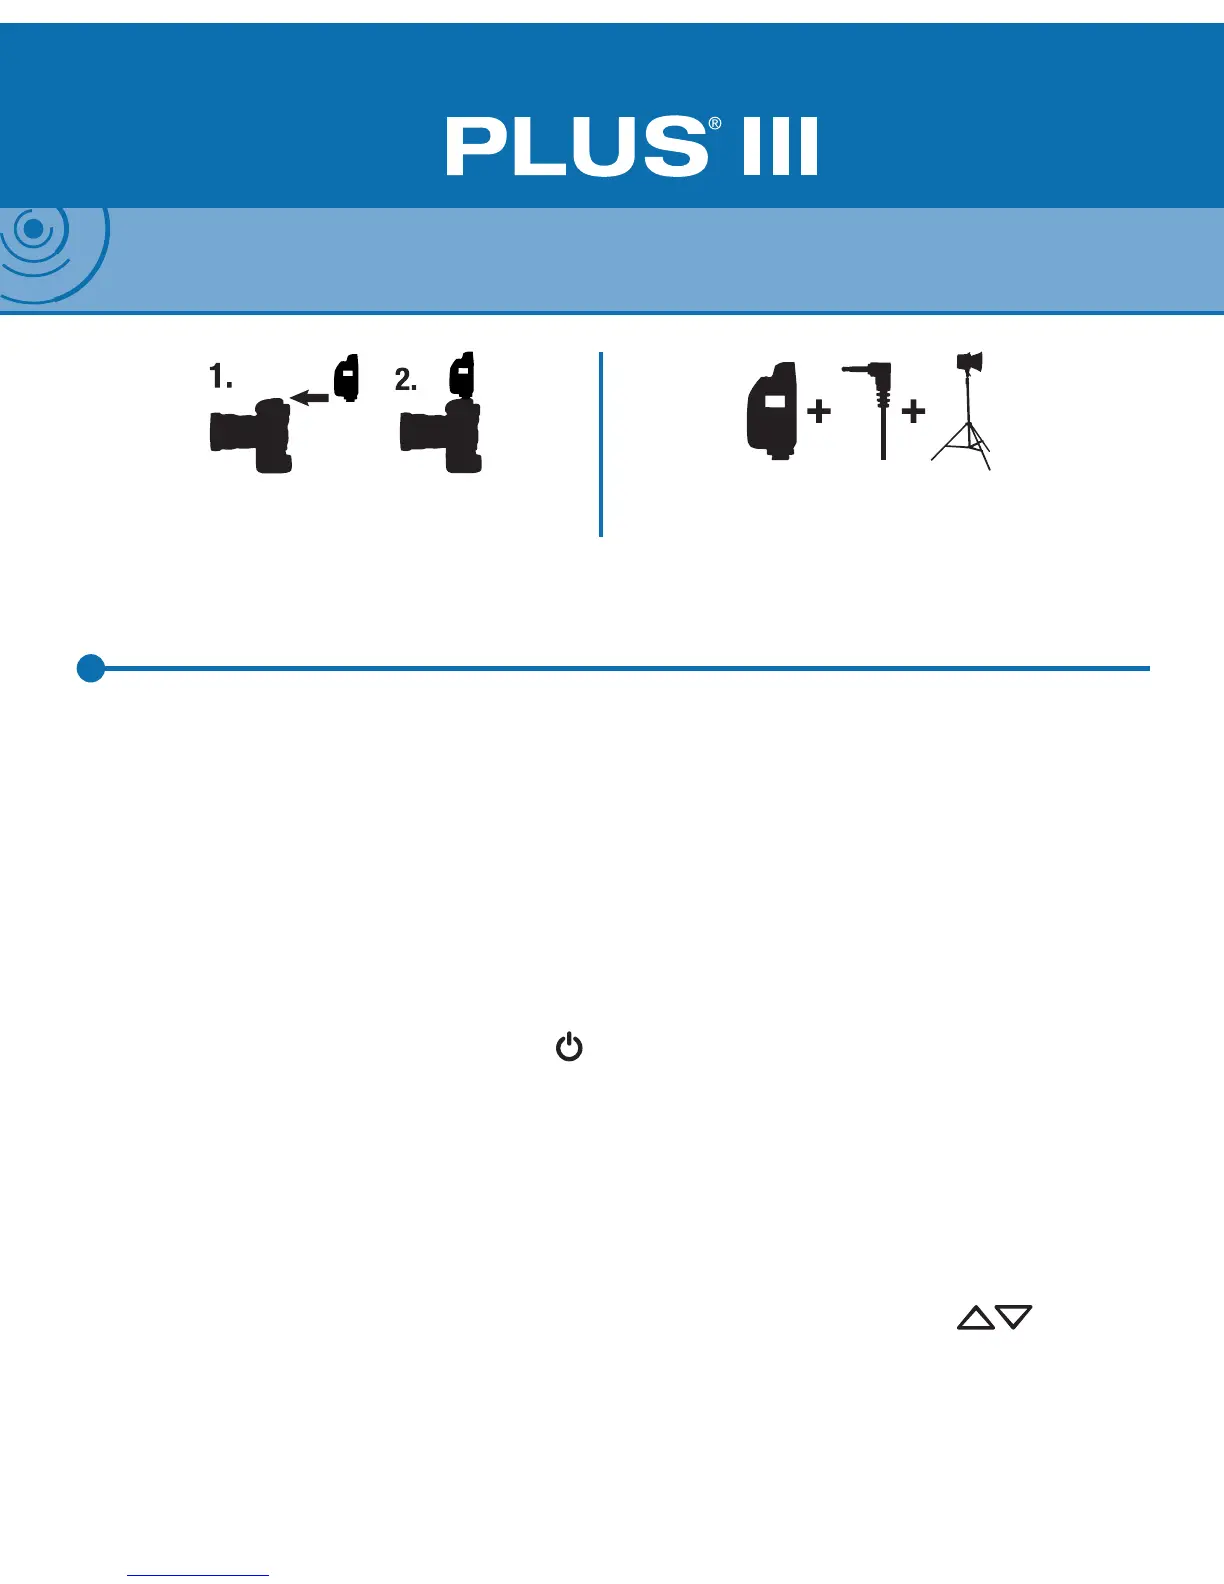
NOTE: The Plus III slides into hot shoe with the LCD screen facing the side of the camera. See
diagram below.
Connect the transmitting Plus III to camera
hot shoe and tighten the locking ring
Connect the receiving Plus III to your ashes
with the appropriate sync cable