ELECTRICAL
10.14
6. Install clear battery vent tube from vehicle to
battery vent. WARNING: Vent tube must be free
from obstructions and kinks and securely
installed. If not, battery gases could accumulate
and cause an explosion. Vent should be routed
away from frame and body to prevent contact with
electrolyte. Avoid skin contact with electrolyte, as
severe burns could result. If electrolyte contacts
the vehicle frame, corrosion will occur.
7. Route cables so they are tucked away in front and
behind battery.
HIGH BEAM HEADLIGHT
ADJUSTMENT
The headlight beam can be adjusted to any position
desired by turning the adjusting knob located on the
bottom right side of the headlight pod.
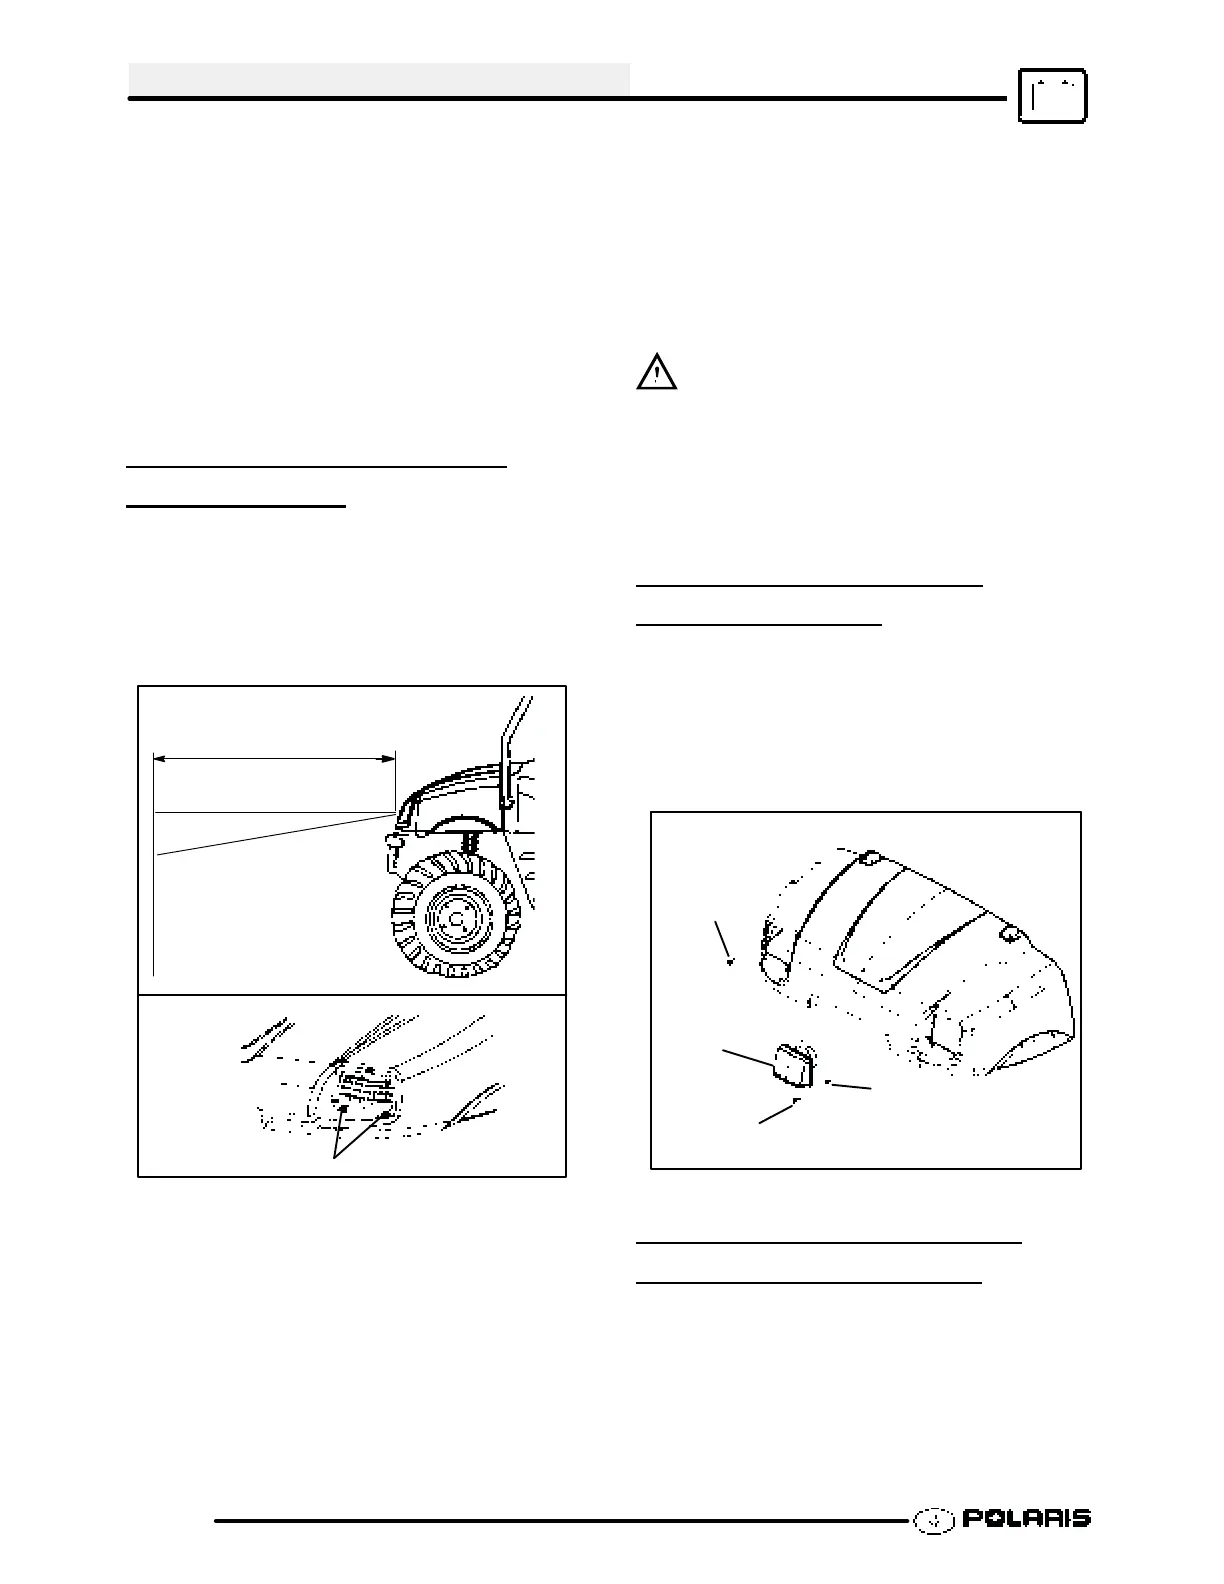
1. Place the vehicle on a level surface with the
headlight approximately 25’ (7.6 m) from a wall.
25’ (7.6 m)
Lamp Center Height
8” (20.3 cm)
A
2. Measure the distance from the floor to the center
of the headlight and make a mark on the wall at
the same height.
3. Start the engine and turn the headlight switch to
high beam.
4. Observe headlight aim. The most intense part of
the headlight beam should be aimed 2² (5.1 cm)
below the mark placed on the wall in Step 2
NOTE: Rider weight must be included in the seat.
On machines with separate low beam lights, the
drop should be 8² (20.3 cm) in 25’ from the center
of the low beam lamp.
GTurn the right screw clockwise to adjust
to the left.
GTurn the left screw clockwise to adjust to
the right.
GTurn the bottom screw clockwise to
adjust up.
W ARNING: Due to the nature of light utility
vehicles and where they are operated, headlight
lenses become dirty. Frequent washing is necessary
to maintain lighting quality. Riding with poor lighting
can result in severe injury or death.
5. Adjust beam to desired position .
HEADLIGHT HOUSING
REPLACEMENT
1. Open the hood.
2. Disconnect wire harness to headlamp.
3. Remove screws and spring.
4. Remove headlight.
5. Insert new bulb and reverse steps.
Headlight
Spring
Screw
Adjust
Screw
TAILLIGHT/BRAKELIGHT
LAMP
REPLACEMENT
If the taillight/brakelight does not work the lamp may
need to be replaced.
1. From the rear of the taillight remove two screws
holding lens cover in place and remove lens
cover.
 Loading...