GENERAL INFORMATION
2.21
CAUTION:
Do not over-tighten hose clamps at radiator, or
radiator fitting may distort, causing a restriction to
coolant flow. Radiator hose clamp torque is 36 in. lbs.
(4 Nm).
COOLING SYSTEM
PRESSURE
TEST
Refer to Page 3.5 for pressure test procedure.
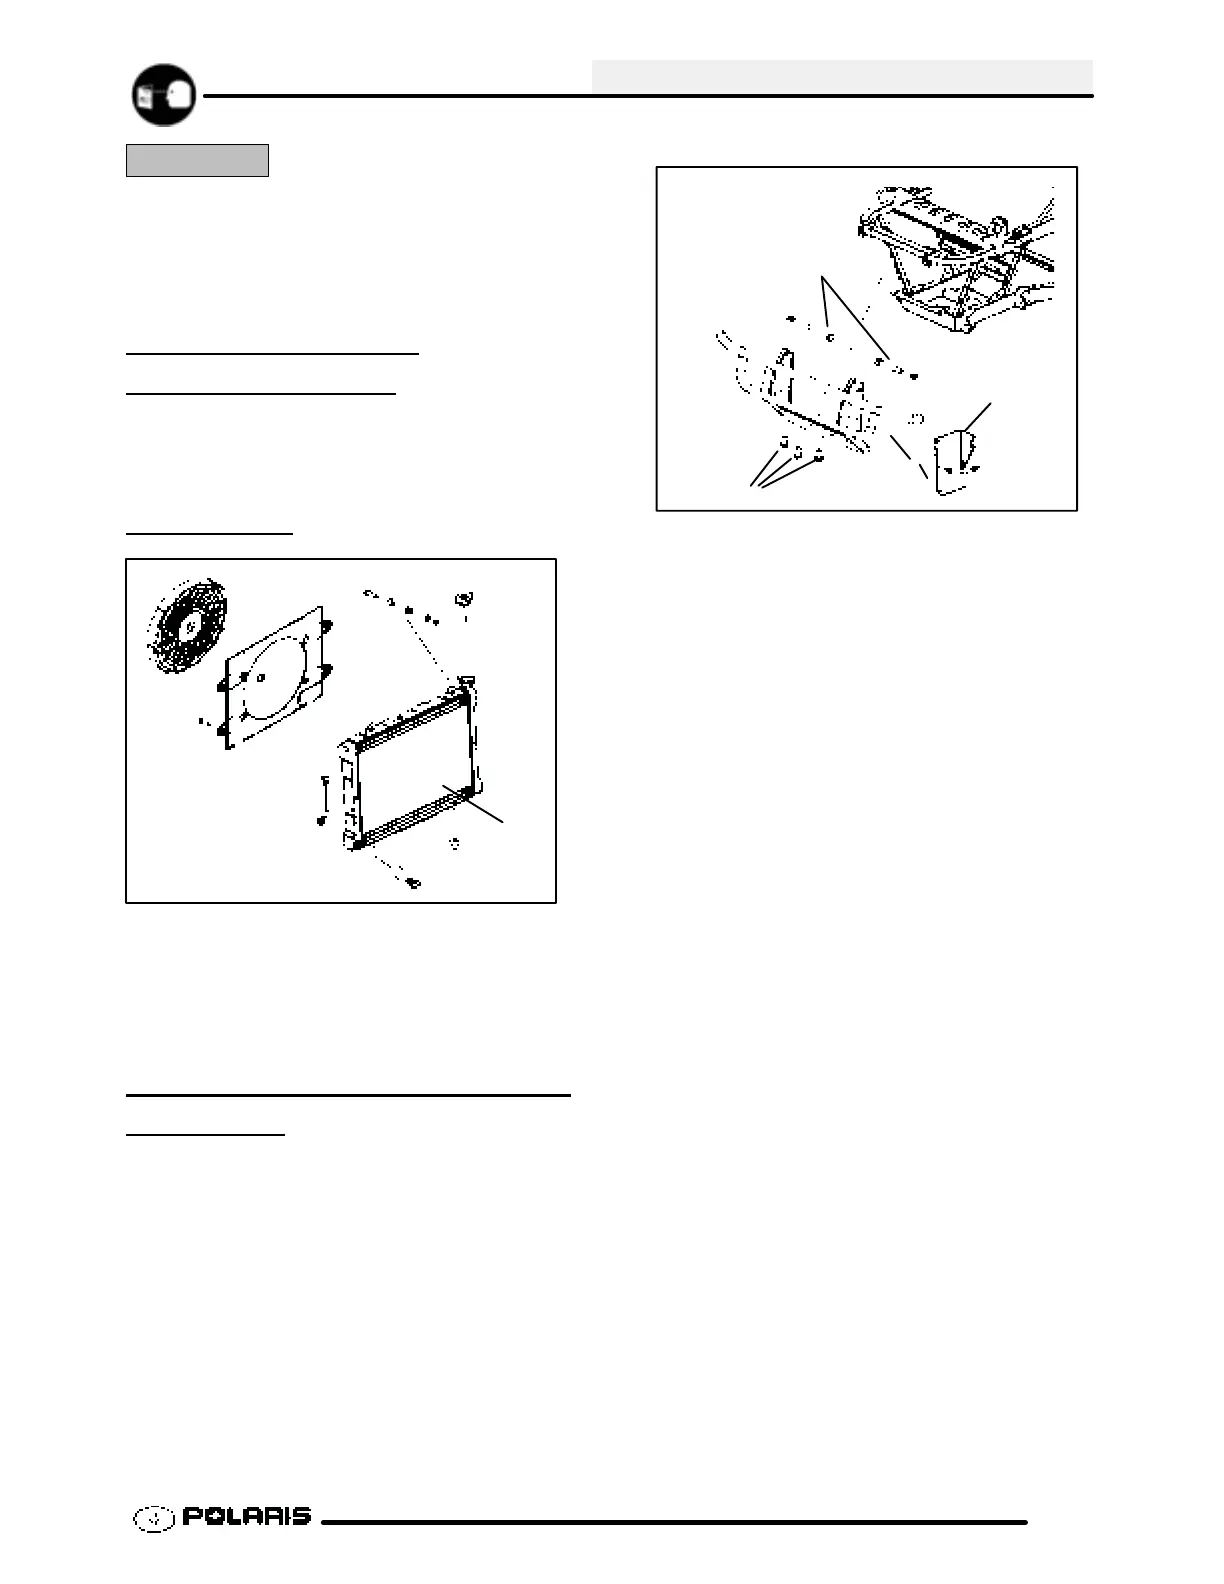
RADIATOR
A
1. Check radiator (A) air passages for restrictions or
damage.
2. Carefully straighten any bent radiator fins.
3. Remove any obstructions with compressed air or
low pressure water.
COOLANT DRAIN/RADIATOR
REMOV
AL
1. Remove the front bumper. Remove three bolts
that secure the bumper to the bottom of the
frame. Remove six screws (both sides) that
secure the wheel well panel to the frame.
Remove two bolts that secure the top bumper to
the frame.
Bolts
Bolts
Wheel Well
2. Remove two mounting screws that secure the top
of the radiator to the frame. Remove the radiator
cap. Pull the radiator out of the frame at an angle.
NOTE: If you have trouble reaching the top radiator
bolts, remove four screws from the top front of the
hood liner. Prop the front of the hood up 1.5 inches
(38.10 mm) to help remove the top bolts that secure
the radiator to the frame.
3. Remove the drain plug and drain the coolant from
the radiator. Drain the coolant into a suitable
container and properly dispose of the coolant.
4. Remove the outlet radiator hose, inlet radiator
hose, surge tank hose, and overflow hose from
the radiator .
5. Unplug the thermal sensor harness and the fan
harness.
 Loading...