you want to expose and tap proceed. The app will guide you through your first exposure.
6. Place your phone on the phone platform
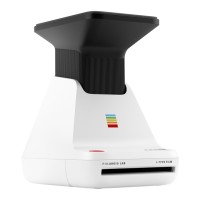
Place your phone on the phone platform with the screen facing toward the lens of the Polaroid Lab. Ensure that
it is correctly aligned:
the top of your phone must be facing the rear of the camera. Remove any phone covers or screen protectors to
ensure the best performance.
The app will detect the Polaroid Lab and orientate the image to be perfectly aligned with the film. It will also
display a calibration image above the light sensor to correctly expose your image without having to adjust your
phone’s backlight. Make sure that you
turn off all settings or apps which influence the color of the display, such as night shift or true tone, as these can
severely impinge the final photograph.
7. Push the red Shutter button
The Polaroid Lab will detect your phone on the platform and will measure the brightness of the display to ensure
the perfect exposure.
Wait until the Rainbow logo LED flashes then press the red shutter button. The photo will be ejected from the
slot at the front of the camera as soon as you let go of the shutter button.
Remove the photo from beneath the film shield and let the shield roll back into the Polaroid Lab. Place the photo
face down to continue shielding it from light as it develops.
If you want to take another photo of the same image then press the shutter button again.
Further Guidance
1. How much film is left in the pack?
There are 8 orange LED lights on the front of the Polaroid Lab. When the Lab is switched on and not in sleep
mode, the LEDs will constantly display the film count. The number of LEDs which light up corresponds to the
number of shots left in the film pack. For example: If 6 LEDs light up, that means there are 6 shots left in the film
pack. If you have used up all 8 shots in the film pack, or if there is no film pack inserted in the camera, then the
LEDs will blink rapidly when you turn the Polaroid Lab on or press the shutter button.
2. How much battery is left?
The Polaroid Lab displays the remaining battery level on four LEDs above the USB slot. When the Polaroid Lab
is charging the LED will flash, and when fully charged with a USB cable inserted the LEDs will all be unlit as it
will be running on power directly from the charger.
Battery level:
1. Between 1 to 4 LEDs light up One LED indicates enough charge for at least 2 packs of film.
2. Battery charged and USB cable Battery charged and USB cable connected: No LEDs light up. connected: No
LEDs light up.
The film counter LED will show the remaining number of photos.
3. Battery empty
Battery empty
No charge remaining. No LEDs light No charge remaining. No LEDs light up, and the Polaroid Lab will cease to
up, and the Polaroid Lab will cease to operate until it is recharged. operate until it is recharged.
3. Compatible film
The Polaroid Lab works with all Polaroid i-Type and 600 type film packs.
We recommend using i-Type film as it is optimized for use with the Polaroid Lab.
The Polaroid Lab is not intended to be used with SX-70 film, Spectra film or any other type of film.
4. Power supply
Charge the Polaroid Lab before use to ensure it has enough (see →Charge the Polaroid LabThe battery level
rear LEDs will flash whilst the Polaroid Lab is plugged in and charging, and will turn off once the Polaroid Lab is
fully charged.
5. Cleaning the rollers
Sometimes excess developer paste from photos may build up on the Polaroid Lab’s rollers, affecting the
Polaroid Lab’s performance and causing photos to show unwanted imperfections. The Polaroid Lab has a built-
in roller cleaning mode to help with this issue. Just follow these steps:
1. Close the phone platform to turn off the Polaroid Lab
2. Open film door
3. Hold down the right touchpoint and press and hold the shutter button for >2 seconds
4. Rollers will move to the starting position for cleaning
5. Release both buttons, the Polaroid Lab is now in roller cleaning mode
6. Using a damp cloth or cotton swab, gently clean the rollers

 Loading...