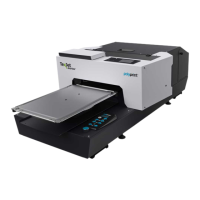
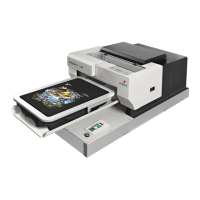
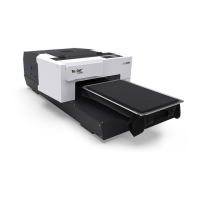
The TexJet® shortee² is a Direct-to-Garment (DTG) printer manufactured by Polyprint, designed for printing directly onto garments. This installation guide provides essential information for setting up, operating, and maintaining the device.
Function Description:
The TexJet® shortee² is engineered to print designs directly onto various garments, making it suitable for custom apparel production. It utilizes a multi-color ink system, including CMYK and white inks, to achieve vibrant and detailed prints. The printer is designed for ease of use, with features that streamline the printing process from setup to maintenance. It supports different ink configurations, specifically CMYK+WWWW (Cyan, Magenta, Yellow, Black, White, White, White, White) and 2XCMYK (two sets of Cyan, Magenta, Yellow, Black), allowing users to choose the configuration best suited for their printing needs, whether it's for light or dark garments. The Snap On Platen system facilitates quick and easy attachment of printing surfaces.
Important Technical Specifications:
- Dimensions and Weight: The printer requires a flat, stable surface with dimensions of at least 700x700 mm and must be capable of supporting more than 95 kg, indicating its substantial size and weight.
- Platen Size: It comes with a standard 27x40cm Snap On Platen, which is the printing area for garments.
- Ink System: The printer uses refillable cartridges. The guide specifies nine (9) labeled refillable cartridges and two (2) non-labeled refillable cartridges, accommodating the CMYK+WWWW or 2XCMYK ink configurations. The ink cartridge configuration table details the specific ink types for each slot:
- Slot 1: (MK) Black
- Slot 2: (PK) Black
- Slot 3: (LK) Light Black (for CMYK+WWWW) or Yellow (for 2XCMYK)
- Slot 4: (LLK) Light Light Black (for CMYK+WWWW) or Black (for 2XCMYK)
- Slot 5: (C) Cyan
- Slot 6: (VM) Vivid Magenta
- Slot 7: (LC) Light Cyan (for CMYK+WWWW) or Cyan (for 2XCMYK)
- Slot 8: (VLM) Vivid Light Magenta (for CMYK+WWWW) or Magenta (for 2XCMYK)
- Slot 9: (Y) Yellow
- Connectivity: The printer connects to a PC via a USB cable and an Ethernet cable, indicating both direct and network connectivity options.
- Power Requirements: Users must verify that the source voltage matches the rated voltage listed on the SN – Rating plate to ensure proper and safe operation.
- Environmental Conditions: Ideal operating conditions are 20°C temperature and 55% humidity. The printer should be kept away from direct sunlight and heat sources, and places subject to rapid changes in temperature and humidity should be avoided.
- Included Accessories: The package includes essential tools and components for setup and maintenance:
- Five (5) Funnels for ink refilling.
- Five (5) Syringes with adaptors for air removal from cartridges.
- One (1) USB Software Dongle and one (1) USB Installation Drive for software installation.
- One (1) Power Cable, one (1) Ethernet Cable, and one (1) USB Cable for connectivity.
- Five (5) Transparent Nozzle Sheets for nozzle tests.
- One (1) Pipette and two (2) Swabs for maintenance.
- An Emergency Stop Button for safety.
Usage Features:
- Installation and Setup: The installation process involves unboxing, removing protective packaging, and carefully positioning the printer. It requires four people to lift the printer due to its weight. The Snap On Platen is easily attached to the printer's tower.
- Ink Cartridge Installation:
- Ink bottles must be shaken for 1 minute each before filling.
- Rubber seals are removed from cartridges for filling, using the provided funnel.
- Ink level should not exceed the maximum indication on the cartridge side.
- Air supply must not be sealed when putting back the rubber seal.
- A syringe is used to remove air from the cartridge until the filter is full of ink, ensuring optimal ink flow.
- Cartridges are then installed into the correct sockets, and the cover is closed.
- Power On and Initial Charge: The printer is powered on by pressing the power button, and the desired language is selected. After connecting the printer to a PC via USB, the Digital Factory Apparel Polyprint Edition software is used to initiate the "Initial Charge" procedure, which fills the ink lines.
- Nozzle Test:
- A transparent nozzle sheet is placed on the left corner of the 27x40cm platen.
- The "AUTO" button on the lower panel sets the platen at the optimum distance from the print head.
- The "Start Position Button" or "Blue Button" sends the table inside.
- A "READY TO PRINT" indication should be displayed on the Platen Control panel.
- The nozzle test pattern is printed by navigating through the printer's top panel: Settings > Maintenance > Print Head Nozzle Check > Print.
- The pattern is checked for gaps; a clean pattern indicates clear nozzles.
- Emergency Stop Button: A dedicated emergency stop button is connected to the left side of the printer, providing an immediate safety shut-off mechanism.
- Software Integration: The printer integrates with the Digital Factory Apparel Polyprint Edition software, which is essential for controlling printer settings, monitoring status, and initiating print jobs. The installation guide refers to a separate DFA v10 installation guide for proper software setup.
Maintenance Features:
- Nozzle Cleaning: If the nozzle test pattern shows gaps or missing lines, a "Head Cleaning" procedure should be performed via the Settings Menu > Maintenance > Head Cleaning option. For persistent issues, users are directed to the Quick User Guide for detailed instructions on cleaning the Print Head.
- Ink & Pretreatment Storage: White, CMYK inks, cleaning solutions, and pretreatments should be stored in a dry place with room temperature ranging between 10-40°C, with 20°C being the recommended temperature. Proper storage ensures the longevity and quality of these consumables.
- Transportation: Before moving the printer, the maintenance tank must be emptied of waste ink, and the platen tower must be locked using the yellow safety bar. The yellow safety bar, removed during initial unboxing, must be kept for future transportation needs. This ensures the printer's components are secured during relocation.
- Error Indicators: The "Limit light" turning red indicates the table is too high. Users must lower the table using the "DOWN" button until the light turns off before pressing the "Start Position Button." If the "Blue Led Button" is on, it signifies that the tray is not in the printing position.