www.cuisinetechnology.com 1817
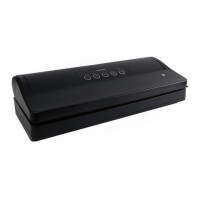
PolyScience Vacuum Sealing Systems
Turning the Unit On
DAY-TO-DAY OPERATION
Press � The unit will run through a short start-up sequence during
which the last selected Vacuum Level, Marinate Time and Seal Time
will be displayed (see Set-Up, page 14)� The unit is ready for use
when 00 is displayed continuously on the readout�
!
NOTE: The Chamber Vacuum Sealer stores the most
recently used operational settings when the unit is
turned Off or if electrical power is disrupted�
Placing the Heat-Seal Bag in the Vacuum Chamber
Selecting the Vacuum Level
Your 300 Series Chamber Vacuum Sealer features ve Vacuum
Levels� Depending on the Vacuum Level selected, it may take from
10 to 45 seconds to pull the desired vacuum (see Control Panel
Overview, Vacuum Level Button, page 9)�
!
NOTE: Delicate foods (such as seafood, berries,
peas, etc�) may be crushed or damaged if packaged
using too great a Vacuum Level�
Press until the LED adjacent to the desired Vacuum Level lights�
Setting the Seal Time
Automatic Vacuum Packaging
• The vacuum pump turns On and the LED associated with the
selected Vacuum Level begins ashing; the LEDs for lower Vacuum
Levels light as those levels are achieved� The time on the Digital
Display counts up (in seconds) until the selected Vacuum Level is
achieved�
• When the selected Vacuum Level is achieved, the LED associated
with the level lights steady and the vacuum pump turns Off�
• The seal step is initiated if Seal Time is 01 or greater�
• The time remaining in the seal step is displayed on the digital
readout�
• When the display reaches 00, it begins ashing and three one-
second audible signals sound to indicate that the process is
complete� You may also notice the bag tightening around the product
as air is let back into he vacuum chamber�
Correct placement of the heat-seal bag within the Vacuum Chamber
is crucial to the vacuuming and sealing process� Here are some
guidelines to follow that will help ensure that your products are
properly vacuum packaged�
1� Allow at least 1�75 inch (4�5 cm) of space between the top of the
food item and the open end of the bag�
2� Lay bag at in the Vacuum Chamber with the opening of the
bag across the seal bar� If packaging a bag containing liquids
or wet product, keep the contents of the bag below the height of
the seal bar�
3� Secure the open end of the vacuum bag in the bag clamp
located in front of the seal bar�
The Seal Time on your 300 Series Chamber Vacuum Sealer is
adjustable to help ensure proper sealing when bags with different
wall thicknesses are used� The Seal Time setting can be set from 00
(no sealing) to 6 seconds in 0�5 second increments�
1� Press until the Seal Time LED lights; the last selected Seal
Time will appear on the Digital Display�
2� Press the and/or buttons until the desired setting appears
on the Digital Display�
Bags
1� Select the Vacuum Level and set the Seal Time as required (see
Selecting the Vacuum Level and Setting the Seal Time,
page 17-18)�
2� Open the Chamber Vacuum Lid�
3� Place the food item in a suitably sized heat-seal bag and secure
in the Chamber Vacuum Sealer (see Placing the Heat-Seal Bag
in the Vacuum Chamber, page 17)�
4� Close the Vacuum Chamber Lid�
5� Press � The vacuum and seal process will proceed as follows�
6� Open the Vacuum Chamber Lid�
7� Open the clamp, remove the bag and check for proper vacuum
and seal�
 Loading...