EasyManua.ls Logo

Porter-Cable BN200B - User Manual

Porter-Cable BN200B
7 pages
Print Icon
To Next Page IconTo Next Page
Loading...
 -
-
Operator and others in work area MUST
wear safety glasses with side shields. These safety
glasses must conform to ANSI Z87.1 requirements
(approved glasses have “Z87” printed or stamped
on them). It is the employer’s responsibility to
enforce the use of eye protection equipment by the
tool operator and other people in the work area.
(Fig. A)
 
Under some condi-
tions and duration of use, noise from this product
may contribute to hearing loss. (Fig. A)
 Conden sation
from an air compressor can rust and damage the
internal workings of the tool. (Fig. B)
 -
     
[Not to exceed 120 psi (8.3 bar)] Do not connect
the tool to a compressor rated at over 175 psi. The
tool operating pressure must never exceed 175 psi
even in the event of regulator failure. (Fig. C)
          -
       
       
(Fig. D)
         
Bottled compressed gases such as oxygen, carbon
dioxide, nitrogen, hydrogen, propane, acetylene or
air are not for use with pneumatic tools. Never use
combustible gases or any other reactive gas as a
power source for this tool. Danger of explosion and/
or serious personal injury may result. (Fig. E)
 
       
Use hose connectors that shut off air sup-
ply from compressor when the tool is disconnected.
(Fig. F)
        
      
     

       
      

-

      
 If the contact trip is adjusted when
the tool is connected to the air supply and nails are
loaded, accidental discharge may occur. (Fig. G)
• -

The tool driving mechanism may cycle
when tool is connected to the air supply. Do not
load fasteners with trigger or safety depressed to
prevent unintentional firing of a fastener.
 
-
Do not tape or tie trigger or contact trip in
       
       
     
  L’opérateur et les autres personnes
œuvrant dans la zone de travail DOIVENT porter
des lunettes de sécuri munies de protecteurs
latéraux. Ces lunettes de sécurité doivent être con-
formes à la norme ANSI Z87.1 (les lunettes approu-
vées portent l’inscription imprimée ou estampillée
« Z87 »). L’employeur a la responsabilité d’imposer
le port d’un équipement de protection oculaire par
l’opérateur de l’outil et toute personne se trouvant
dans la zone immédiate de travail. (fig. A)
  
     
  Dans certaines conditions et selon la
durée d’utilisation, le bruit émis par ce produit pour-
rait contribuer à une perte auditive. (fig. A)
       
 La condensation issue d’un compresseur
d’air risque de faire rouiller et d’abîmer les compos-
ants internes de l’outil. (fig. B)
       
       -
   (ne pas excéder les 8,3 bars
(120 psi)). Ne pas raccorder l’outil à un compresseur
d’une puissance nominale supérieure à 12,6 bars
(175 psi). La pression de fonctionnement de l’outil
ne doit jamais excéder 12,6 bars (175 psi) même
dans l’éventualité d’une défaillance du régulateur.
(fig. C)
 
     

    
(fig. D)
 -
   Les gaz comprimés en bouteille
comme l’oxygène, le dioxyde de carbone, l’azote,
l’hydrogène, le propane, l’acétylène ou l’air ne doivent
pas être utilisés avec les outils pneumatiques. Ne
jamais utiliser de gaz combustibles ou tout autre type
de gaz réactif comme source d’énergie pour cet outil.
Leur utilisation représente un danger d’explosion et
peut se solder par des blessures corporelles graves.
(fig. E)
 

Utiliser des connecteurs de tuyau qui coupent
l’alimentation en air dès que l’outil est débranché.
(fig. F)
 







-


     
    -

  El operador y toda otra persona
que se encuentre en el área de trabajo DEBEN
usar anteojos de seguridad con protección lat-
eral. Estos anteojos de seguridad deben cum-
plir con los requisitos ANSI Z87.1 (los anteojos
aprobados tienen impreso o estampado “Z87”).
Es responsabilidad del empleador exigir el uso
de equipo de protección para los ojos por parte
del operador de la herramienta y de las personas
en el área de trabajo. (Fig. A)
      -
En ciertas
circunstancias y según el período de uso, el ruido
de este producto puede contribuir a la pérdida
de audición. (Fig. A)
        La
condensación de un compresor de aire puede
oxidar y dañar los mecanismos internos de la
herramienta. (Fig. B)
    
      
    (No exceda 8,3 bar
[120 psi]). No conecte la herramienta a un com-
presor con una capacidad nominal superior a
12,1 bar (175 psi). La presión de operación de la
herramienta nunca debe exceder 12,1 bar (175
psi), aún en el caso de una falla en el regulador.
(Fig. C)
      
      

       

(Fig. D)
       -
 Los gases comprimidos envasados
como el oxígeno, el dióxido de carbono, el
nitrógeno, el hidrógeno, el propano, el acetileno
o el aire no son para utilizar con herramientas
neumáticas. Nunca utilice gases combustibles
o cualquier otro gas reactivo como fuente de
energía para esta herramienta. Podría provocarse
un peligro de explosión y/o lesiones personales
graves. (Fig. E)
      
      
     .
Utilice conectores de mangueras que cierren el
suministro de aire del compresor cuando la her-
ramienta está desconectada. (Fig. F)
 
-
       

-
-
-



Fig. A
70 psi
4.9 bar
120 psi
8.3 bar






 
Loquet de dégagement
Pasador para desobstrucción
 
Déclencheur par contact
Activador por contacto
 
Appui antimarques
Protector anti-rayadura
 
Fenêtre indicatrice de recharge
Ventana indicadora del nivel de clavos
 
Chargeur
Fuente
 
Mécanisme de dégagement
du chargeur
Liberador del resorte propulsor
 
Port d’admission d’air
Entrada de aire
 
Échappement arrière
Escape trasero
 
Crochet de ceinture réglable
Sujetador ajustable para el cinturón
 
Bouton de verrouillage de la détente
Bloqueo del gatillo
 
Détente
Gatillo
 
Molette de réglage de profondeur
Rueda de ajuste de la profundidad



F
K
L
C
F
K
L
C


 
 / Longueurs / Longitud 5/8'' 1-3/8"
(16 mm 35 mm)
5/8'' 2"
(16 mm – 50 mm)
 / Diamètres / Diámetros 18 gauge
(calibre 18)
18 gauge
(calibre 18)
/ Entrée d’air / Admisión de aire 1/4" NPT
(1/4 po)
1/4" NPT
(1/4 po)
Part No. N030769 JUL09
Copyright © 2000, 2003, 2007, 2009 PORTER-CABLE
Instruction manual
Manuel d'instructions
Manual de instrucciones
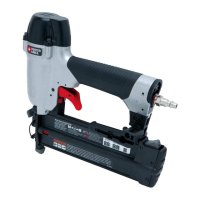
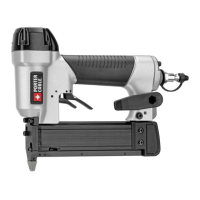
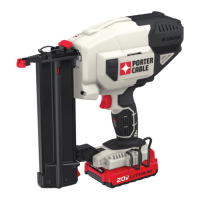
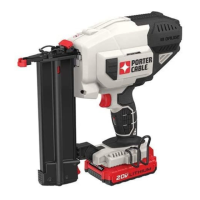
BN138
BN200B
BRAD NAILER
Cloueuse de finition
Clavadora
www.deltaportercable.com

INSTRUCTIVO DE OPERACIÓN, CENTROS
DE SERVICIO Y PÓLIZA DE GARANTÍA.
LÉASE ESTE
INSTRUCTIVO ANTES DE USAR EL PRODUCTO.

The definitions below describe the level of severity for each
signal word. Please read the manual and pay attention to
these symbols.
Indicates an imminently hazardous situation
which, if not avoided,  result in   .
Indicates a potentially hazardous situation
which, if not avoided,  result in   
.
Indicates a potentially haz ard ous situation
which, if not avoided,  result in   
.
Indicates a practice    -
which, if not avoided,  result in p


Les définitions ci-dessous décrivent le niveau de gravité pour
chaque symbole. Veuillez lire le mode d’emploi et porter une
attention particulière à ces symboles.
Indique une situation dangereuse imminente
qui, si elle n’est pas évitée,


Indique une situation potentiellement
dangereuse qui, si elle n’est pas évitée,

se solder par
un

.
Indique une situation potentiellement dan-
gereuse qui, si elle n’est pas évitée

se solder par


.
Indique une pratique ne posant  
   mais qui par contre, si rien n’est
fait pour l’éviter,  poser des   


Las siguientes definiciones describen el nivel de gravedad
de cada advertencia. Lea el manual y preste atención a
estos símbolos.
Indica una situación de peligro inminente
que, si no se evita,
    

Indica una situación de peligro poten-
cial que, si no se evita,

provocar la
 

ATENCN:
Indica una situación de peligro poten-
cial que, si no se evita,

provocar


Indique une pratique ne posant 
 mais qui par contre, si
rien n’est fait pour l’éviter,  poser des

SAVE THESE INSTRUCTIONS

When using any pneumatic tool, all safety precautions, as outlined below, should be followed to avoid the risk ofor . Read and understand all instructions
before operating the tool.
CONSERVEz CES dIRECTIVES

lorsqu’on utilise un outil pneumatique quelconque, respecter toutes les mesures de sécurité, décrites ci-après, pour éviter un risque de  ou.
Lire et assimiler toutes les directives avant d’utiliser l’outil.
CONSERVE ESTAS INSTRUCCIONES

Al utilizar una herramienta neumática, deben seguirse todas las precauciones de seguridad descritas a continuación, a fin de evitar el riesgo deo.
Lea y comprenda todas las instrucciones antes de emplear la herramienta.

Questions and Answers

  • S
    salazarkellyAug 14, 2025
    Why is my Porter-Cable Nail Gun skipping fasteners?
    • M
      Maria BrennanAug 14, 2025
      Skipping fasteners or intermittent feed in your Porter-Cable Nail Gun can occur due to several reasons: * Restricted air supply: Check your air supply and couplers. * Loose nosepiece screws: Tighten the nosepiece screws using the appropriate hex wrench. * Incorrect fasteners: Use only the recommended size and angle fasteners. * Dirty magazine: Clean the magazine track and nosepiece. * Worn magazine: Replace the magazine. * Broken or damaged driver blade: Replace the Driver Blade Kit. * Worn or damaged trigger valve o-ring: Replace the valve using the Trigger Valve Kit. * Worn piston o-ring: Replace the piston o-ring using the O-ring Repair Kit. * Worn or damaged pusher spring: Replace the spring. * Loose magazine: Ensure the magazine latch is holding firmly.
  • M
    Michelle WardAug 18, 2025
    Why do fasteners jam in my Porter-Cable Nail Gun?
    • E
      edgar34Aug 18, 2025
      Fasteners can jam in your Porter-Cable Nail Gun for these reasons: * Worn driver channel: The driver channel in the nose piece may be worn, and you should replace the nosepiece. * Incorrect fasteners: Ensure you are using the recommended size and angle fasteners. * Loose magazine: Check that the magazine screws are holding firmly. * Worn driver blade: Replace the Driver Blade Kit. * Loose nosepiece screws: Tighten the nosepiece screws using an appropriate hex wrench. * Fasteners not feeding properly: Ensure fasteners are feeding properly into the nose.
  • G
    Gary VazquezAug 21, 2025
    How to fix air leaks around the nose of my Porter-Cable BN200B when the tool is in actuated position?
    • A
      Andrew HigginsAug 21, 2025
      If you notice air leaking around the nose of your Porter-Cable Nail Gun when the tool is in the actuated position (driver blade down), the likely cause is a damaged or worn bumper. Replace the bumper using the Bumper Kit to resolve this issue.
  • C
    charles89Aug 25, 2025
    What causes a Porter-Cable BN200B Nail Gun top cap to leak air and how to fix it?
    • B
      Brian KellerAug 25, 2025
      Air leaks from the top cap of your Porter-Cable Nail Gun can be caused by: * Loose cap screws: Tighten the cap screws using the appropriate hex wrench. * Damaged gasket/o-ring: Replace the gasket/o-rings using the O-ring Repair Kit.
  • M
    Mark LoweryAug 27, 2025
    How to repair a Porter-Cable BN200B trigger valve housing leak?
    • J
      Jennifer LynchAug 27, 2025
      A trigger valve housing leak in your Porter-Cable Nail Gun is often due to an O-ring or valve stem failure. Replace the valve using the Trigger Valve Kit.
  • C
    Curtis PayneAug 31, 2025
    What to do if my Porter-Cable BN200B has a lack of power or is sluggish?
    • B
      brianhernandezAug 31, 2025
      If your Porter-Cable Nail Gun is showing a lack of power or seems sluggish, consider the following: * Low air pressure: Check the air supply. * Damaged or worn o-rings: Replace the gasket/o-rings using the O-ring Repair Kit. * Blocked exhaust port: Disconnect the air, remove the exhaust plate from the top of the tool, and clean the port.
  • P
    Phyllis HendersonSep 3, 2025
    What to do if my Porter-Cable BN200B won't cycle in cold weather?
    • C
      Christopher JonesSep 3, 2025
      If your Porter-Cable Nail Gun isn't cycling in cold weather, here's what you can check: * Air supply: Make sure the tool is receiving air by checking the air supply. * Frozen valve: Warm up the tool if the valve may be frozen. * Damaged o-rings: Replace the gasket/o-rings using the O-ring Repair Kit if they are damaged or worn. * Broken driver blade: Replace the Driver Blade Kit if the driver blade is broken or damaged.
  • K
    kristinmoyerSep 6, 2025
    How to fix air leaks around the nose of my Porter-Cable BN200B Nail Gun when the tool is at rest?
    • M
      Michael GeorgeSep 6, 2025
      If air is leaking around the nose of your Porter-Cable Nail Gun when the tool is at rest (driver blade in the up position), it's likely due to damaged or worn o-rings. Replace the gasket/o-rings using the O-ring Repair Kit.
  • A
    andrewsmithSep 10, 2025
    How to fix exhaust leaks on Porter-Cable BN200B?
    • L
      Laurie HardySep 10, 2025
      If your Porter-Cable Nail Gun is leaking from the exhaust, it is likely due to a damaged main seal or o-ring, or debris inside the tool. Replace the gasket/o-rings using the O-ring Repair Kit.

Summary

General Safety Precautions

Tool Assembly Procedures

Tool Preparation Before Use

Tool Operation Guide

Using the Lock-Off Feature

How to use the trigger lock-off switch to prevent accidental firing.

Loading Fasteners into the Magazine

Step-by-step guide for loading fasteners into the tool's magazine.

Actuating the Tool

Instructions on how to fire the tool using sequential action.

Adjusting Fastener Depth

How to adjust the depth setting wheel for fastener insertion depth.

Clearing a Jammed Nail

Procedure for Clearing Jams

Detailed steps to safely clear a jammed nail from the tool's nosepiece.

Maintenance Procedures

Daily Maintenance Chart

Tasks to perform daily for tool maintenance.

Product Warranty and Guarantees

Three Year Limited Warranty

Details of the three-year warranty against defects in materials and workmanship.

Troubleshooting Common Problems

Trigger Valve Housing Leaks

Solutions for leaks originating from the trigger valve housing.

Top Cap Air Leaks

Troubleshooting steps for air leaks from the top cap.

Exhaust Leaks

Diagnosing and fixing leaks from the exhaust port.

Air Leaks Around Nose

Addressing air leaks near the nosepiece in different operational states.

Tool Not Cycling in Cold Weather

Resolving issues with the tool's operation in cold temperatures.

Lack of Power or Sluggish Operation

Troubleshooting steps for reduced power or slow tool performance.

Porter-Cable BN200B Specifications

General IconGeneral
TypeBrad Nailer
Power SourcePneumatic
Magazine Capacity100
Fastener TypeBrad nails
Fastener Gauge18
Operating Pressure70-120 PSI
Air Consumption0.3 CFM
Depth AdjustmentYes
Tool-Free Jam ReleaseYes
Nail Size18 GA
Fastener Length5/8 inch to 2 inch

Related product manuals