5.5
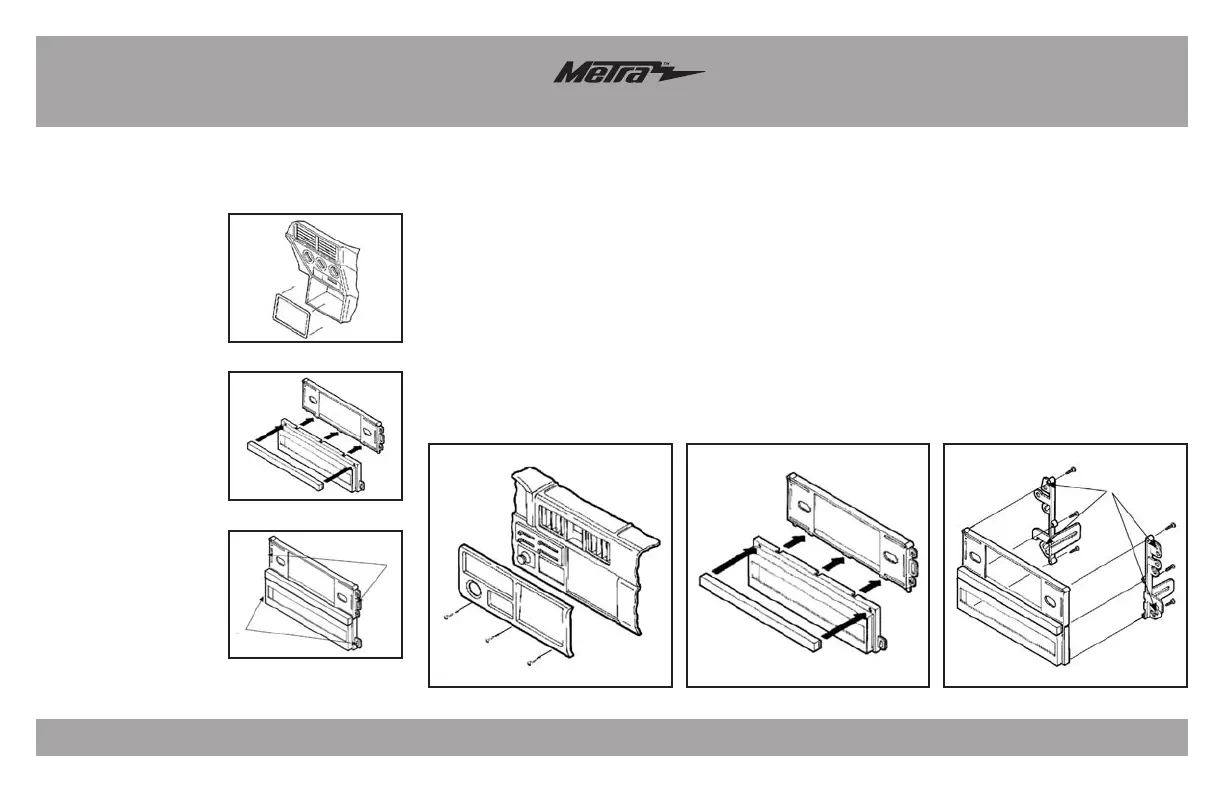
1. Unclip the radio trim
bezel and remove.
2.
Remove (4) screws
securing the factory
radio and disconnect
the wiring.(Figure A)
3.
Snap the filler bar onto
the equalizer housing
and slide the assembly
onto the bottom of
the radio housing.
(Figure B)
4.
Cut and remove all
mounting tabs on the
radio housing EXCEPT
tabs “G”. (Figure C)
Continue to kit
assembly, p. 5.6
Mitsubishi Galant
1989-1993
1. Remove (3) screws from the bottom edge of the
dash trim bezel and remove the bezel.
2.
Remove (4) screws securing the factory radio and
disconnect the wiring. (Figure A)
3.
Snap the filler bar onto the equalizer
housing and slide the assembly onto the bottom
of the radio housing. (Figure B)
Note: The factory pocket may be used by omitting
this step and mounting the pocket under the radio
housing during installation.
4.
Cut and remove all mounting tabs on bracket
Set #1 EXCEPT tabs “H”.
5.
Mount the converted brackets to the
back of the assembly with (6) #8 x 3/4” hex-head
screws supplied.
Continue to kit assembly, p. 5.6
Mitsubishi Van
1987-1990
Dash Disassembly 99-7000
(Figure A)
(Figure B)
(Figure A) (Figure B)
(Figure C)
“G”
“G”
Mounting tab(s): identified by a
stamped letter on back of tab
(Figure C)
Mounting tab(s): identified by a
stamped letter on back of tab
“C”

 Loading...