35
Replace the chain
IMPORTANT: Do not clamp chainsaw in a vise to replace the saw
chain or guide bar.
Replace the chain when the cutters are too worn to sharpen or when
the chain breaks. Only use replacement chain noted in this manual.
Always include new drive sprocket when replacing the chain. This
will maintain proper driving of the chain. (Note: For proper chain and
drive sprocket, see Parts List.)
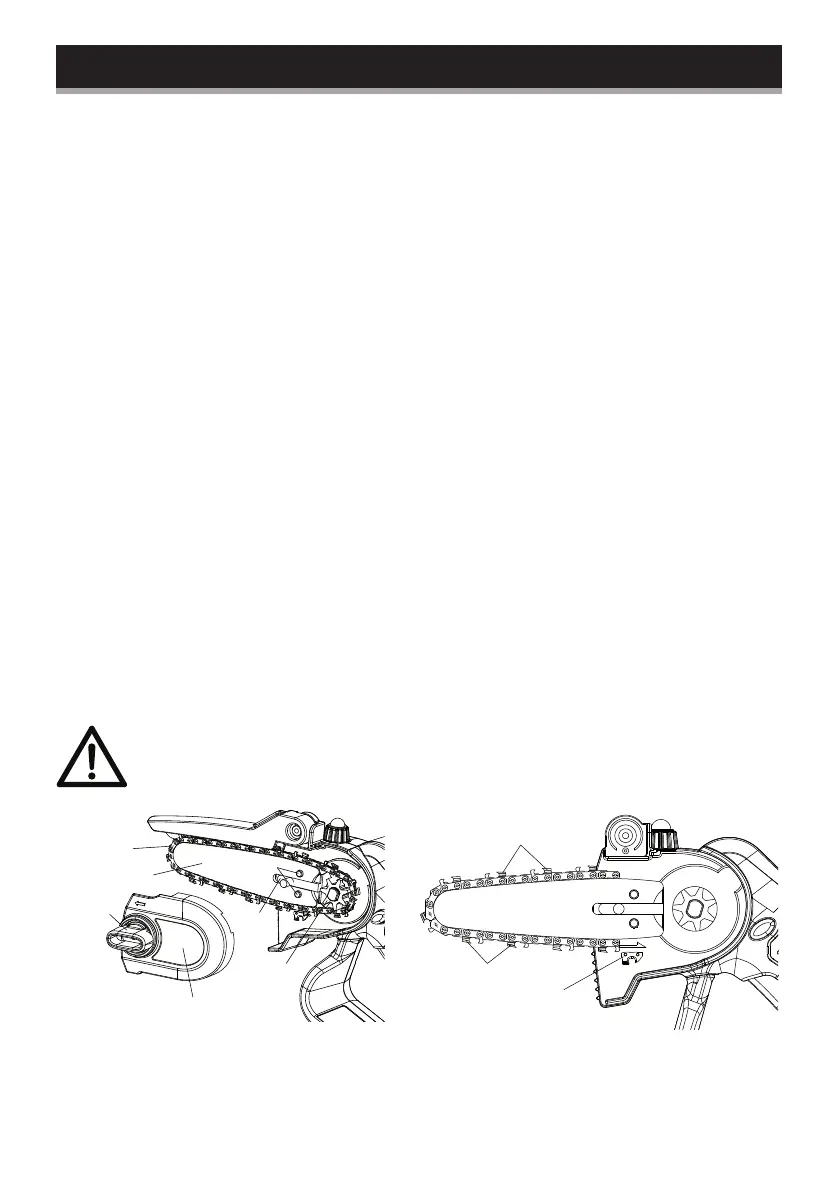
1. Loosen tension wheel.
2. Remove sprocket cover and tension wheel.
3. Remove saw chain.
4. Place new chain around the guide bar, along the top groove of
the guide bar, and around the guide bar nose.
Note: Make sure cutting edges of the chain are facing in the right
direction: The chain cutting edges on top of the guide bar face
the guide bar nose.
5. Put the guide bar with the new saw chain into the automatic
tensioner, and push backward along the guide block, then put the
saw chain into the sprocket and flatten the guide bar.
Warning: When replacing saw chains you must remove the
battery pack from the chainsaw and wear protective gloves.
Severe injury or death could occur from body contact with a
moving chain.
6. Place sprocket cover into positioning groove.
7. Lock the sprocket cover with tension wheel. (IMPORTANT:
Securely tighten tension wheel.)
CAUTION:
Do not place chain in the wrong direction. If wrong,
saw will vibrate badly and will not cut.
Sprocket Cover
Tension Wheel
Saw Chain
Guide Bar
Automatic tensioner
Guide block
Sprocket
cutting edges
cutting edges
chain slide