EasyManua.ls Logo

PowerSpec Pro 3D Printer - Page 12

PowerSpec Pro 3D Printer
28 pages
Print Icon
To Next Page IconTo Next Page
To Previous Page IconTo Previous Page
Loading...
10
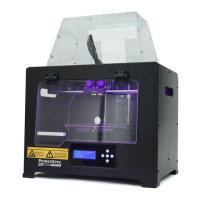
When the object is imported you may find that it is not on the virtual build platform or even on the screen, using the
function keys indicated by the blue boxes in the illustration above, you can change the camera angle and reposition the
object onto the center of the build platform. Once you've done this, the next step is to generate the Gcode. This is
achieved by clicking on the button (Generate GCode) at the bottom of the panel.
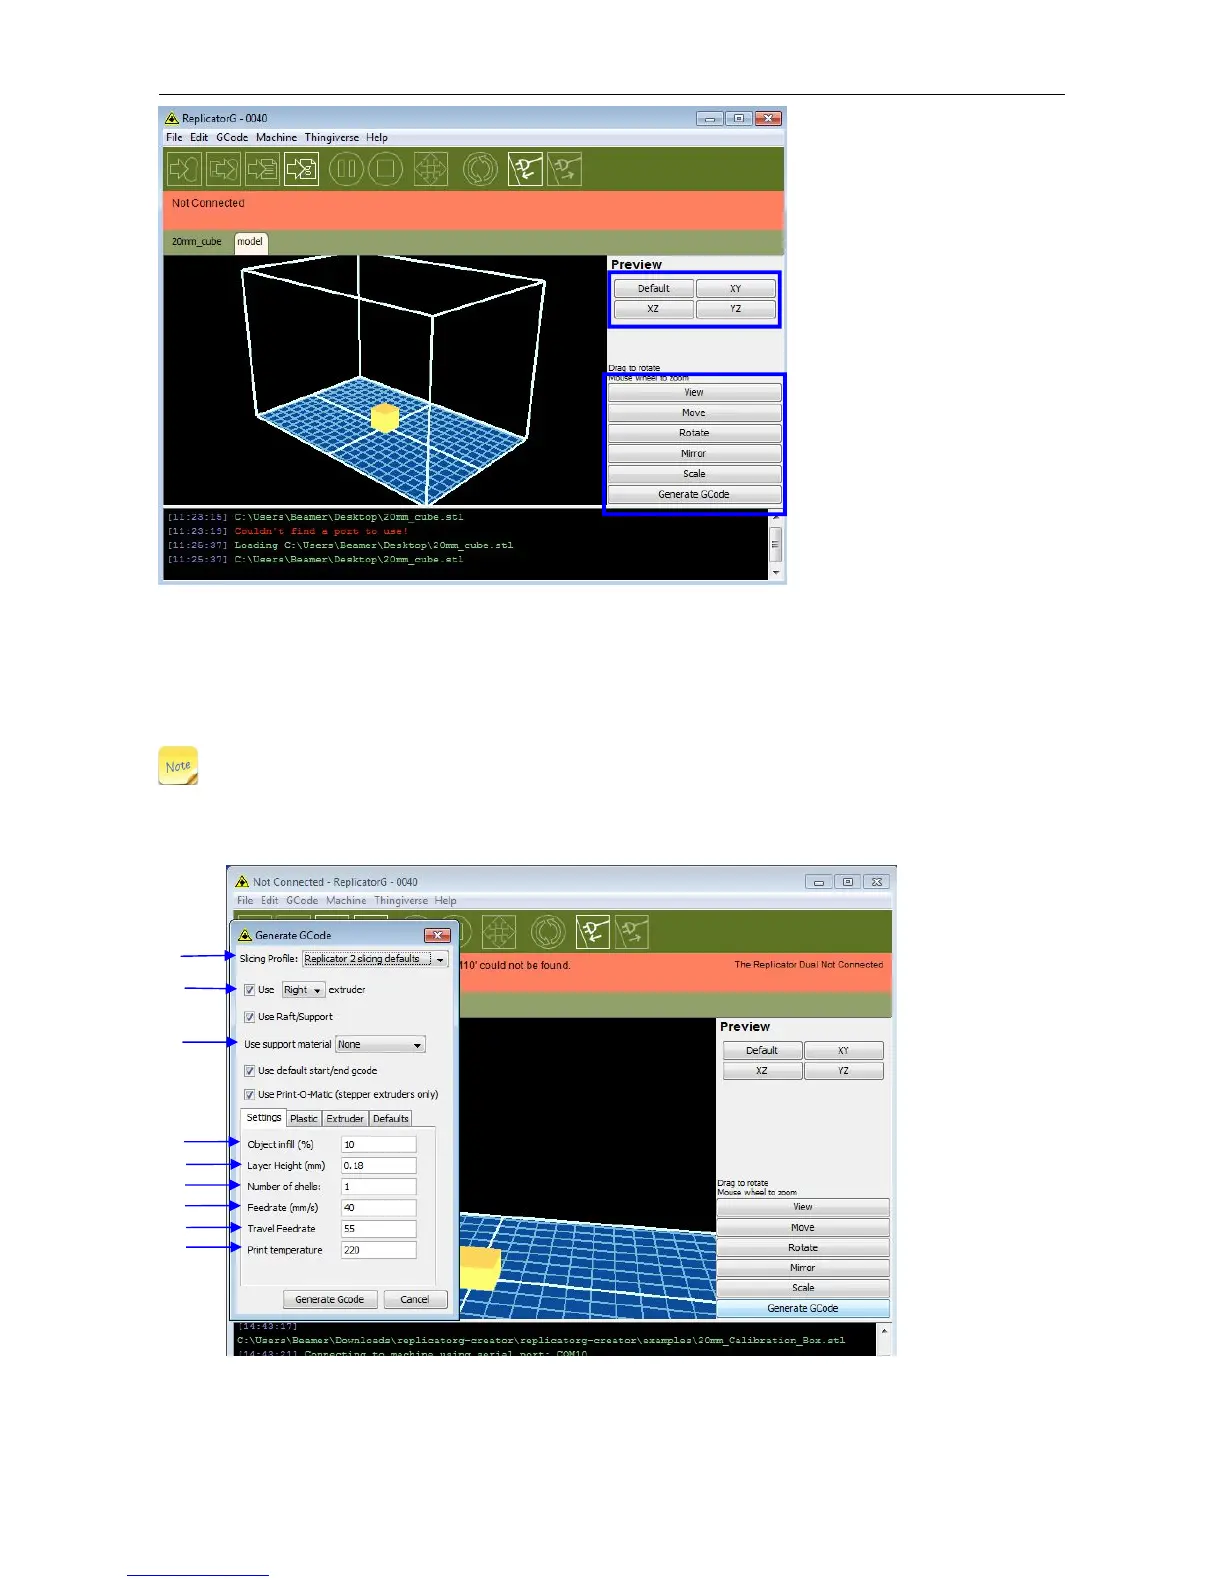
EXPLANATION OF GCODE SETTINGS
A new window will pop up, giving you several options on how the Gcode will be generated:
A. Slicing Profile: select Replicator slicing defaults for ABS printing, then select Replicator 2 slicing defaults for PLA printing.
B. This tells the printer which extruder to use for a dual-extruder head printer, either the left or right head can be selected.
C. If your sample will have any hanging surfaces, it is recommended to have support. Select None indicates that there is no
A
C
D
F
G
H
I
E