Manual Setting
Reminder: The controller will work fine under default setting except lithium battery.
Caution! All steps must be carried out when the PV modules are
disconnected to controller.
Step 1: D00
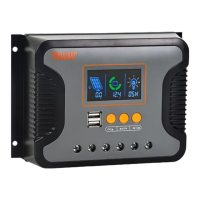
Press the button PRG, then LCD displays D00. This is setting for load working time
(Default is 24-hour). Press ENT until numbers flash, then press UP/DOWN to set up time
that you want, long-press ENT to confirm it. This output voltage is same as battery. The
load is only for small DC loads less 5A current. If no load, just leave it.
Step 2: D01
Press the button UP, LCD shows 13.8. This is default value of floating charging. Press
ENT until numbers flash, then press UP/DOWN to set up voltage that you want, long-
press ENT to confirm it.
Caution! This value is for one 12V battery. If there are many batteries in
series, the controller will multiply them in proportion automatically and the LCD
only displays the voltage of one battery (For example, if your battery is 4x12V, and
if you set the voltage at 14.1, the charge voltage will be 4x14. 1 automatically, but
the LCD only displays 14.1).
Step 3: D02
Continue to press the button UP, LCD shows 14.5. This is highest absorption charging
voltage for battery. Press ENT until numbers flash, then press UP/DOWN to set up
voltage that you want, long-press ENT to confirm it.
Caution! This value is for one 12V battery. If there are many batteries in