page no. 31 of 68
LX Range Users, Installation & Servicing Instructions Doc Ref M110 issue 1.0 Dec 2020.
2.2 Installation of Flue System/Combustion Air
2.2.1 General
Only flue systems supplied through Powrmatic Ltd may
be used with this appliance. Twin Wall Flue can also be
used.
IMPORTANT: All flues must be installed in
accordance with IGEM/UP/10 Edition 4,
BS5440-1 and BS5440-2 and with reference
to the requirements of the Clean Air Act.
IMPORTANT: The maximum permitted
length of flue system is 6m, or 12m if the flue
outlet only is used. If an offset is required two
sets of 45° bends should be used each set
being equivalent to 0.5m of flue length. 90° bends may be
used but each set will be equivalent to 1.0m of flue length.
Note: For flue positioning and minimum
clearances of flue, please refer to current
IGEM/UP/10, BS5440-1 and BS5440-2
standards.
Notes for all systems.
i) Final overall length of adjustable disconnection piece
must be between 360 - 415mm.
ii) 45° offsets may be used if required.
Each set is equivalent to 0.5m of flue length.
iii) Horizontal terminations shall be located according to
any minimum clearance distances and subject to the risk
assessment criteria given in Appendix 9 of IGEM/UP/10
Edition 4. A terminal guard shall be fitted to a horizontal
flue terminal situated below 2.0m from floor level or
in any position where it may cause injury to persons
resulting from touching hot surfaces.
iv) Where heaters are used in clean environments it is
permissible to take the combustion air directly from the
heated space.
v) for existing type B22 installations only, it is
recommended that both air inlets are utilised. In addition
a 90° bend should be fitted to the rear inlet, the inlet
opening of the bend facing to the side of the heater i.e.
away from the main air fan.
v1) We do not recommend cutting the terminal or flue
pipe. All adjustment must be made by the use of the
adjustable length and additional lengths of flue, (250mm,
500mm, and 1000mm are available.).
The minimum distance between surfaces of the flue pipe
and any surfaces made from combustible materials is
150mm. If it is necessary for the flue pipe to pass through
a structure made from combustible materials a metal
sleeve must be used so that the minimum clearance of
25mm is maintained.
The flue and combustion air ducts supplied with the
heater are capable of withstanding their own weight
over the allowable flue lengths. Wall bands and bracing
brackets, or equivalent, must be used to provide lateral
stability and should be used at centres not exceeding 2.5
metres.
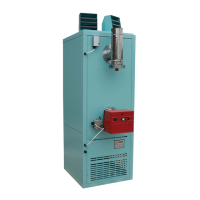
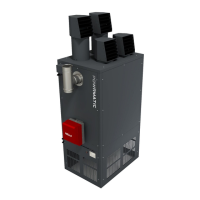
All models are supplied as standard with a rear flue outlet
and the flue outlet and combustion air sockets but can be
converted to top outlet (see section 2.2.2).
See Figures 1a to 2b for the different types of flue
installation. For room sealed units, the correct socket
must be connected via the provided flue system to
outside air.
All outer joints must be finished with the provided locking
bands. A smear of silicon grease to the inside of sockets
will assist in fitting components together. All flue and
combustion air ducts must be supported independently of
the air heater.
2.2.2 Conversion to Top Outlet
NOTE: All Heaters are dispatched with REAR
flue / combustion air spigots as standard.
Type C32
1a. Remove the two blanking plates from the flue /
combustion air openings on the underside of the top panel
by removing 8 screws. Remove exhaust fan outlet spigot
and the air inlet spigot from the rear panel by removing 8
screws.
Type B22
1b. Remove the blanking plate from the flue opening on
the underside of the top panel by removing 4 screws.
Remove exhaust fan outlet spigot from the rear panel by
removing 4 screws.
All
2. Remove the vacuum sensing tube from the original test
point connection and replace with the black cap from the
unused test point connection.
3. Remove the screws securing the fan mounting box
to the exhaust header plate and remove fan assembly.
Ensure that the gasket is not damaged, if necessary
replace or make good with silicon sealant.
4. Rotate fan assembly 90° anticlockwise and refit the
fan assembly to the exhaust header plate utilising the
original screws. Reconnect the vacuum sensing tube onto
the new test point location.
5. Secure the exhaust fan outlet flange to the underside
of the top panel and refit the blanking plate(s) and flue
spigot(s).
 Loading...