18
|
12780 San Fernando Road, Sylmar, California 91342 | www.semcopackaging.com | Email: semcoinfo@PPG.com
11. Mixer setting adjustments (cont.)
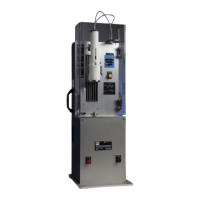
Calibration – Semkit package sensor locations
1. Remove rear panel.
2. On lower section of the mixer, the main cylinder has 5
sensors mounted to the cylinder:
3. Check the sensor location. It is measured from the top of
the cylinder to the top edge of the sensor. See red lines
in picture.
4. If sensors are greater than 1/32" from the locations listed
above, proceed to step 5 below.
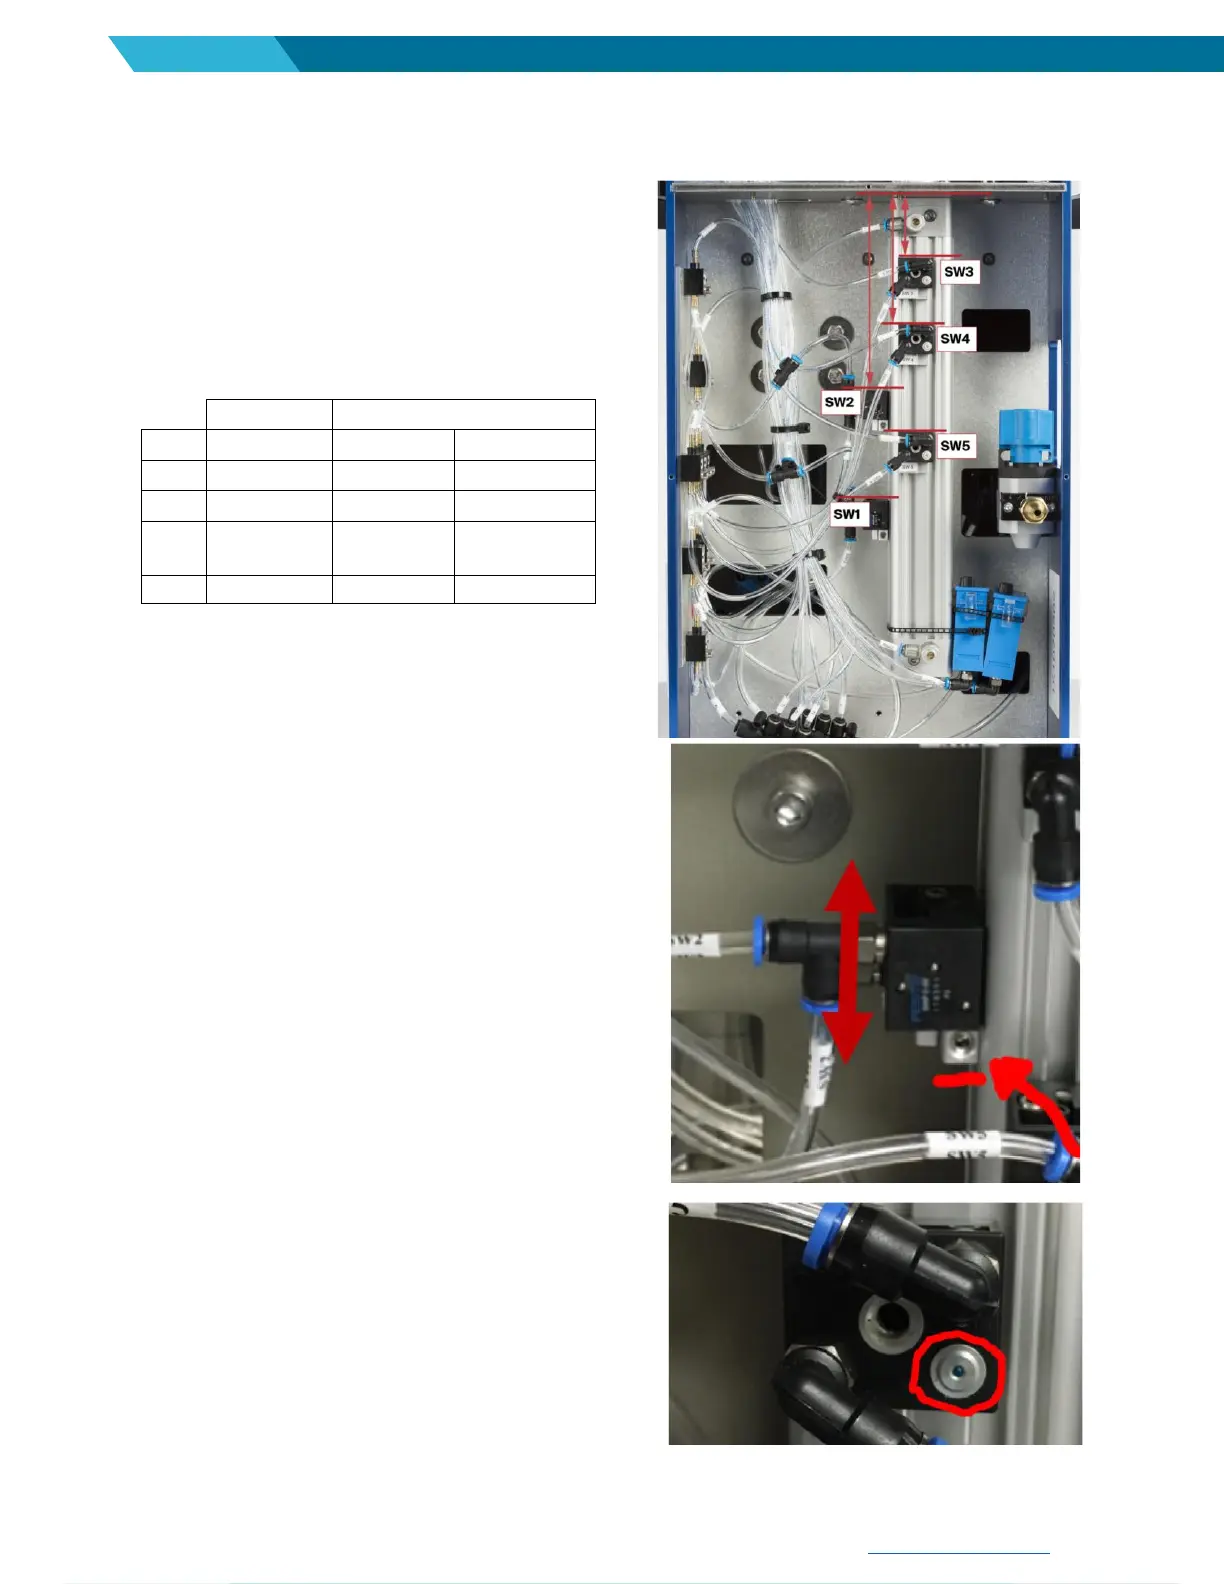
5. Using 2.5 mm Allen wrench, loosen the sensor block bolt.
6. Move sensor up or down until proper distance from top
of cylinder is located.
7. Tighten sensor block bolt firmly.
8. When all checks/adjustments are completed, re-install
rear panel.
When properly activated, the sensor “pin” should come out. If
this does not happen during mixer, the sensor is out of
position or needs replacement. If replacing sensor, the
orientation of the sensor should be the same when placed
back on the air cylinder. The ‘pin’ should be on lower right
side.