4/23
INSTALL THE PROJECTOR
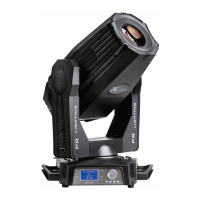
Clamp
Safety Cord
Handle
Digital Control
Panel
Warning
Please run the safety cord
through two holes for safety.
!
Take 2 clamps and the safety cord out from the package and mount 2 clamps on the underside of fixture with 2 retainers attached to each
clamp. Hang the fixture on the structure and fasten the screws attached to each clamp. (See the WARNING on the underside of the base
as shown above) To pass the SAFETY CORD through the HOLES for safety! Always ensure that the projector is firmly anchored to
avoid vibration and slipping whilst functioning. Always ensure that the structure that you are going to mount the projector to is secure and
strong enough to support the weight of a XR 330 Spot
WARNING:
1. The projector MUST be lifted or carried by the HANDLES instead of clamps.
2. For safety the safety cord should afford 10 times the Projector’s weight.
FITTING THE LAMP
Lock the yoke before
fitting/replacing /adjusting the
lam just as Shown by Figure 1,
after Opening the cover at the
rear of the projector by
loosening 8fastfit screws at both
sides of the head.
For lamp adjustment, please see
the figure2. The removal of a
lamp is showed by the figure3.
Please tighten the power cord
for the lamp before the
installation.
Installation and removal are
in reverse orders.
Note: don’t touch the bulb of
the new lamp with bare
hands so as not to impair the
beam output. Do not damage
the sticking-out of the lamp.
Important: Always read
"Instructions for use"
enclosed with the lamp.
Figure 1: 8 pcs
of fastfit screws
Figure2:Lamp adjustment
/loosen the two screws and
lift the fan.
Using cross screwdriver to
adjust the two screws for the
adjustment the lamp's position
and gently and take
the lamp out
Press the lamp aslant
Figure3:Take out the
lamp
 Loading...