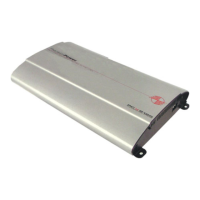
1. Cooling Plenums: Maintain a minimum 2” clearance around cooling plenums
for proper amplifier cooling.
2. QBASS™ Control: Add more bass to the system by turning this control clock-
wise to boost the selected QBASS™ frequency up to +18dB.
3. QBASS™ Remote Port: Port to plug in the optional QBASS Plus™ Remote
knob.
4. Power & Ground Connections: After connecting the power and ground
cables to the PowerLock™ wire connector, plug it in here.
5. Power Indicator: A green light indicates that the amplifier power is ON.
8
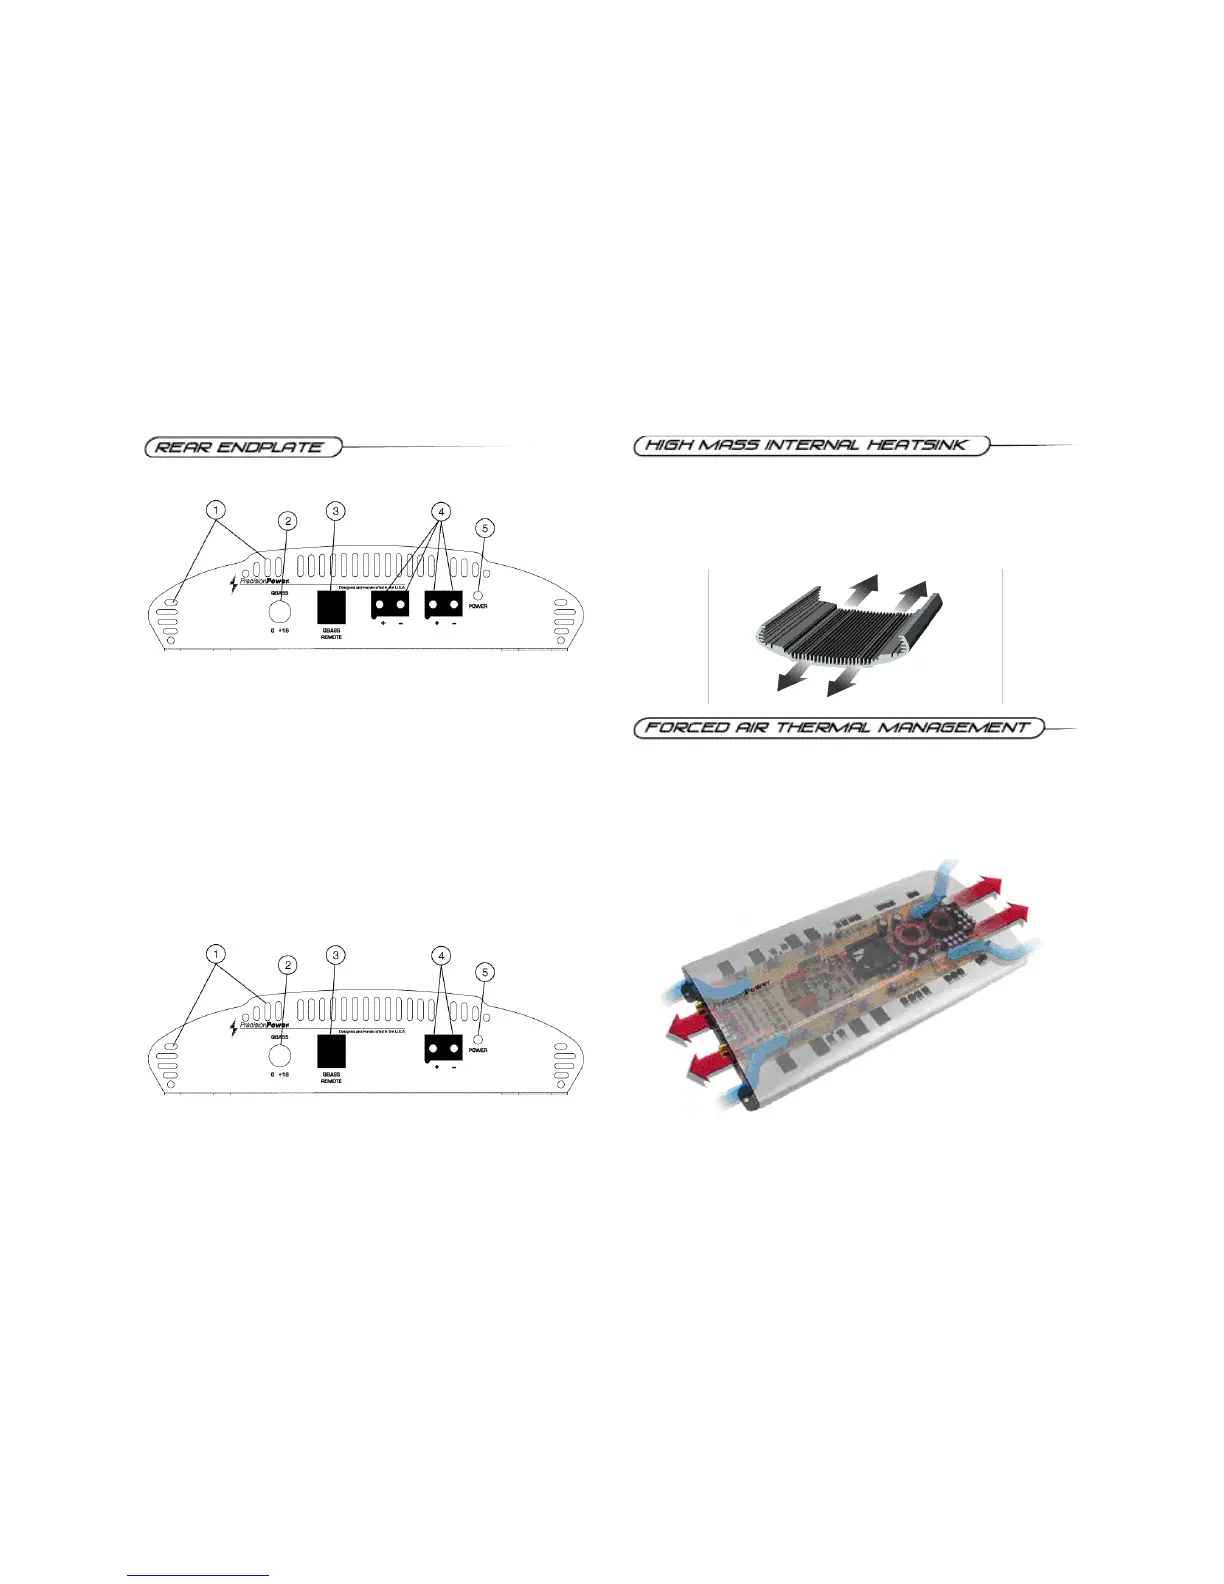
To manage the additional heat associated with higher output capability, a thermally
controlled fan has been designed into the PCX 2125, PCX 2200 and PCX 2400.
When the heatsink temperature reaches a pre-determined value, the fan is
activated and cool air is drawn in through the lower intake vents on the endplate.
This cool air flows below the circuit board, through the fan and across the internal
fins, cooling the heatsink. The warm air is then forced out through the upper
endplate exhaust vents.
The New! PCX™ amplifiers mass has been increased by 2 lbs. per linear foot
over last year’s P O W E RC L A S S ™ amplifiers, resulting in far superior heat
dissipation. The unique heatsink on your PCX™ amplifier has been designed with
fins on the inside of the aluminum extrusion. This allows for the transfer of heat
from the circuitry to the heatsink fins and out through the vents in the endplates.
Be sure you have ample space around the amplifier for cooling; at least 2" on all
sides.
13
PCX 2400 Power Panel
PCX 2125, 2200 Power Panel