EasyManua.ls Logo

Precor 9.55 - User Manual

Precor 9.55
49 pages
To Next Page IconTo Next Page
Loading...
9.55 Treadmill
Page 1
9.55 Treadmill
Warning: This service manual is for use by Precor trained service providers only.
If you are not a Precor Trained Servicer, you must not attempt to service any Precor Product;
Call your dealer for service.
This document contains information required to perform the majority of troubleshooting, and
replacement procedures required to repair and maintain this product.
This document contains general product information, software diagnostic procedures (when
available), preventative maintenance procedures, inspection and adjustment procedures,
troubleshooting procedures, replacement procedures and electrical block and wiring diagrams.
To move directly to a procedure, click the appropriate procedure in the bookmark section to the
left of this page. You may “drag” the separator bar between this page and the bookmark section
to change the size of the page being viewed.
© 2003 Precor Incorporated
Unauthorized Reproduction and Distribution Prohibited By Law

Table of Contents

Question and Answer IconNeed help?

Do you have a question about the Precor 9.55 and is the answer not in the manual?

Precor 9.55 Specifications

General IconGeneral
Model9.55
TypeTreadmill
Motor3.0 HP Continuous Duty
Incline Range0% - 15%
Speed Range0.5 - 12 mph
DeclineNo
Weight Capacity350 lbs (159 kg)
DisplayLED
Heart Rate MonitoringTouch and Wireless

Summary

Section One - Things You Should Know

About This Appendix

Provides context and version information for the 9.55 treadmill service manual.

Physical Specifications

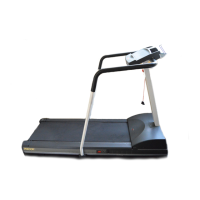
Details dimensions, weight, and power requirements of the 9.55 treadmill.

Section Two, Software Features

Accessing Hardware Validation Program

Steps to enter diagnostic modes for hardware testing.

Accessing Information Display Program

Steps to view odometer, hour meter, and software versions.

Accessing User Parameter Program

Steps to change measurement units, password, and user names.

Documenting Software Problems

Guidelines for recording software-related issues.

Section Three - Checking Treadmill Operation

Treadmill Operation Check Procedure

Steps to verify treadmill function after maintenance.

Section Four, Inspection and Adjustment Procedures

Calibrating the Lift Motor

Procedure for calibrating the lift motor system.

Adjusting Drive Belt Tension

Procedure for setting correct drive belt tension.

Section Five, Troubleshooting Procedures

Troubleshooting the Keypad and Upper PCA

Diagnosing issues with the console keypad and main board.

Troubleshooting the Lift System

Steps to diagnose problems with the treadmill's lift motor.

Troubleshooting the Speed Sensor

Steps to diagnose issues with the speed sensor.

Troubleshooting the External A.C. Power Source

Checks for proper electrical supply and circuit requirements.

Section Six, Replacement Procedures

Replacing the Lift Motor

Step-by-step guide for replacing the lift motor.

Replacing the Lift Platform

Procedure for removing and installing the lift platform.

Replacing the Lower Logic PCA

Steps for replacing the lower logic PCA.

Replacing the Lower Power PCA

Steps for replacing the lower power PCA.

Replacing the Lower PCA (version 2)

Procedure for installing a version 2 lower PCA.

Replacing the Speed Sensor

Steps for removing and installing the speed sensor.

Replacing Drive Motor

Procedure for removing and installing the drive motor assembly.

Replacing the Circuit Breaker

Steps for replacing the treadmill's circuit breaker.

Replacing the Line Filter

Procedure for removing and installing the line filter.

Replacing the Line Cord

Steps for replacing the treadmill's power cord.

Replacing the Drive Motor Cooling Fan

Procedure for replacing the drive motor cooling fan.

Replacing the Drive Motor Brushes

Steps for replacing worn drive motor brushes.

Replacing the PROM

Procedure for replacing the Programmable Read-Only Memory chip.

Section Seven, Technical Diagrams and Parts Lists

Wiring Diagram 7.1 - 9.55 (version 1)

Electrical wiring schematic for version 1.

Block Diagram 7.2 - 9.55 120 Vac (version 1)

Functional block diagram for 120V version 1.

Block Diagram 7.3 - 9.55 240 Vac (version 1)

Functional block diagram for 240V version 1.

Wiring Diagram 7.4 - 9.55 120 Vac (version 2)

Electrical wiring schematic for version 2 (120V).

Wiring Diagram 7.5 - 9.55 240 Vac (version 2)

Electrical wiring schematic for version 2 (240V).

Block Diagram 7.6 - 9.55 120 Vac (version 2)

Functional block diagram for version 2 (120V).

Block Diagram 7.7 - 9.55 240 Vac (version 2)

Functional block diagram for version 2 (240V).

Related product manuals