3.4 Controlling Studio 192-Series Mic Preamps from your DAW
Studio 192-series microphone preamps can be controlled from the front panel, UC
Surface, or Studio One. If you configure your Studio 192-series interface as a MIDI
device inside your DAW application, you can also control trim and phantom power
from within your DAW environment and store those settings with your session.
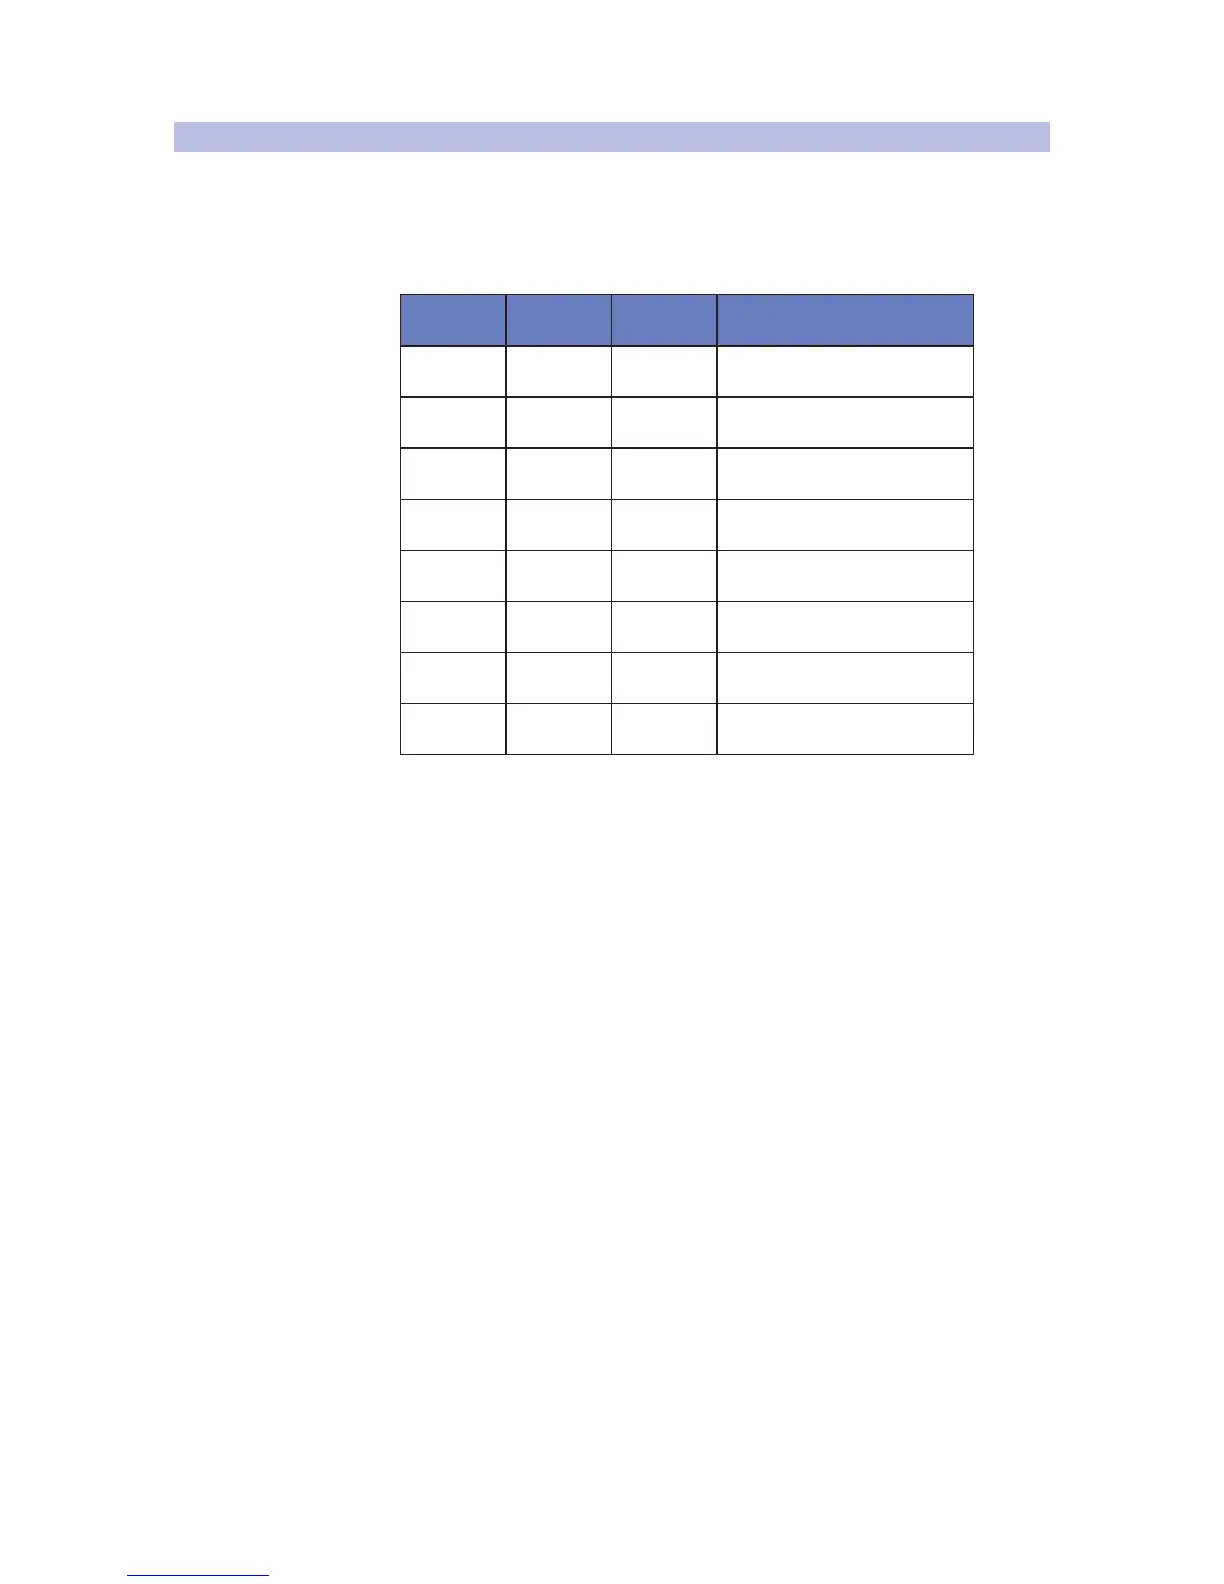
Below is a chart explaining the MIDI controls for your Studio 192-series preamps:
Preamp MIDI Channel Trim Level Phantom Power ON /OFF
Preamp 1 Channel 1 CC #7 CC #14 (0 to 63 = On, 64 to 127 = Off)
Preamp 2 Channel 2 CC #7 CC #14 (0 to 63 = On, 64 to 127 = Off)
Preamp 3
(Studio 192)
Channel 3 CC #7 CC #14 (0 to 63 = On, 64 to 127 = Off)
Preamp 4
(Studio 192)
Channel 4 CC #7 CC #14 (0 to 63 = On, 64 to 127 = Off)
Preamp 5
(Studio 192)
Channel 5 CC #7 CC #14 (0 to 63 = On, 64 to 127 = Off)
Preamp 6
(Studio 192)
Channel 6 CC #7 CC #14 (0 to 63 = On, 64 to 127 = Off)
Preamp 7
(Studio 192)
Channel 7 CC #7 CC #14 (0 to 63 = On, 64 to 127 = Off)
Preamp 8
(Studio 192)
Channel 8 CC #7 CC #14 (0 to 63 = On, 64 to 127 = Off)
For more information on controlling your preamps
from Studio One, please review Section 5.4.