2. Click on the Audio I/O Setup tab.
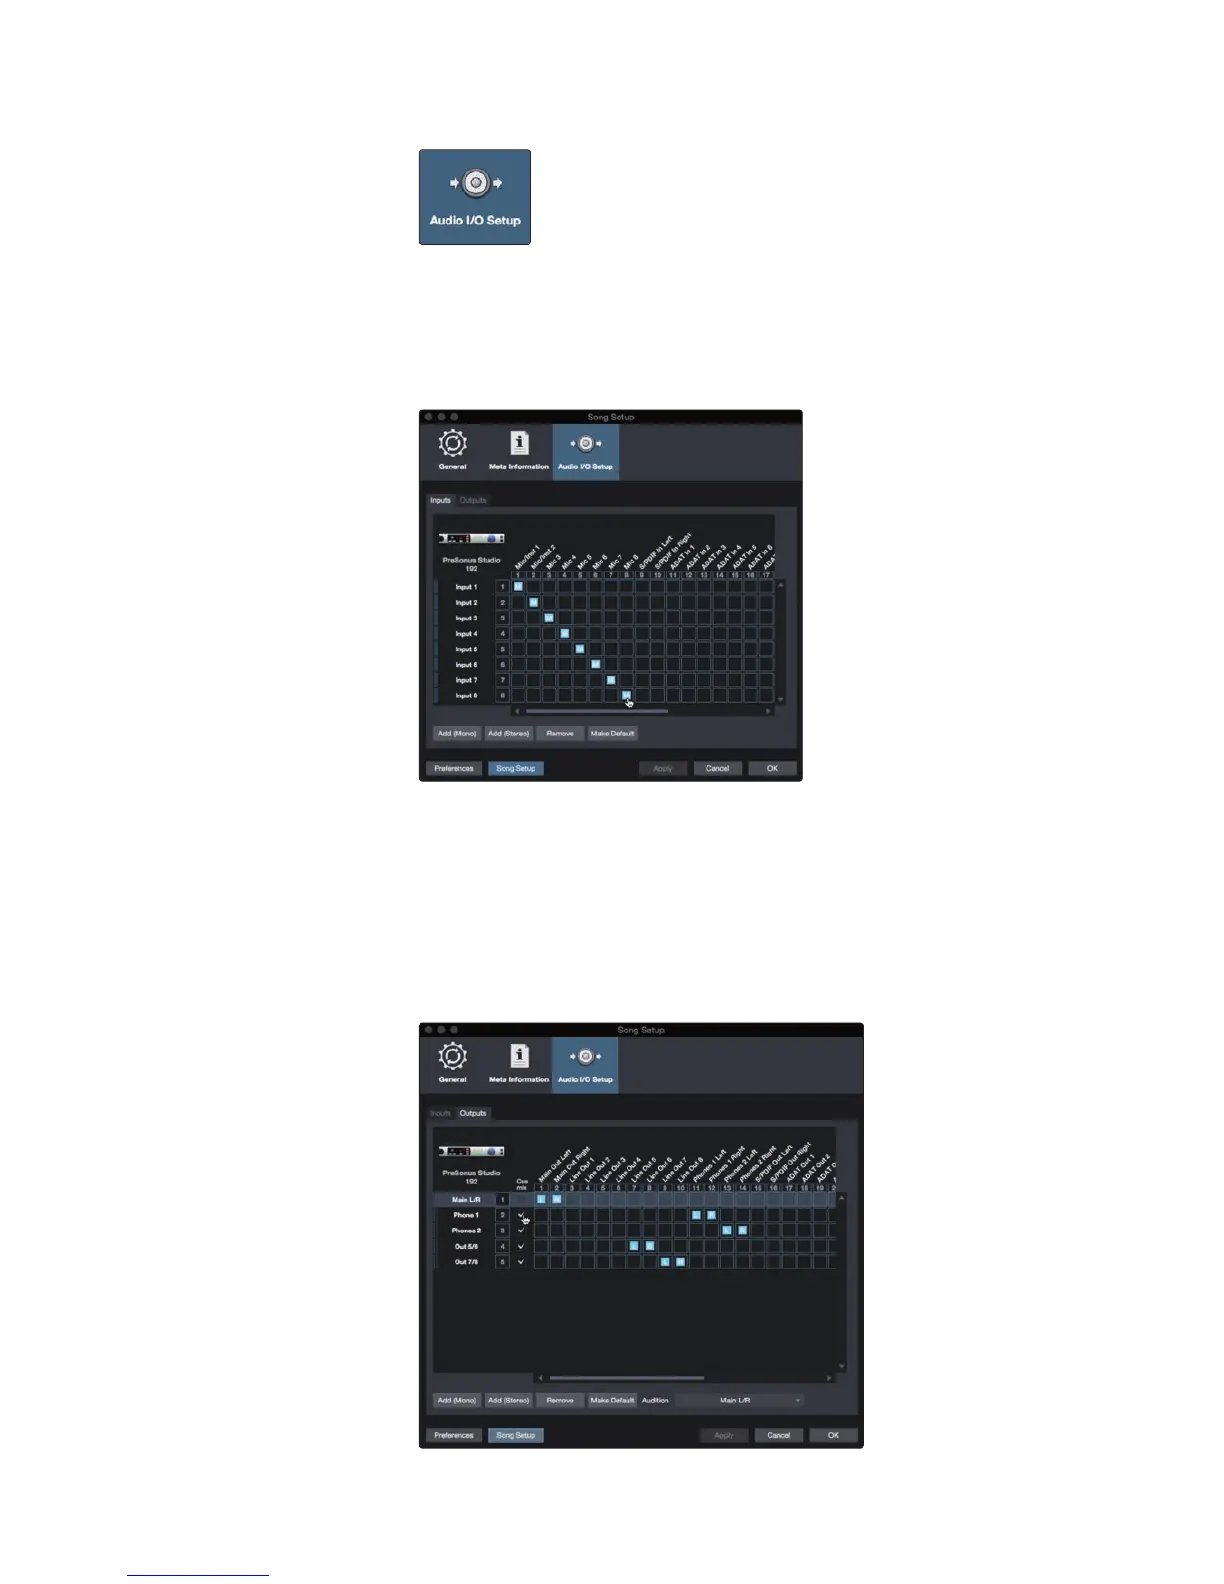
3. From the Inputs tab, you can enable any or all of the inputs on your
PreSonus Studio 192 audio interface that you’d like to have available.
We recommend that you create a mono input for each of the inputs on
your interface. If you plan on recording in stereo, you should also create
a few stereo inputs. You can give each input a custom name by simply
clicking on the default name. Press the TAB key to edit the next name.
Note: Studio 192-series inputs that share mono and stereo buses will
always link the Fat Channel controls as stereo. Because of this, it is
recommended to have dedicated stereo and mono inputs.
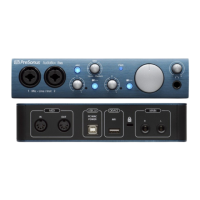
4. Click on the Outputs tabs to enable any or all of the outputs on your Studio
192 audio interface. In the lower right corner, you will see the Audition select
menu. This allows you to choose the output from which you will audition audio
files prior to importing them into Studio One Artist. In general, you will want
this to be the main output bus. You can give each output a custom name by
simply clicking on the default name. Press the TAB key to edit the next name.
Power User Tip: If you would like this I/O configuration to be the same
every time you open Studio One, click the Make Default button.