Do you have a question about the Prestige APSRS3Z and is the answer not in the manual?
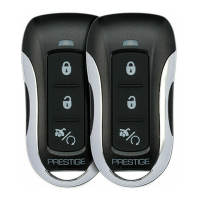
Learn Lock, Unlock, Start/Trunk buttons for transmitters.
Program channels 5, 6, 7 and driver priority functions.
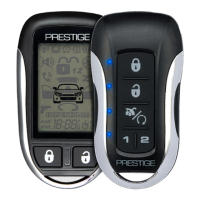
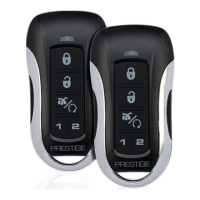
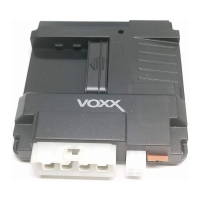
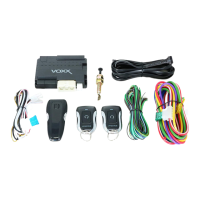
The Prestige Model APSRS3Z is a 3-channel remote car starter system designed to provide convenience and enhanced control over a vehicle. It comes with two three-button programmable RF transmitters and utilizes a three-channel receiver capable of accepting up to four transmitters. An external superheterodyne receiver antenna with a push-button switch and LED is included for improved reception and user feedback.
The core functionality of the APSRS3Z revolves around remote vehicle starting and keyless entry. For keyless entry, the system provides outputs for locking and unlocking the vehicle's doors. A dedicated trunk release output is also available. The remote start feature is supported by several on-board relays, including a start relay, an accessory relay, an ignition 1 relay, an ignition 2 relay (which can be selected to be on or off during cranking), and a parking light relay. An ignition 3 / shock by-pass / GM VAT output is also present, though it requires an additional relay.
The system incorporates a tach signal learning circuit for precise engine starting and two positive and two negative safety shutdown circuits to ensure safe operation. An alarm by-pass output is included, along with accessory outputs that can pulse before and after start, during crank, and after shut down. Users can choose between steady or flashing parking lights for run indication, and the remote start run time is selectable from 5, 10, 15, 20, 45, or 60 minutes. The door lock output pulse can be set to 1 second, 3.5 seconds, or 1 second/double 1 second. A "Car Finder Mode" is also integrated for locating the vehicle in crowded areas.
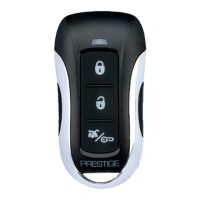
Keyless Entry: To lock or unlock the vehicle's doors, simply press and release the corresponding Lock or Unlock button on the transmitter once. For user convenience, the parking lights will flash and the horn will beep once when the doors are locked, and twice when they are unlocked.
Remote Car Finder: This feature is particularly useful in crowded parking lots. To activate, press and hold either the Lock or Unlock button on the transmitter for three seconds while within range of the car. The parking lights will flash and the horn will beep, making the vehicle more visible. This mode automatically turns off after 30 seconds. To deactivate it sooner, press and release either the Lock or Unlock button once.
Remote Trunk Release: If the vehicle has an electric trunk release and this option has been added to the system, press and hold the Key/Trunk button on the keychain transmitter for three seconds until the trunk opens.
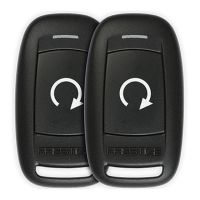
Remote Starting the Vehicle: To start the vehicle remotely, press and release the Trunk/Start button twice within two seconds. The vehicle will start and run for the pre-programmed cycle (up to 60 minutes). The parking lights will flash or remain on, depending on the installation settings, to indicate operation. To disengage the remote starter upon entering the vehicle, turn the ignition key to the ON position (not the spring-loaded start position) and then step on the brake pedal. The vehicle will continue to run on its own power. The engine will stop running before the pre-programmed run cycle expires if any of the following actions occur: pressing and releasing the Key/Trunk button twice within two seconds, depressing the brake pedal, opening the vehicle's hood, or placing the unit in the safety override/disabled mode. The system will not start the vehicle if the hood is open, the gear shift selector is not in Park, the brake pedal is depressed, or the override/service disable mode is engaged.
Push-Button LED Receiver Valet/Override/Safety Control Switch: This switch allows temporary disabling of the remote starting function, recommended when the vehicle is being serviced. To enter override/service mode: With the system disarmed/unlocked and the ignition switch off, press and hold the Push-Button on the windshield receiver. Then, turn the ignition switch on, off, on, off, on, off. The LED will flash two short flashes followed by one long flash, indicating the unit is in R/S Override mode. To exit R/S Override mode: With the system disarmed, press and hold the Push-Button on the windshield receiver. Then, turn the ignition switch on, off, on, off, on, off. The LED will turn off, indicating full functionality. The LED on the receiver can also be toggled on or off. To do this, turn the ignition switch on then off. Within 5 seconds, press and hold the receiver's push-button switch for 5 seconds. The LED will flash once for "ON" and twice for "OFF."
Programmed Transmitter Notification (PTN): After disarming and turning the ignition key on, the unit's LED will report the number of programmed transmitters. This safety feature alerts the user if an unauthorized transmitter has been added. Typically, two flashes and a pause (repeated three times) indicate two programmed transmitters. If additional flashes are noted, it suggests an unauthorized transmitter may have been added. This can be corrected by erasing and reprogramming all transmitters.
Programming New or Replacement Transmitters (BANK 1): The transmitter model is 173BP and uses a CR2032 battery. To program: Turn the ignition key to the ON position. Press and release the valet/programming switch three times (siren/horn chirps or lights flash). Press the Lock Button of each transmitter to be programmed until a chirp is heard or the lights flash. Turn the ignition switch to the OFF position. This programs the Lock, Unlock, and Start/Trunk buttons. For additional channel programming (beyond the 1 option button), use any unused button or combination of buttons. For example, to access option channel 5, from step 3 above, press and release the valet/programming button four additional times, then press any unused transmitter button or button combination. Similar steps apply for channels 6 and 7. Note that not all systems have channels above 3. Certain systems may utilize channels 6 and 7 for driver priority programming, which must be set up by an installer. If enabled, using the unlock button of transmitter 1 sets driver 1 priority, and transmitter 2 sets driver 2 priority. The unlock button can be programmed into two receiver channels (unlock, channel 2, and driver priority 6 or 7) in this scenario. The system will not allow a transmitter button to be programmed into two receiver channels simultaneously.
Transmitter Battery Replacement: To replace the CR2032 battery, separate the transmitter halves by inserting a coin into the slot on the lower right side of the case. Carefully slide the old battery out, noting that the positive (+) side faces away from the circuit board. Insert a new battery with the correct orientation and reassemble the case.
| Number of Remotes Included | 2 |
|---|---|
| Alarm Features | Yes |
| Keyless Entry | Yes |
| Remote Start | Yes |
| Security System | Yes |
| Smartphone Control | No |