18 www.pridemobility.com Jazzy 1113
IV. DISASSEMBLY
DISASSEMBLY
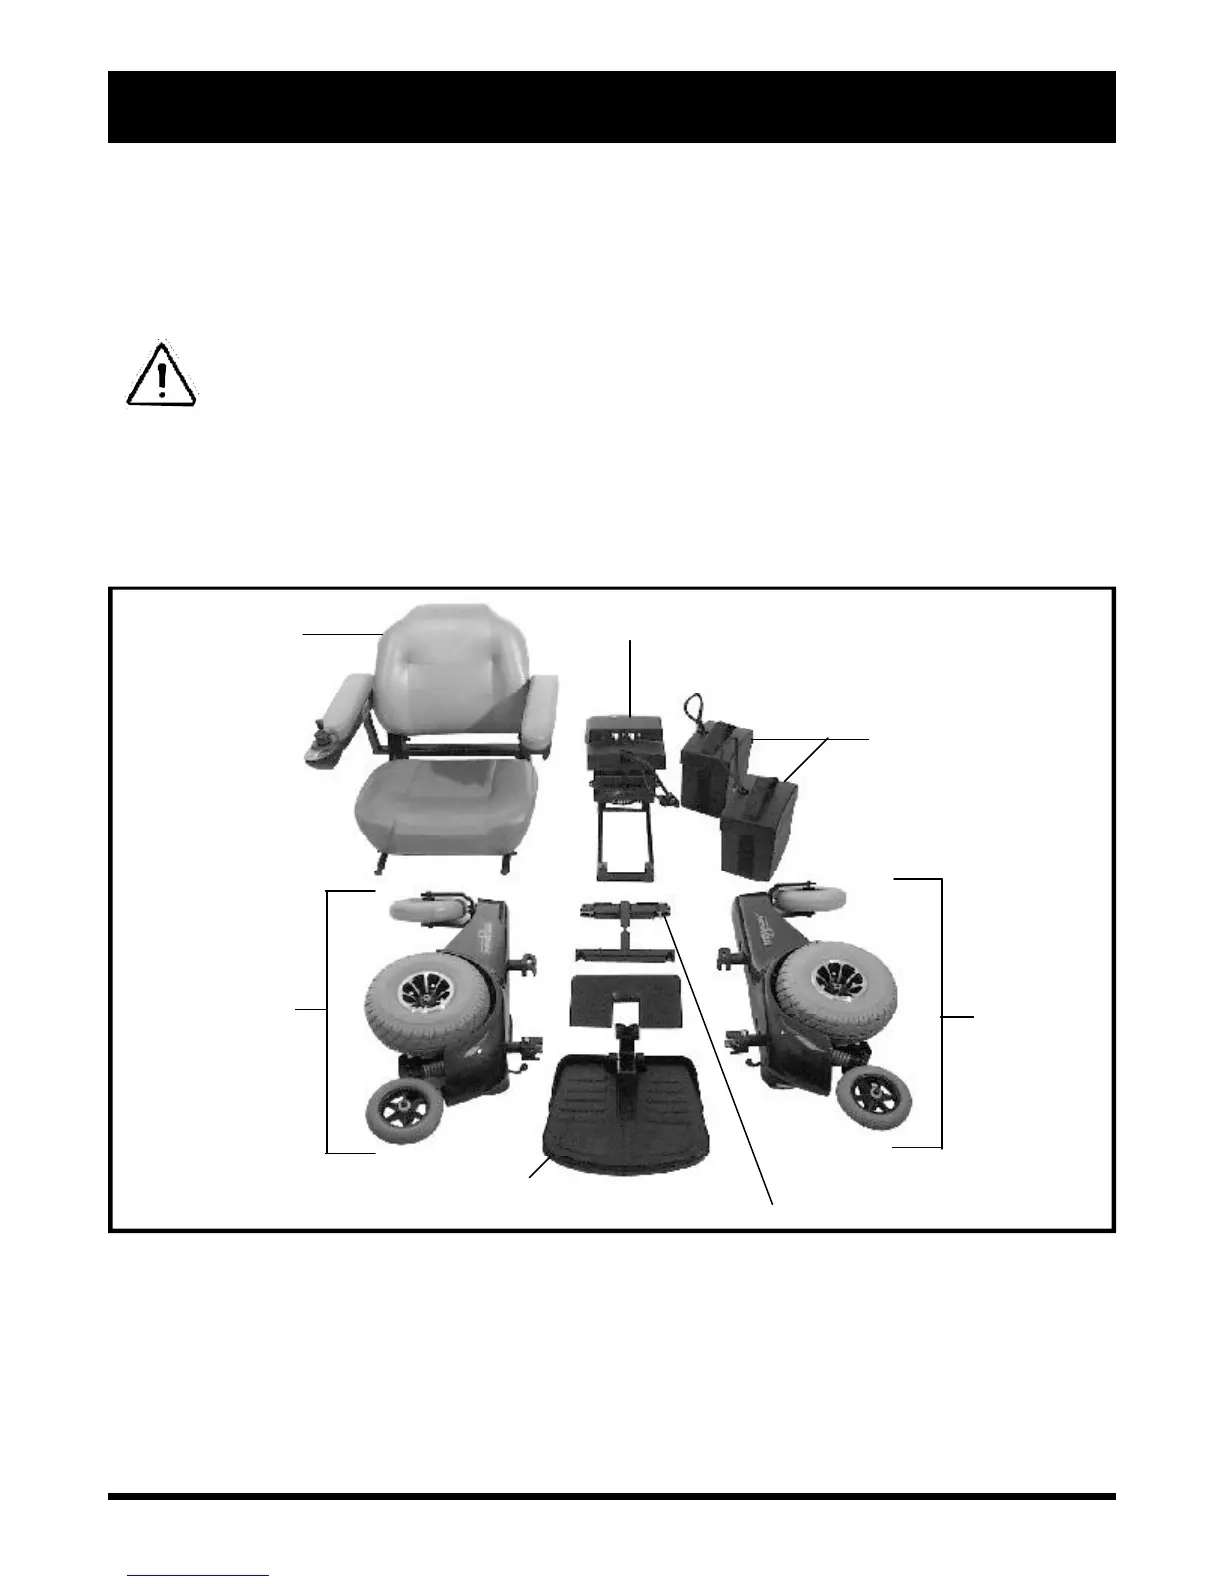
Your power chair disassembles into eight easily transportable component assemblies (see figure 12)—with no
tools required.
WARNING! Even though no tools are required to disassemble or assemble the your power
chair, you should take care not to place your hands or fingers on the areas of the component
assemblies where they may be pinched, as the assemblies “snap” together or “snap” apart.
WARNING! Some power chair components are heavy. You may need assistance to lift or
carry them. Please refer to the specifications table for specific components weights.
NOTE: During both the disassembly and the assembly of the your power chair, you may find it helpful
to engage the drive motors so that the power chair does not roll while you are disassembling or assem-
bling it. See III. “Your Power Chair.”
LEFT FRAME
ASSEMBLY
FOOTREST
SEAT
RIGHT FRAME
ASSEMBLY
BATTERY WELL FRAME
FRONT FRAME
Figure 12. The Jazzy 1113 Component Assemblies
BATTERY BOXES
To disassemble the Jazzy 1113:
Turn off power to the unit, and position the power chair in a location where there is ample working room on all four
sides of the unit. We recommend 1 meter or more of clearance on all sides. There are eight component assemblies,
some of which take up a great deal of space when disassembled from the chair. See figure 12.