Jazzy 1113 www.pridemobility.com 25
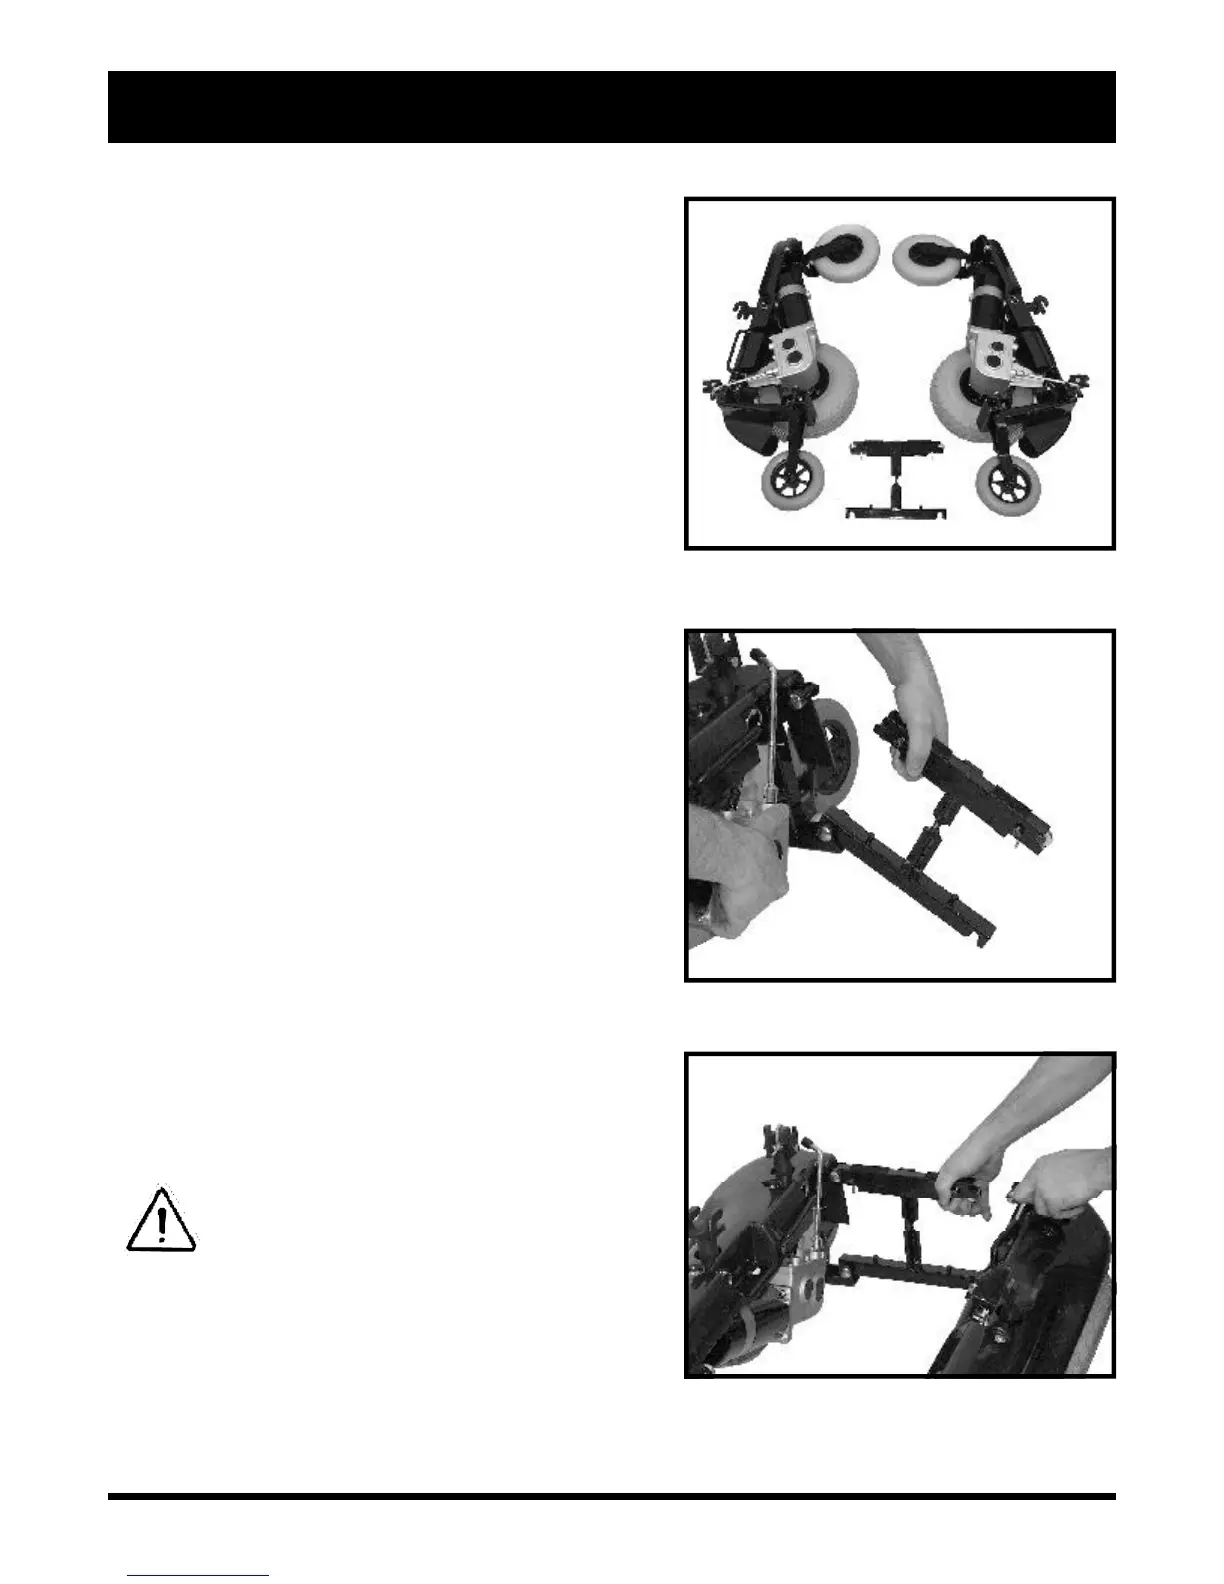
Figure 25. Frame Assemblies
Figure 26. Frame Assembly Connection
VI. ASSEMBLY
ASSEMBLY
1. Place the three frame assemblies next to each other as
shown in figure 25.
2. Stand behind the assemblies and grasp the front frame
with your left hand. Fit the notch on the bottom bar of the
front frame onto the locating pin on the lower section of
the right frame assembly. (The frame is shown in figure 26.)
3. Pivot the front frame top bar toward the right frame
assembly and, while holding the latch release lever, push
the top bar of the front frame onto the locking mechanism
until the two assemblies snap securely into place. Release
the latch release lever to hold the two assemblies together.
NOTE: The front frame should be positioned with the
two semicircular notches in the vertical bar facing
forward.
4. Grasp the left frame assembly and lift it to an upright
position.
5. Tilt the front frame with the right frame assembly attached
so that the notch on the bottom bar of the front frame fits
onto the locating pin on the bottom section of the left frame
assembly.
NOTE: You will need to tilt the left frame assembly
slightly away from the front frame to make the parts fit
together. See figure 27.
6. While holding the latch release lever, pivot the right frame
assembly and the front frame until the locking mechanism
on the top bar of the front frame snaps securely to the left
frame assembly. Release the latch release lever to hold
the two assemblies together.
WARNING! Make certain that the front
frame is snapped securely to both the right
frame assembly and to the left frame
assembly.
Figure 27. Fitting the Frames