www.probuilttools.com
23
HEAD REMOVAL & INSTALLATION GUIDE
Models: PB2000, PB2400ES, PB3600ES
NOTE: Pro-Built Tools recommends that you send your equipment to an
authorized service center and have an authorized Pro-Built Tools Technician
work on your product. Please contact a technician for further diagnosis and instructions.
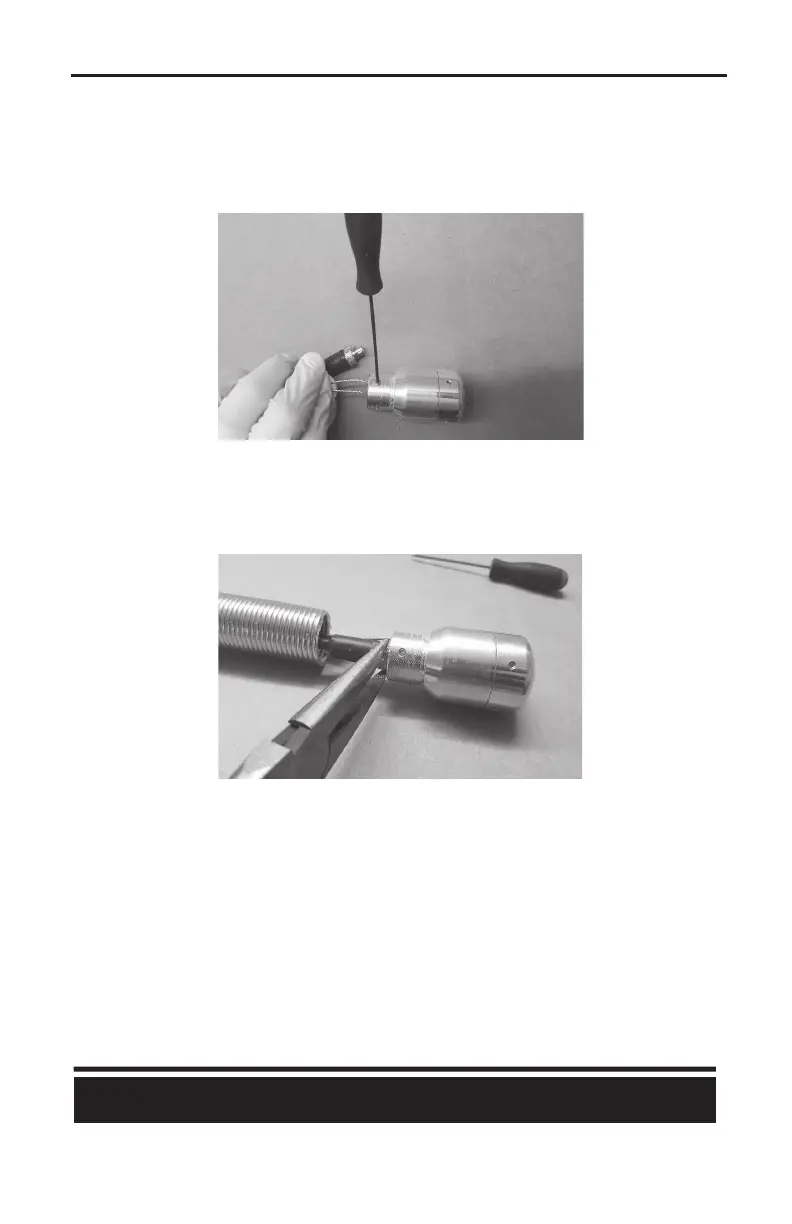
7) To install a camera head, begin by installing the tension cable loop. Be sure that your set screw
is going THROUGH the loop of the tension cable and not simply pinching it in place.
8) Line up the notch (key-way) from the pin connector to the matching notch (key-way) in the
camera head. It is designed to only be installed in one orientaon. DO NOT FORCE IT INTO
PLACE. Once in place, use your needle nose pliers to ghten the pin connector to the camera
head. Only ghten the pin connector to the head ½ turn past snug. DO NOT OVERTIGHTEN.
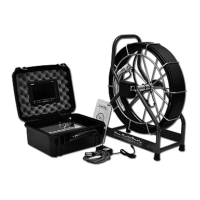
9) To aach the spring to the head, note the rotaon of the spring assembly towards the camera
head. Using your hands, rotate the spring in the SAME DIRECTION as the rungs (facing the
camera head) and PUSH the head into the spring - This moon DECOMPRESSES the spring and
allows the head to fit inside. Once you let go, the spring is recompressed to the head and the
installaon is complete.
10) Remove any zip es applied to the reel for stabilizaon and return the camera head assembly to
the reel.