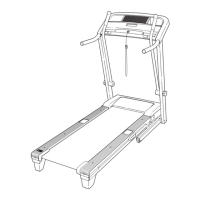
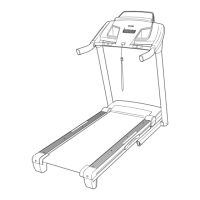
11
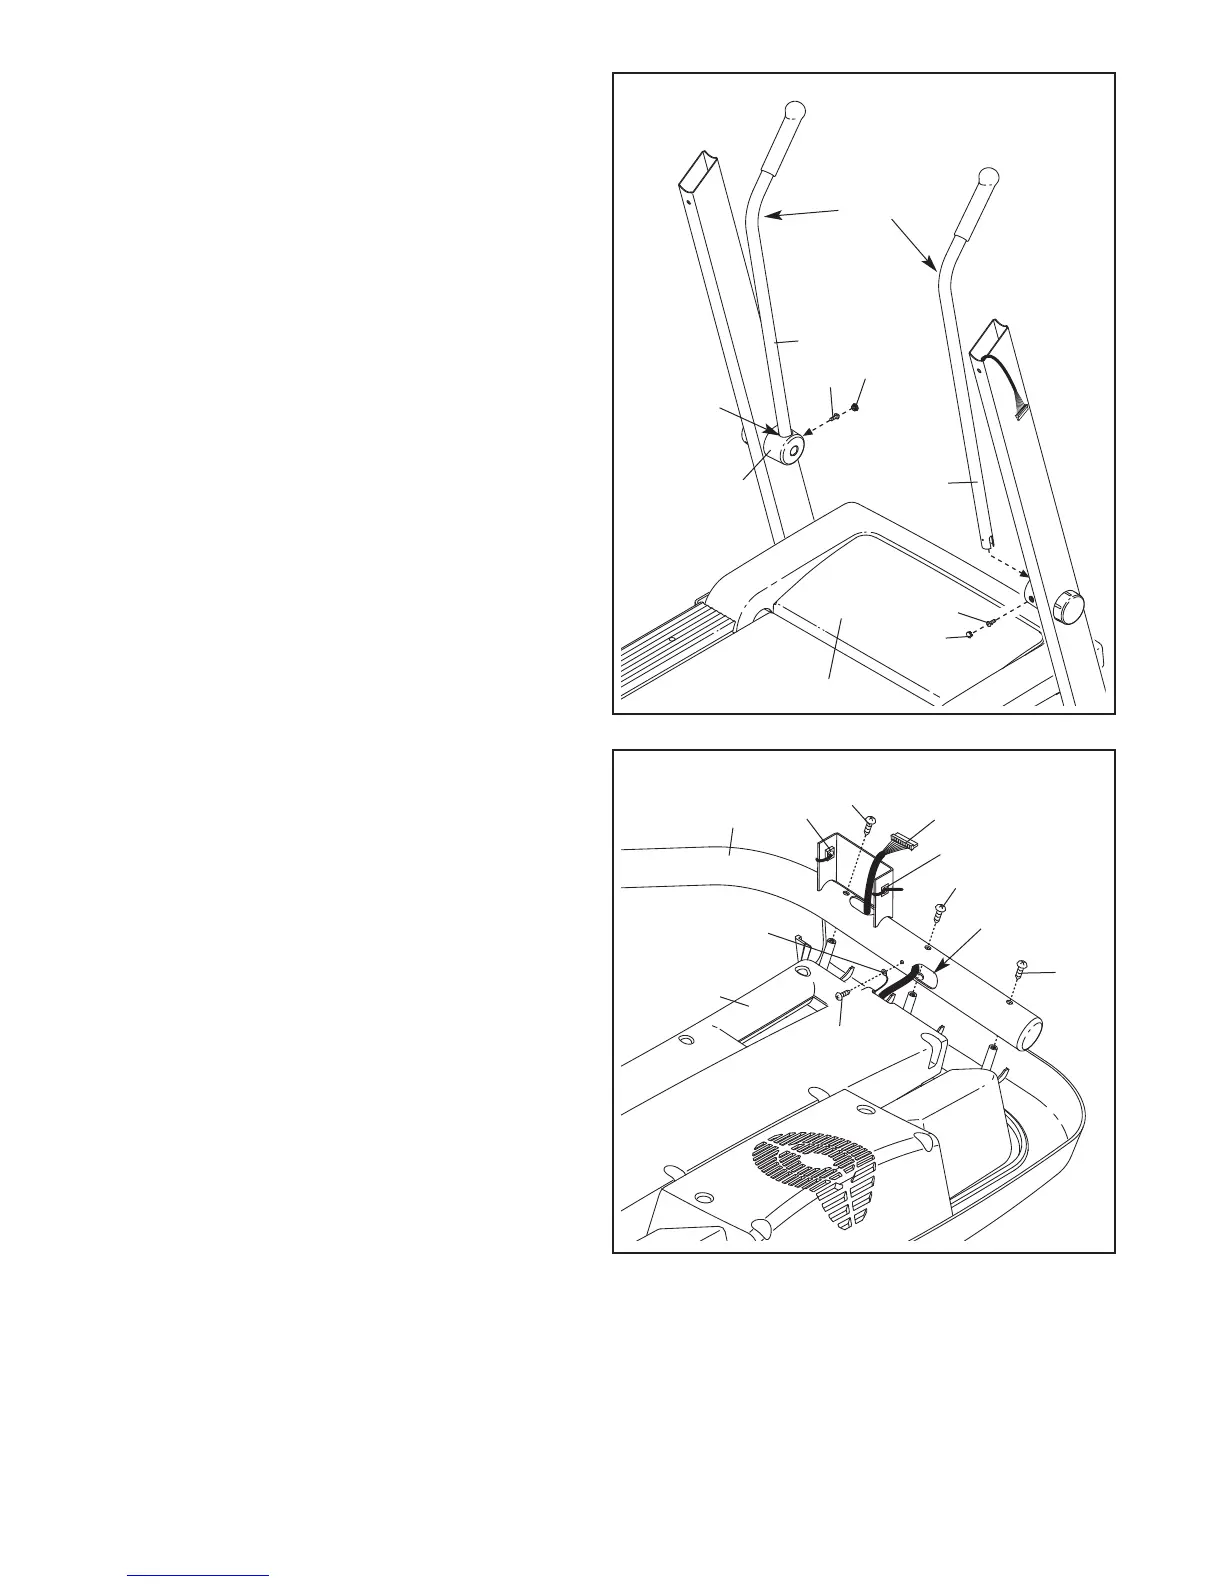
11. Insert the end of a Crosswalk Arm (82) into the
hole in the top of a resistance mechanism.
Make sure that the bend in the Crosswalk
Arm is positioned as shown.
Tighten the M4.2 x 19mm Screw (1) into the re-
sistance mechanism and Crosswalk Arm (82)
from the direction shown. Press a Small Cap
(13) into the hole for the Screw.
Attach the other Crosswalk Arm (82) as de-
scribed above.
Carefully lower the Crosswalk Arms (82) down
toward the Walking Belt (50).
82
1
Hole
13
1
82
13
50
11
Bend
Resistance
Mechanism
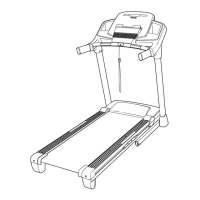
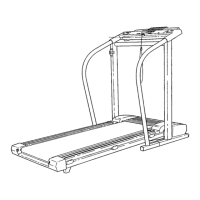
12. Set the console assembly face down on a soft
surface to avoid scratching the console assembly.
Identify the Right Handrail (100) which is
marked with a sticker. Remove the ties from the
Cage Nuts (39). Hold the Right Handrail near
the console assembly. Attach the console
ground wire to the Right Handrail with a #8 x
1/2" Ground Screw (29).
Next, insert the console wire into the large hole
in the Right Handrail (100) and pull it out of the
top as shown. Attach the Right Handrail with
three M4.2 x 19mm Screws (1). Make sure that
no wires are pinched. Start all three Screws
before tightening any of them; do not over-
tighten the Screws.
100
12
1
1
1
Large Hole
Console
Wire
29
39
39
Console
Ground Wire
Console
Assembly