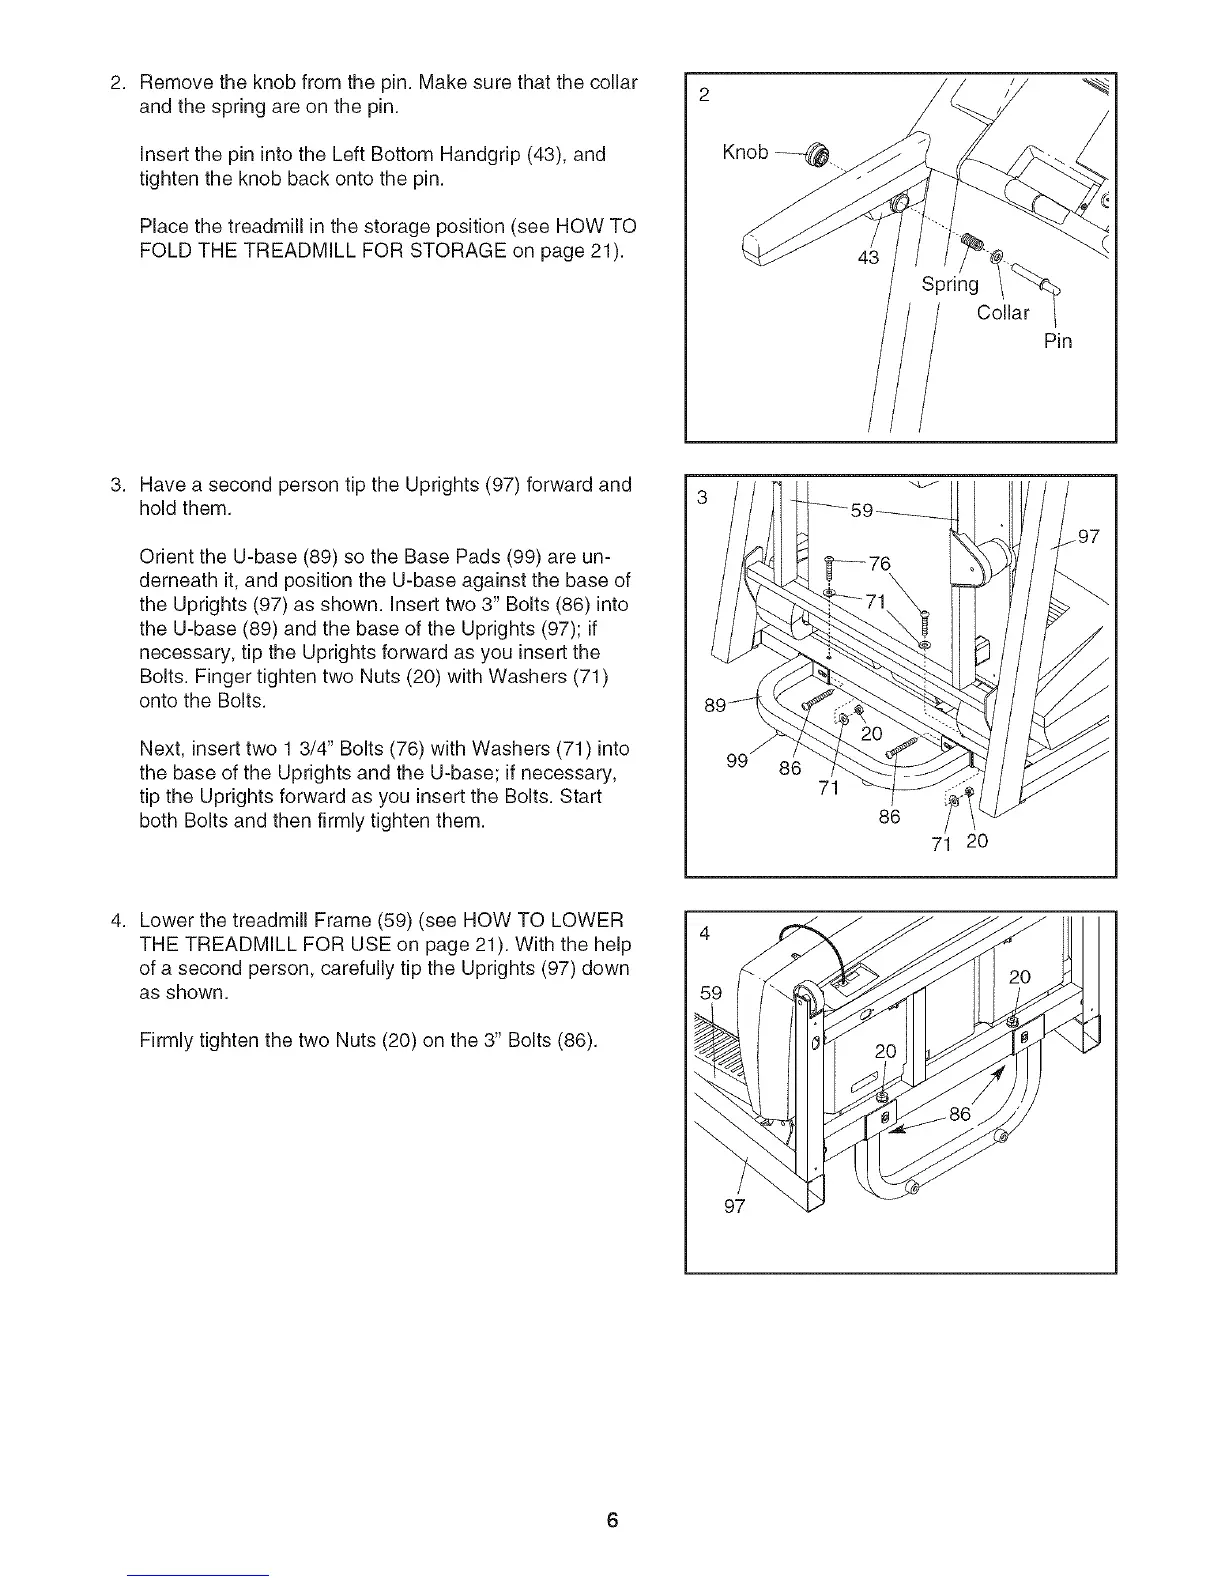
Removetheknobfromthepin.Makesurethatthecollar
andthespringareonthepin.
InsertthepinintotheLeftBottomHandgrip(43),and
tightentheknobbackontothepin.
Placethetreadmillinthestorageposition(seeHOWTO
FOLDTHETREADMILLFORSTORAGEonpage21).
2
Knob
43
Spring
Collar
Pin
Havea secondpersontiptheUprights(97)forwardand
holdthem.
OrienttheU-base(89)sotheBasePads(99)areun-
derneathit,andpositiontheU-baseagainstthebaseof
theUprights(97)asshown.Inserttwo3" Bolts(86)into
theU-base(89)andthebaseoftheUprights(97);if
necessary,tiptheUprightsforwardasyouinsertthe
Bolts.FingertightentwoNuts(20)withWashers(71)
ontotheBolts.
Next,inserttwo13/4"Bolts(76)withWashers(71)into
thebaseoftheUprightsandtheU-base;ifnecessary,
tiptheUprightsforwardasyouinserttheBolts.Start
bothBoltsandthenfirmlytightenthem.
99
86
71
86
71 20
LowerthetreadmillFrame(59)(seeHOWTOLOWER
THETREADMILLFORUSEonpage21).Withthehelp
ofasecondperson,carefullytiptheUprights(97)down
asshown.
FirmlytightenthetwoNuts(20)onthe3" Bolts(86).
97