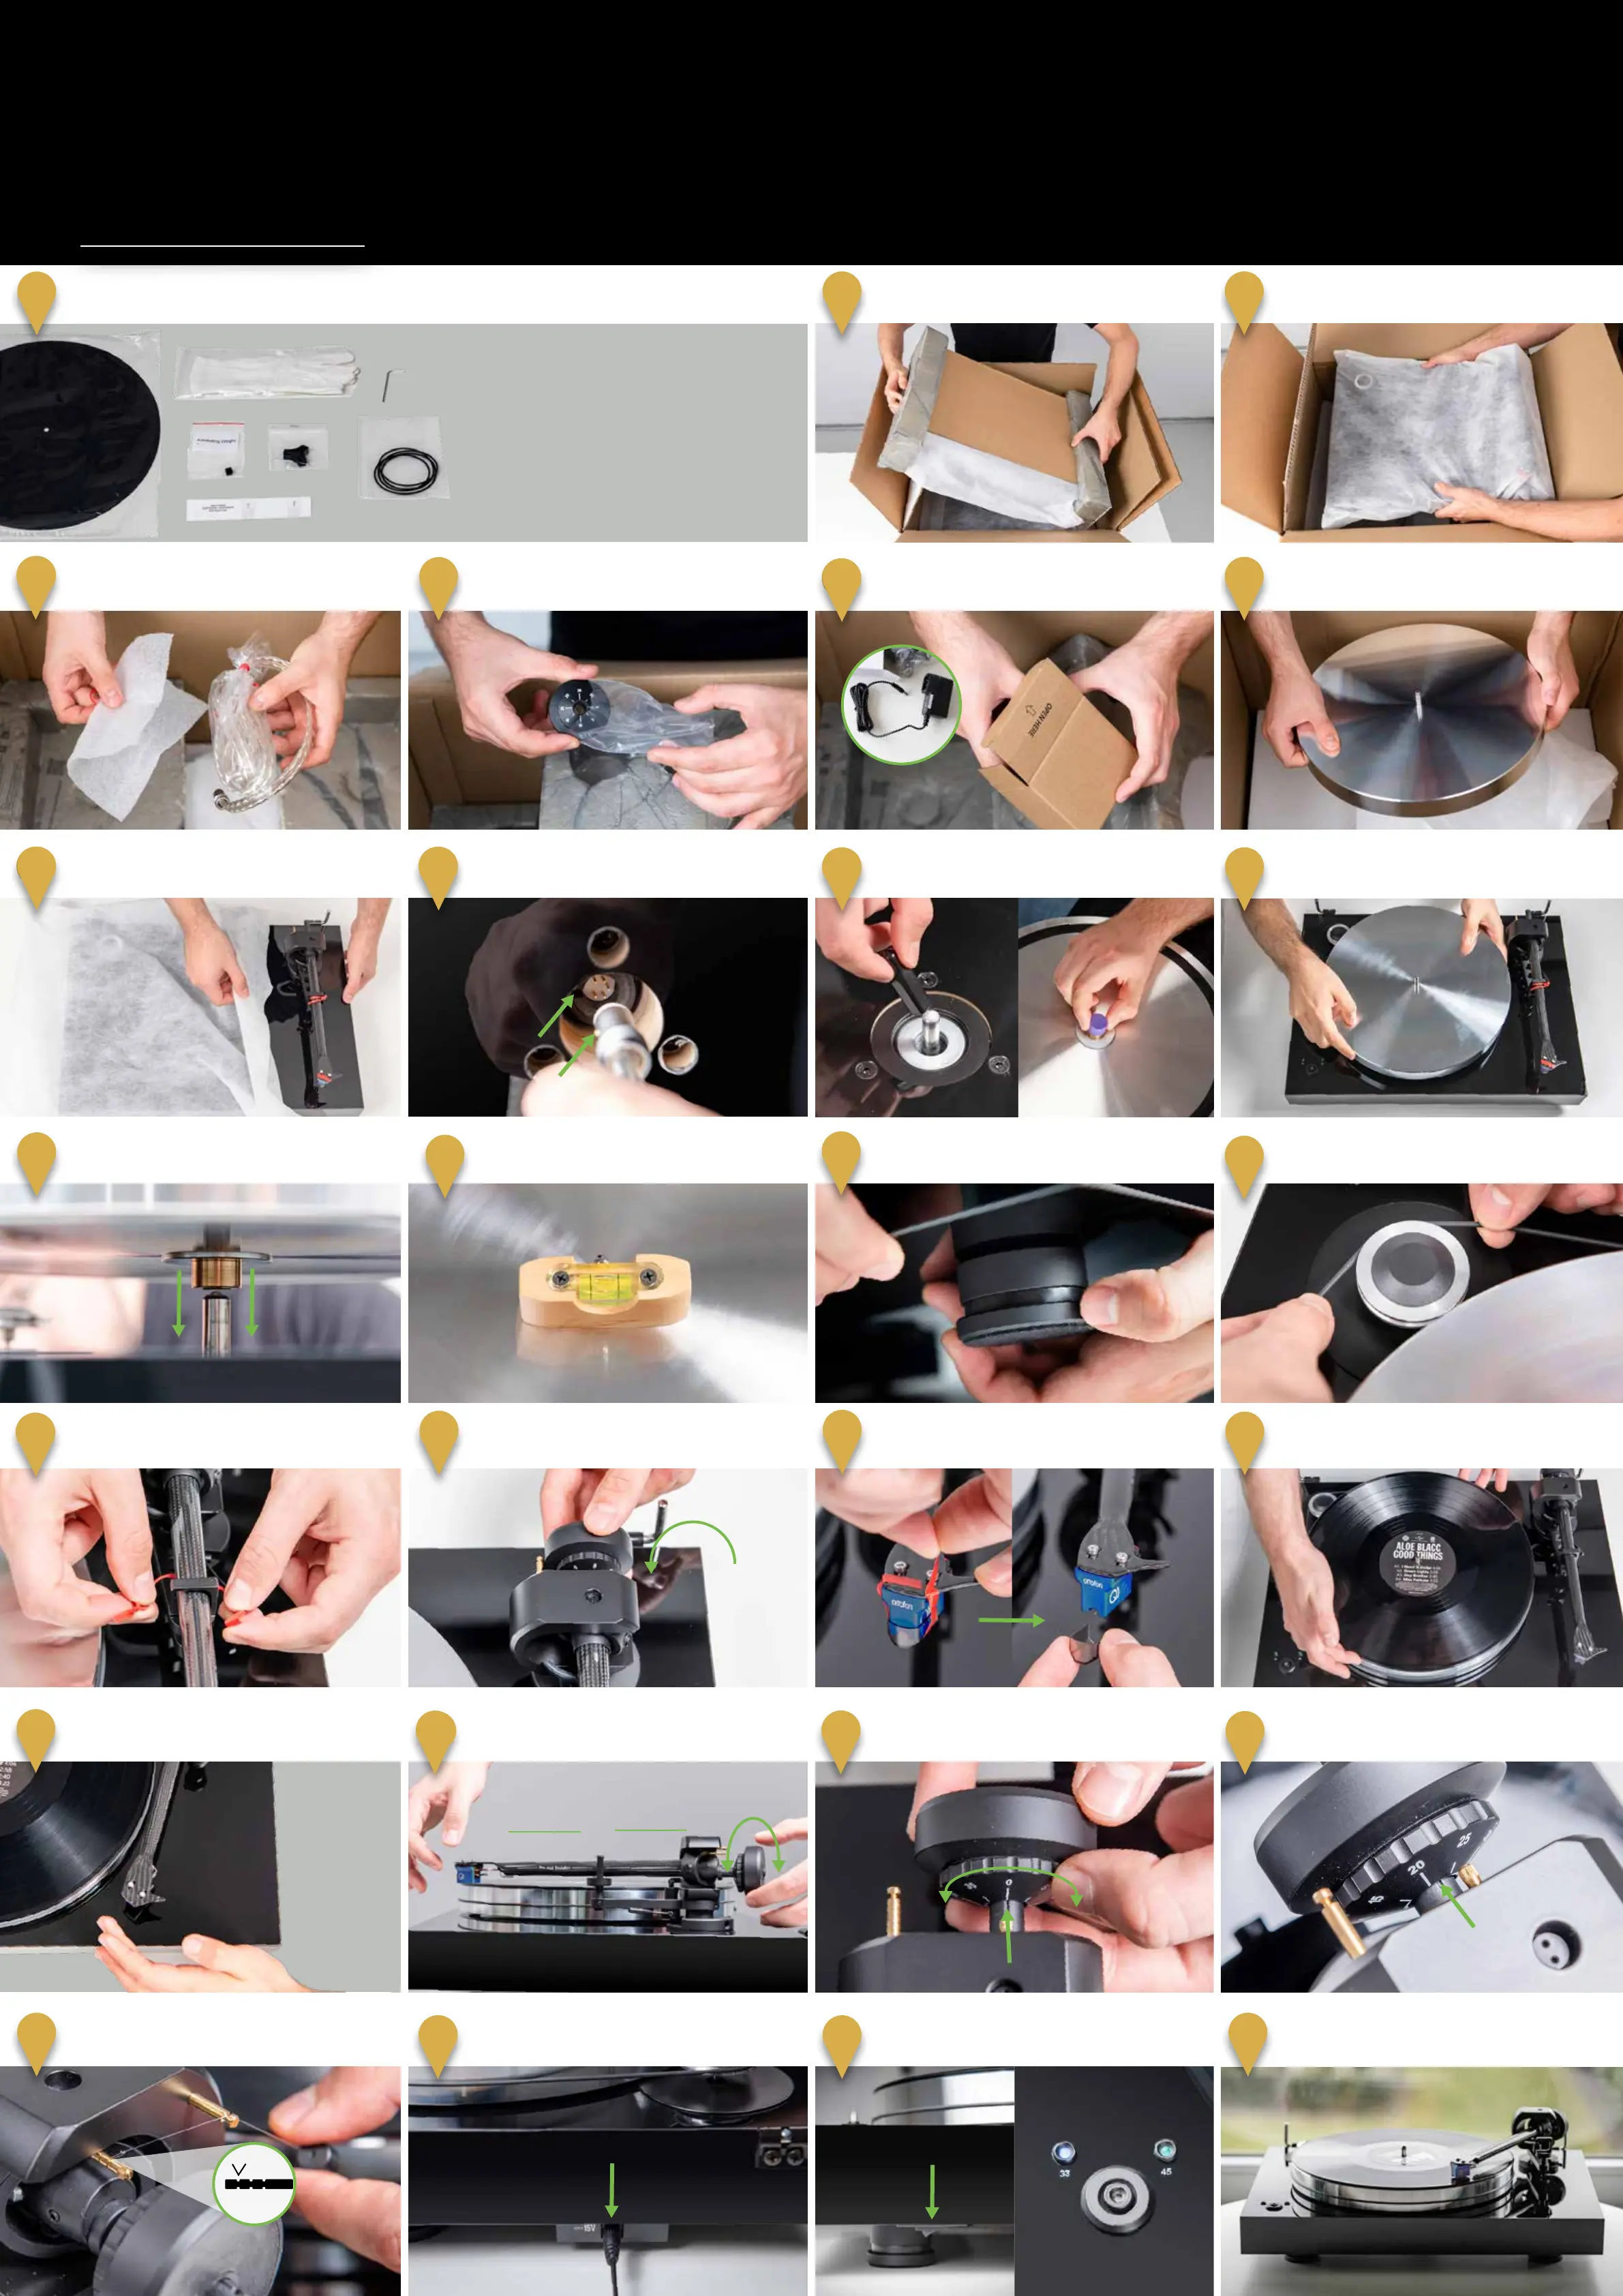
Put the loop of the Antiskating
weight in the outer groove.
24
0°
Balance the tonearm so it stays level by turning
the counterweight forwards and backwards on
the rod. Put the tonearm back on the rest and
raise the tonearm lift.
21
22
Hold the counterweight and set the dial to
‘0‘ by ONLY turning the dial to the marker.
23
Turn the WHOLE counterweight
counterclockwise until the scale reads 23.
19
Screw the counterweight in place.
17
18
Remove stylus protection.
Put the felt mat and a record on
the platter.
Remove tonearm twist tie.
16
11
10
Carefully put the platter on the spindle.
Remove protection caps from spindle
and platter.
Connect the phono cable (Connect it E)
to the turntable. The connector is located
under the tonearm base.
Make sure the connector is aligned with the
plug.
25
Connect to your hi-system and
enjoy your music! Finally!
27
26
Turn the motor on with the switch located on
the front left under the chassis. Select the
speed by pushing the botton.
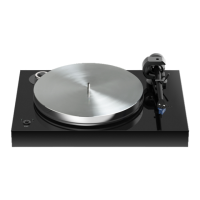
X8
Setup Guide
Getting started:
• Make sure to have enough space to unpack your turntable.
• Always unpack and set up in a clean environment.
• Please Do NOT throw away the packaging! If you need service or want
to return your product, please send it in the original packaging,
including all inserts. In case of damage due to alternative packaging,
your dealer cannot guarantee a full refund.
• complete manual:
www.project-audio.com/en/product/x8
1
32
Unpack all items from accessory bag:
Remove dust cover carton from the box.
Lift the wrapped turntable out of the box.
a) Felt mat
b) Gloves
c) Allen key
d) Antiskating weight
e) Single adapter
f) Drive Belt
g) Cartridge alignment protractor
Unpack Connect it E cable.
5
6
4
7
Unpack the counterweight. Unpack the power supply.
Unpack the platter.
8
Adjust the feet if necessary, so that the
turntable is level.
Put the drive belt on pulley and platter.
13
15
14
Check if the turntable is level.
*Spirit level available separately.
9
Unpack the turntable.
a)
b)
c)
d)
e)
f)
g)
Connect the power supply.
Make sure to align them properly!
12
Carefully place the tonearm between
platter and armrest and lower the tonearm lift.
20
*