BM-16
This document is protected by copyrights.
Copying, using, or distributing without permission of PROMOTECH is prohibited.
8
3. STARTUP AND OPERATION
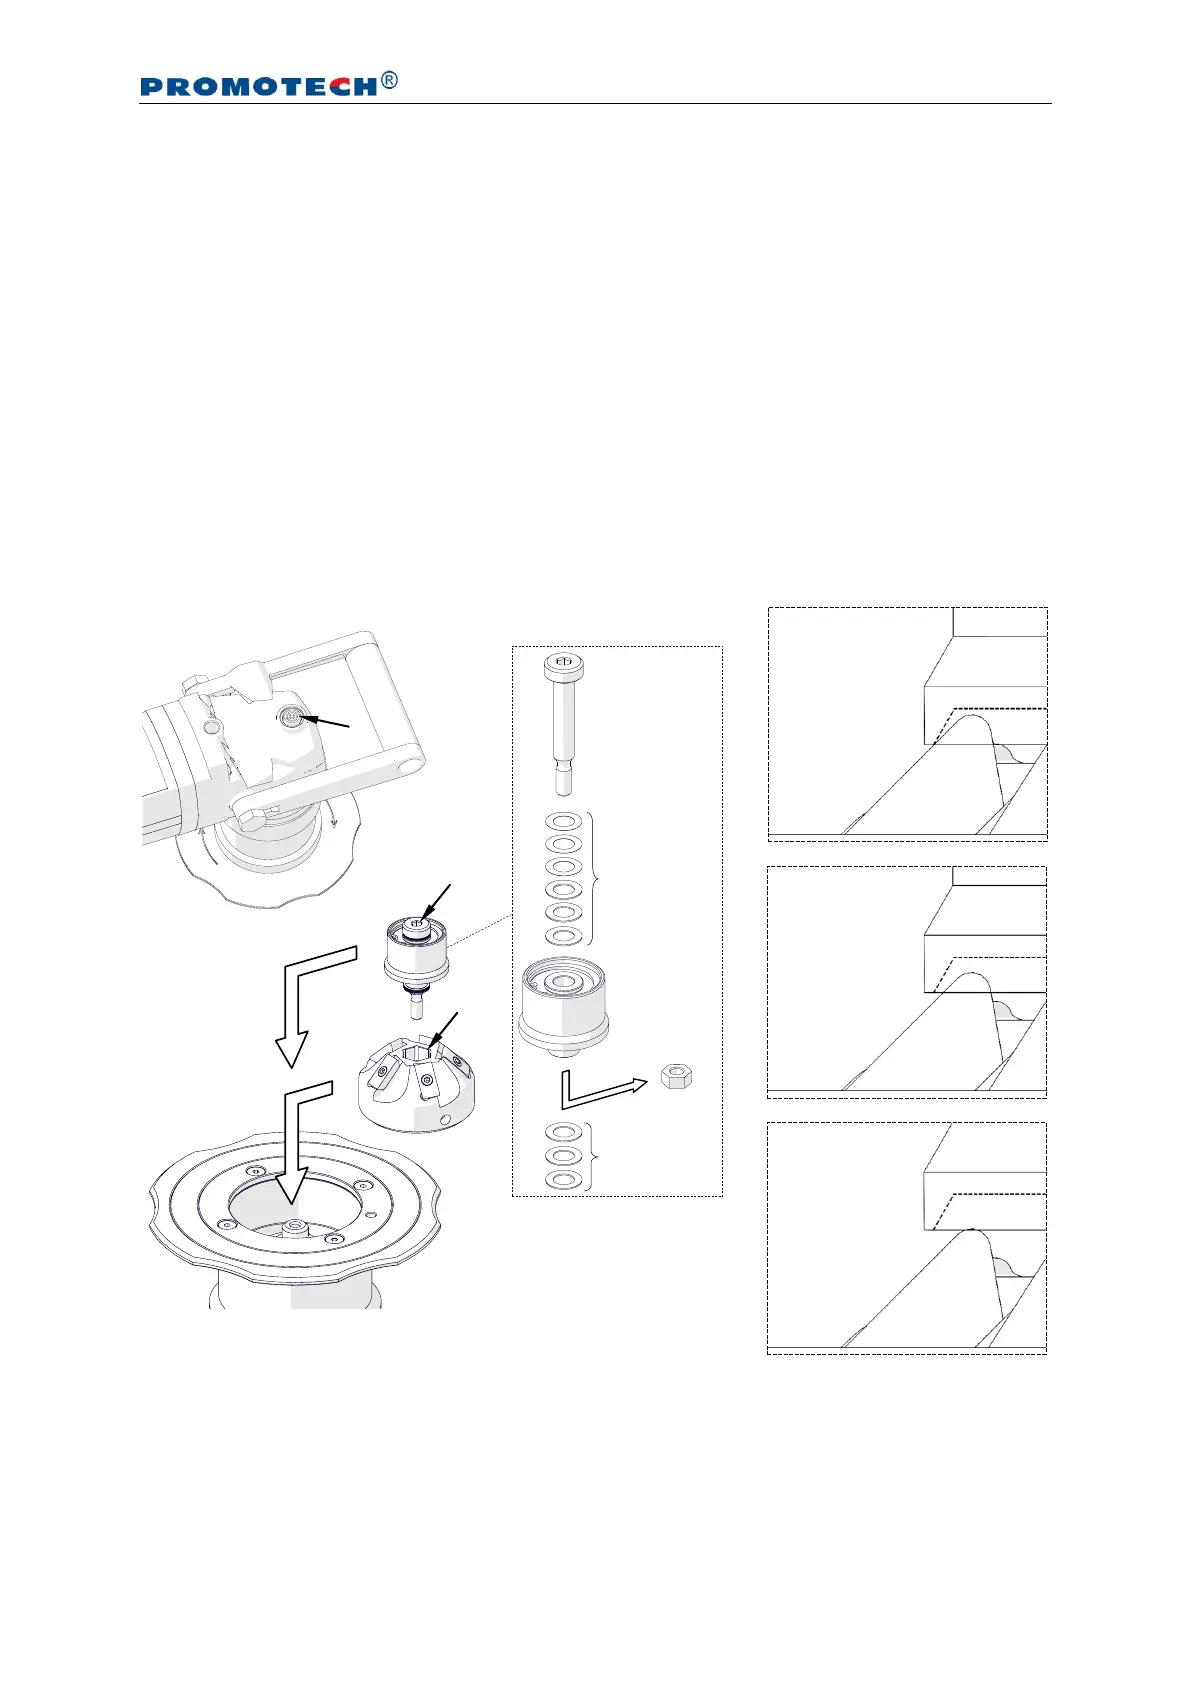
3.1. Installing and removing the milling head
Unplug the machine from the power source. To install the milling head, place it on the
spindle (1, Fig. 3), and then press and hold the spindle lock button 2 and tighten the
head using the 14 mm hex wrench (3). Next, remove the nut (4) and assemble the
roller with the pivot pin using washers (5), and then place the roller on the milling head
(6), press and hold the button 2, and tighten the roller with the 5 mm hex wrench (7).
Use such a number of washers to keep a little gap between the roller and the cutting
inserts (8). The number of 0.5-mm and 0.1-mm washers needed depends on the
milling head used.
Fig. 3. Installing the milling head
INCORRECT
(collision
between
roller and
cutting insert)
INCORRECT
(too large gap
between roller
and cutting
insert)