B
C D
IMPORTANT: ALWAYS REMEMBER TO DISCONNECT YOUR BATTERY CHARGER WHEN NOT IN USE!
Li-Poly
Battery
TABLE OF CONTENTS
Features . . . . . . . . . . . . . . . . . . . . . . . . . . . . . . . . . . . . . . . . . . . . . . . . . . . . . . . . . . . . . . . 2
Remote Control Battery Installation. . . . . . . . . . . . . . . . . . . . . . . . . . . . . . . . . . . . . . . . 2
Charging the TILT
™
’s Li-Poly Battery. . . . . . . . . . . . . . . . . . . . . . . . . . . . . . . . . . . . . . . 2
TILT
™
Battery Installation . . . . . . . . . . . . . . . . . . . . . . . . . . . . . . . . . . . . . . . . . . . . . . . . 2
Tilt™ Diagram . . . . . . . . . . . . . . . . . . . . . . . . . . . . . . . . . . . . . . . . . . . . . . . . . . . . . . . . . . 3
Remote Control Diagram . . . . . . . . . . . . . . . . . . . . . . . . . . . . . . . . . . . . . . . . . . . . . . . . . 3
Flight Preparation. . . . . . . . . . . . . . . . . . . . . . . . . . . . . . . . . . . . . . . . . . . . . . . . . . . . . . . 4
Syncing Your TILT
™
. . . . . . . . . . . . . . . . . . . . . . . . . . . . . . . . . . . . . . . . . . . . . . . . . . . . . 4
Now You Are Ready To Fly . . . . . . . . . . . . . . . . . . . . . . . . . . . . . . . . . . . . . . . . . . . . . . . . 5
Recognizing The Front & Back Of The TILT
™
. . . . . . . . . . . . . . . . . . . . . . . . . . . . . . . . . 5
How to Start/Stop Rotors . . . . . . . . . . . . . . . . . . . . . . . . . . . . . . . . . . . . . . . . . . . . . . . . 5
Speed Select Button . . . . . . . . . . . . . . . . . . . . . . . . . . . . . . . . . . . . . . . . . . . . . . . . . . . . . 5
Auto Land /Take Off Button . . . . . . . . . . . . . . . . . . . . . . . . . . . . . . . . . . . . . . . . . . . . . . 5
3 Channel VS 4 Channel Flying . . . . . . . . . . . . . . . . . . . . . . . . . . . . . . . . . . . . . . . . . . . . 6
3 Channel Flight Control . . . . . . . . . . . . . . . . . . . . . . . . . . . . . . . . . . . . . . . . . . . . . . . . . 6
4 Channel Flight Control . . . . . . . . . . . . . . . . . . . . . . . . . . . . . . . . . . . . . . . . . . . . . . . . . 7
Flight Practice . . . . . . . . . . . . . . . . . . . . . . . . . . . . . . . . . . . . . . . . . . . . . . . . . . . . . . . . . . 7
Adjusting The Trim . . . . . . . . . . . . . . . . . . . . . . . . . . . . . . . . . . . . . . . . . . . . . . . . . . . . . . 8
Calibrating The TILT
™
. . . . . . . . . . . . . . . . . . . . . . . . . . . . . . . . . . . . . . . . . . . . . . . . . . . . 9
How To Perform 360º Stunt Rolls . . . . . . . . . . . . . . . . . . . . . . . . . . . . . . . . . . . . . . . . . . 10
Using Your On-Board Camera and Video Recorder. . . . . . . . . . . . . . . . . . . . . . . . . . . . 11
Testing /trouble Shooting The Camera Before Flight. . . . . . . . . . . . . . . . . . . . . . . . . . 12
Removing Your microSDHC Card. . . . . . . . . . . . . . . . . . . . . . . . . . . . . . . . . . . . . . . . . . . 12
Downloading and Clearing Space on Your microSDHC Card . . . . . . . . . . . . . . . . . . . . 12
Troubleshooting Your TILT
™
. . . . . . . . . . . . . . . . . . . . . . . . . . . . . . . . . . . . . . . . . . . . . . 13
Replacing The Propeller Blades. . . . . . . . . . . . . . . . . . . . . . . . . . . . . . . . . . . . . . . . . . . . 13
Warnings . . . . . . . . . . . . . . . . . . . . . . . . . . . . . . . . . . . . . . . . . . . . . . . . . . . . . . . . . . . . . . 14
Battery Warnings . . . . . . . . . . . . . . . . . . . . . . . . . . . . . . . . . . . . . . . . . . . . . . . . . . . . . . . 14
Care and Maintenance . . . . . . . . . . . . . . . . . . . . . . . . . . . . . . . . . . . . . . . . . . . . . . . . . . . 14
FCC Information . . . . . . . . . . . . . . . . . . . . . . . . . . . . . . . . . . . . . . . . . . . . . . . . . . . . . . . . 15
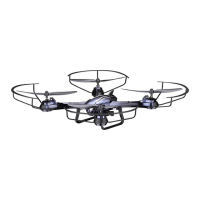
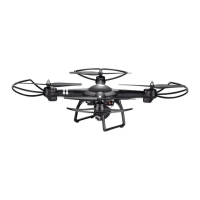
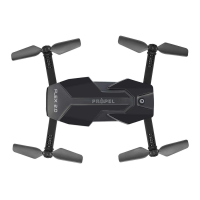
Thank you for purchasing the TILT
™
2.4 Ghz Quadrocopter. Please read this instruction booklet as it
contains valuable information on how to properly fly and care for your TILT
™
.
FEATURES
• Wide range digital radio allows flight range up to 500 feet!
• Six axis gyro for extremely stable flight and maneuverability
•
Switch-blade technology allows you to operate in 3ch or 4ch Modes for beginner to advanced pilots
• Push button 360˚ aerial stunts
• On-board camera records high-definition videos and still photos(1280x720 pixel, 30 frames per second)
• Air pressure sensors lock flight altitude for stable video footage
• Automatically lands with the push of a button
• Additional replacement parts included
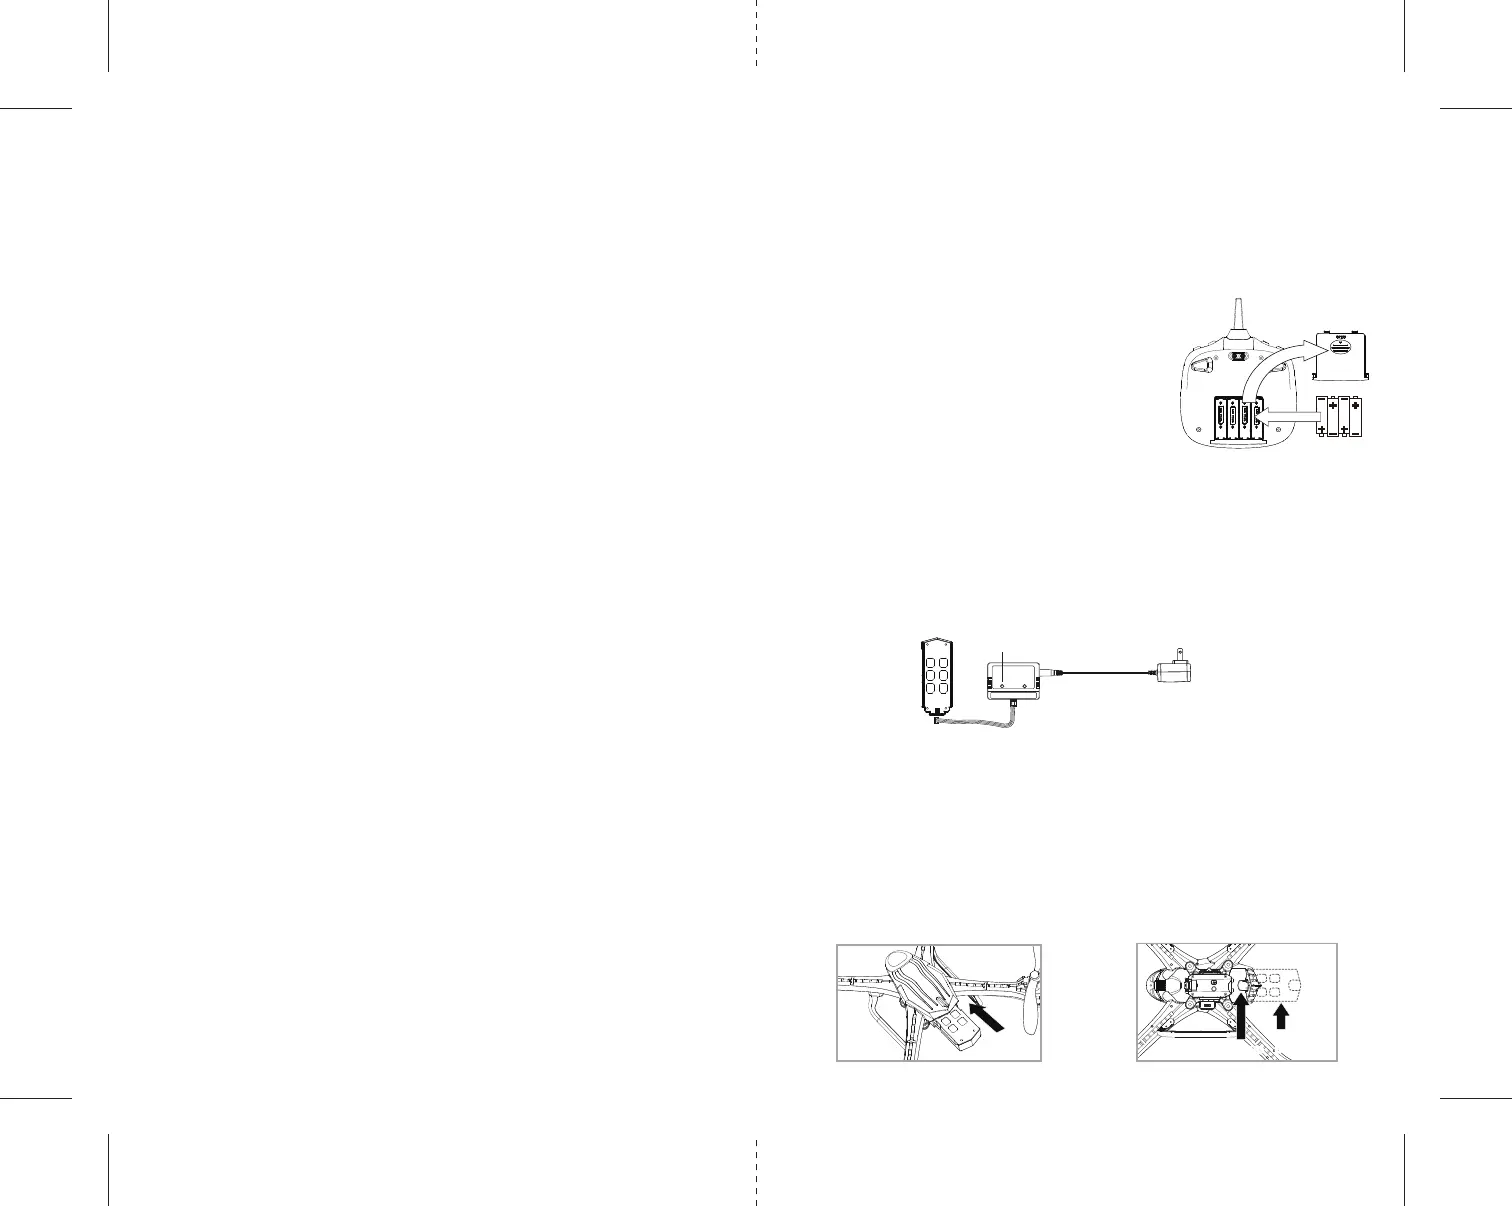
REMOTE CONTROL BATTERY INSTALLATION
1. Slide off the battery cover from the back of the controller.
2. Install 4 fresh “AA” alkaline batteries into the controller as
shown in diagram A. Replace the battery cover.
3. Turn over the controller and turn the on/off switch to the on
position. If the power indicator turns on you have installed your
batteries properly.
CHARGING THE TILT
™ LI-POLY BATTERY
1. Connect the battery to the battery charger as shown (see diagram B).
2. Next, Plug the AC adaptor into a standard wall socket.
CAUTION: improper connection may damage the battery.
Note: The battery charger has a RED LED indicator light to indicate it is charging.
3. When the battery is fully charged the charging indicator light will change to green.
4. Average charging time is approximately 80-100 minutes. A fully charged drone can fly for
approximately 10 minutes depending on environment and user input.
NOTE: You may purchase additional batteries and chargers at www.propelrc.com
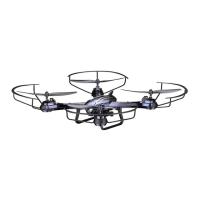
TILT
™ BATTERY INSTALLATION
1. Slide the fully charged battery into the TILT
™’s battery compartment (see diagram C).
The battery is designed to only fit in the compartment one-way, with the guide rail on the bottom of
battery facing downward.
2. Push the battery all the way in and you will hear a click, the drone’s LED lights will light up and
begin flashing when you have installed the battery correctly.
NOTE: The
TILT
™
has no On/Off switch. The drone automatically turns on when the battery is installed.
3. Removing the battery: On the underside of the drone body you will see a small battery eject lever. Using
your finger nail pull the lever up and the battery will eject about 0.5-1cm (see diagram D). Lastly, using
your thumb and forefinger gently pull out the battery.
1 2
4 1.5 volt “AA” Alkaline Batteries
A
B: battery
pop out
CHARGER POWER
AC Adaptor
LED Indicator
A: pull up
A: pull up
B: battery
pop out