jewelry which may get caught in moving parts.
Non-slip footwear is recommended.
Wear protective hair covering to contain long hair.
Exception: The reference to gloves may be omitted
from the instructions for a grinder.
11. ALWAYS USE SAFETY GLASSES. Also use face or
dust mask if cutting operation is dusty. Everyday
eyeglasses only have impact resistant lenses, they
are NOT safety glasses.
12.SECURE WORK. Use clamps or a vise to hold
work when practical. It's safer than using your
hand and it frees both hands to operate tool.
13.DON'T OVERREACH. Keep proper footing and bal-
ance at all times.
14. MAINTAIN TOOLS WITH CARE. Keep tools sharp
and clean for best and safest performance. Follow
instructions for lubricating and changing acces-
sories.
15. DISCONNECT TOOLS before servicing; when
changing accessories, such as blades, bits, cut-
ters, and the like.
16.REDUCE THE RISK OF UNINTENTIONAL START-
ING. Make sure switch is in off position before
plugging in.
17.USE RECOMMENDED ACCESSORIES. Consult
the owner's manual for recommended accessories.
The use of improper accessories may cause risk of
injury to persons.
18. NEVER STAND ON TOOL. Serious injury could
occur, if the tool is tipped or if the cutting tool is
unintentionally contacted.
19. CHECK DAMAGED PARTS. Before further use of
the tool, a guard or other part that is damaged
should be carefully checked to determine that it
will operate properly and perform its intended
function check for alignment of moving parts, bind-
ing of moving parts, breakage of parts, mounting,
and any other conditions that may affect its opera-
tion. A guard or other part that is damaged should
be properly repaired or replaced.
20.DIRECTION OF FEED. Feed work into a blade or
cutter against the direction of rotation of the blade
or cutter only.
21. NEVER LEAVE TOOL RUNNING UNATTENDED.
TURN POWER OFF. Don't leave tool until it comes
to a complete stop.
Table 1:
Minimum gage for cord:
Total length of
cord in feet25 ft50 ft100 ft150 ft
AWG: 18 161614
2. Additional safety regulations
1. DO NOT OPERATE THIS MACHINE UNTIL it is as-
sembled and installed according to the instruc-
tions.
2.DO NOT OPERATE this machine while tired or
under the influence of drugs, alcohol or any med-
ication.
3.OBTAIN ADVICE from a supervisor, instructor, or
another qualified person if you are not familiar with
the operation of this tool.
4. FOLLOW ALL WIRING CODES and recommended
electrical connections.
5. ALWA YS USE PROPER BLADE SIZE and type.
6.ADJUST THE UPPER BLADE GUIDE so that it is
as close as possible to the work piece.
7.KEEP ARMS, HANDS, AND FINGERS away from
the blade.
8. NEVER START THE MACHINE before clearing the
table of all objects (tools, scrap pieces, etc.).
9. NEVER START THE MACHINE with the workpiece
against the blade.
10.DO NOT attempt to saw a work piece that does
not have a flat surface against the table.
11. HOLD WORKPIECE FIRMLY and feed into blade at
a moderate speed.
12.TURN THE MACHINE “OFF” to back out of an
uncompleted or jammed cut.
13.MAKE “RELIEF” CUTS prior to cutting long curves.
14. TURN THE MACHINE “OFF” and wait for the blade
to stop prior to cleaning the blade area, removing
debris near the blade, removing or securing work
piece, or changing the angle of the table. A coast-
ing blade can be dangerous.
15. NEVER PERFORM LAYOUT, ASSEMBLY, or setup
work on the table/work area when the machine is
running.
16.TURN THE MACHINE “OFF” AND DISCONNECT
THE MACHINE from the power source before
installing or removing accessories, before adjusting
or changing set-ups, or when making repairs.
17.TURN THE MACHINE “OFF”, disconnect the
machine from the power source, and clean the
table/work area before leaving the machine.
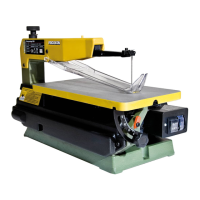
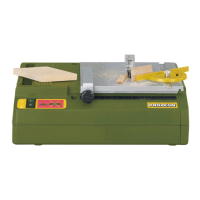
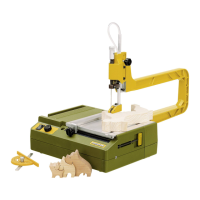
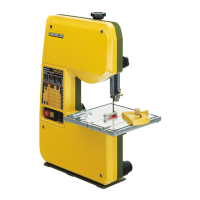
3. Additional safety instructions for
band saws:
For Your Own Safety Read Instruction Manual
Before Operating MICRO Band Saw.
a)Wear eye protection. Use safety glasses. Please
note: Everyday eyeglasses are NOT safety glasses.
Eye protection equipment should comply with
ANSI Z87.1 standards.
b)During extended periods of operation wear ear
protectors (plugs or muffs).
c)Do not remove jammed cut off pieces until blade
has stopped.
d) Maintain proper adjustment of blade tension, blade
guides, and thrust bearings. Poorly maintained
tools and machines can further damage the tool or
machine and/or cause injury.
e) Adjust upper blade guide so that it is about 1/8"
above the workpiece.
f) Hold workpiece firmly against table.
- 6 -
 Loading...