7
v3.0 2024-04-10
Connection Guide
1. To start your camera, please connect the power adapter to the DC-12V power connector port on
the back of the camera, ensuring all connections are correct and secure.
2. The power indicator on the front panel of the camera will illuminate.
3. Once powered on, the camera will initialize. During this phase, it will rotate to the left and right
limit positions, then both horizontal and vertical limit positions. After these limit checks, it will stop
at the center position. Once the camera has stopped moving, the initialization will be complete.
(Note: If preset 0 is saved, The camera will stop at preset 0)
6
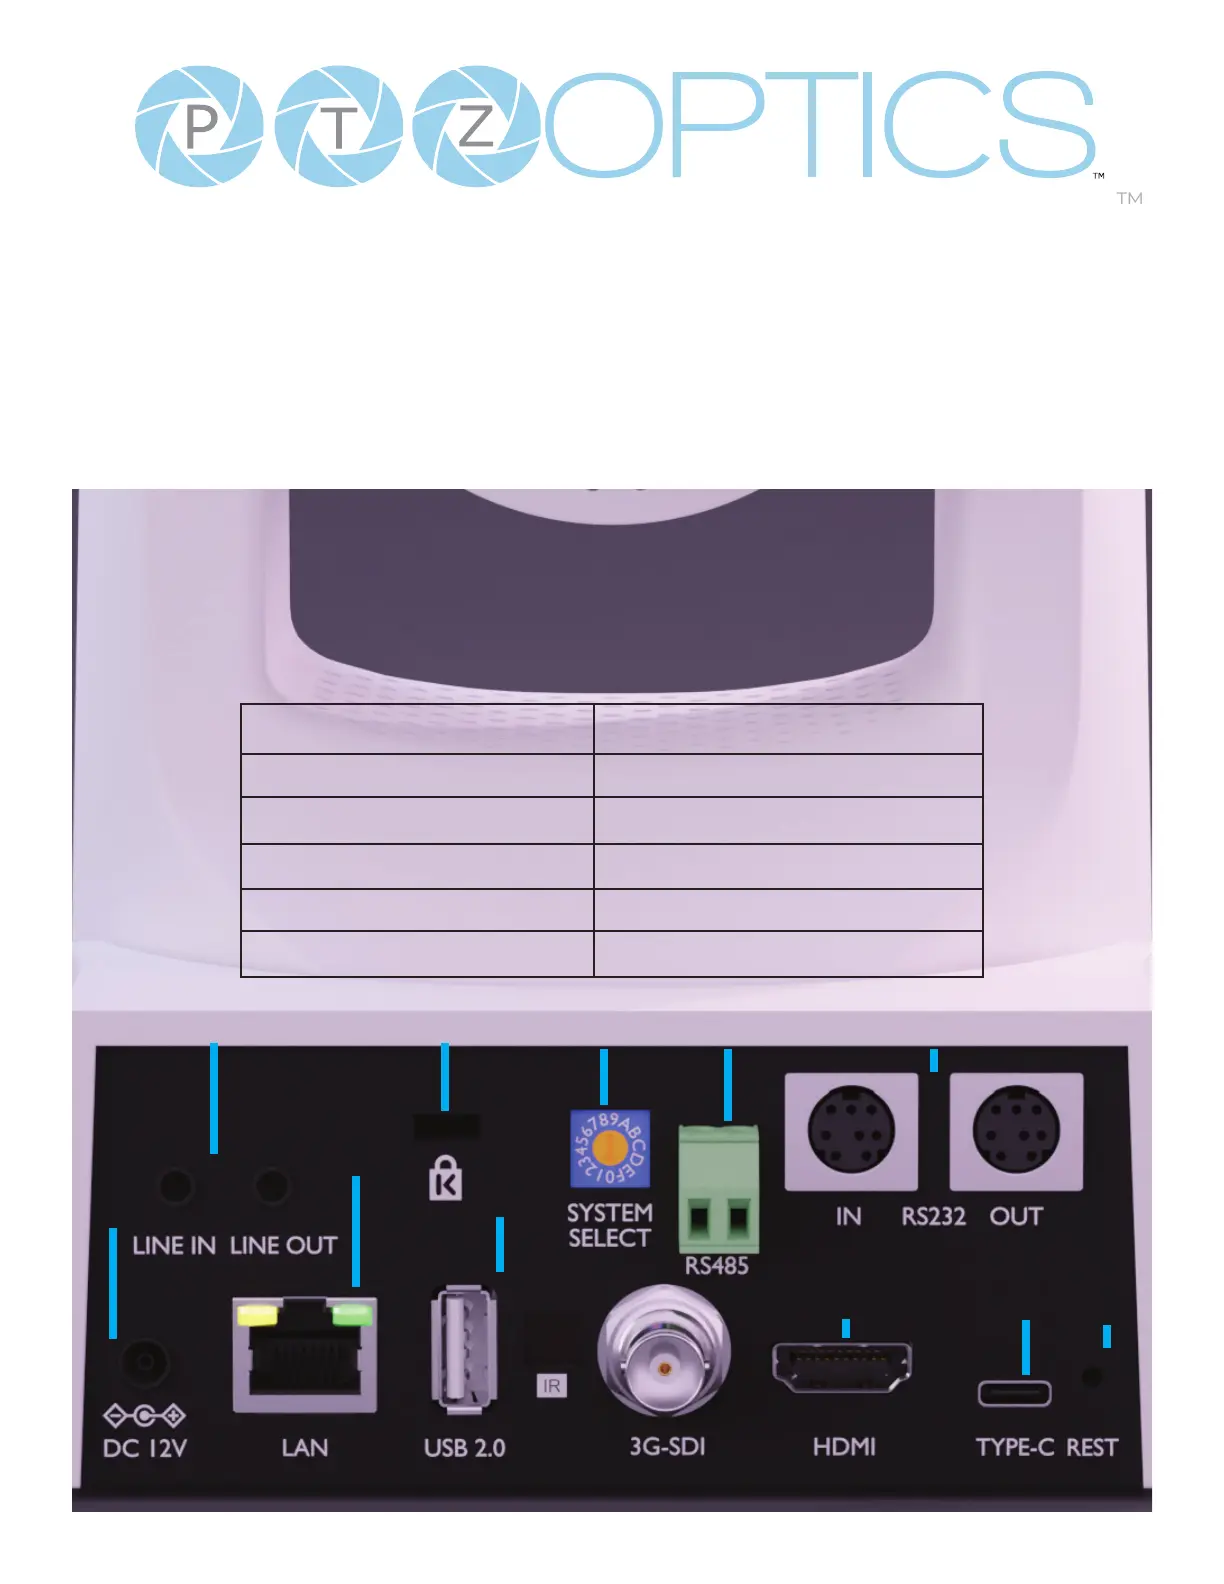
1. Line In & Line Out 7. LAN
2. Kensington Lock 8. USB 2.0 Service Port
3. Resolution Dial 9. 3G-SDI
4. RS485 IN Interface 10. HDMI 1.4
5. RS-232 In/Out 11. USB 3.0 Type-C
6. DC 12V 12. Restore
32 4 5
12109
8
7
11
1