system but no more than 10% over the pump’s rated pressure. After adjustment tighten the lock
nut and reinstall the plastic cover.
Periodic inspection of the valve seat is recommended. If it becomes worn or damaged leakage
will occur regardless of how tightly the valve is adjusted.
7.6 PTP (PUSH TO PURGE / AUTOMATIC BLEED
VALVE)
7.6.1 General Description
The PTP (automatic bleed valve) is a gravity-operated ball check valve that automatically
removes gases from the hydraulic system. On each discharge stroke of the pump, hydraulic
pressure drives the ball off the lower seat, expelling any accumulation of gases at the top of the
hydraulic system. An upper seat limits ball travel and flow during each actuation. On each
suction stroke, the ball is pre-positioned by gravity against the lower seat to prevent reentry of
gas into the system. When all gas has been expelled, a small amount of oil will be displaced on
each discharge stroke. This oil is returned by gravity to the hydraulic reservoir. Under normal
operating conditions this ongoing process removes minute, invisible accumulations of gas long
before they are visible or detrimental to pump operation. To accelerate hydraulic startup,
pressing the spring-loaded button at the top of the valve holds the valve momentarily open so
that large amounts of gas can be instantly purged. When the button is released, the valve
reverts to normal automatic operation. Bleed valve operation can be monitored by observing oil
flow from the center discharge port through the diagnostic window. Any accumulation of solids
can cause the valve to malfunction.
7.6.2 Removal, Cleaning, & Reinstallation
Use the following procedure to remove, clean & reinstall the PTP (Automatic Bleed Valve)
1. Disconnect the power source to the drive motor.
2. Relieve all pressure from the piping system.
3. Slowly unscrew the valve to gradually relieve any residual hydraulic system pressure.
4. Remove the valve and clean it by soaking in compatible solvent. Valve operation can be
confirmed by blowing air through it in both directions and listening for the “click” sound of
ball-seat contact in both directions.
5. Make sure that the copper gasket is installed at the bottom of the threaded hole in the pump
head. It need not be replaced provided that it is sound and undamaged. The elastomer
gasket around the upper portion of the valve assembly may be likewise re-used.
This valve is not repairable and must be replaced if it continues to malfunction after cleaning.
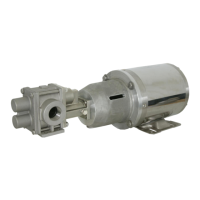
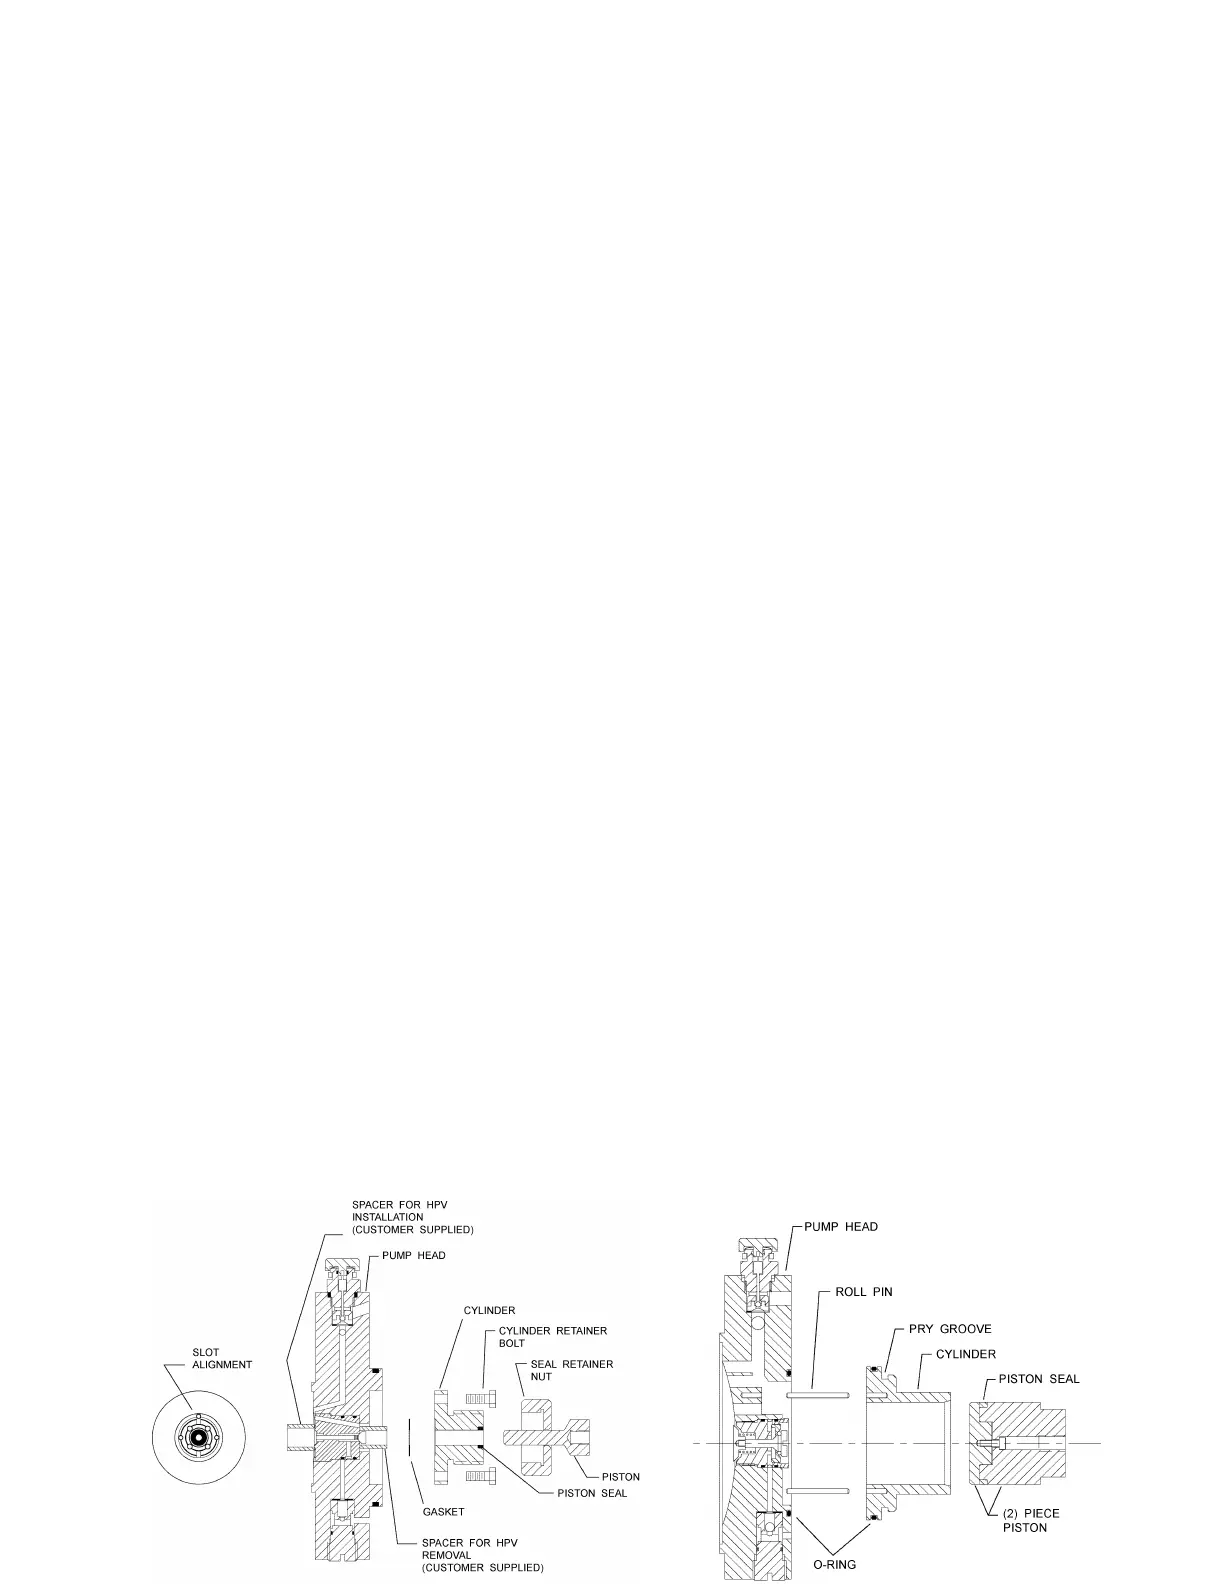
7.7 PISTON SEAL
 Loading...