7. Rotate the motor until the clearance holes in the adaptor and the tapped holes in the motor
align. Fasten the motor to the adaptor using the supplied bolts (4). Tighten bolts evenly to
secure motor.
5.2.3 Electrical
Wire the PULSAR drive motor according to the motor vendor’s nameplates and instructions, and
according to any appropriate national and local electrical codes and regulations.
If the motor is to be utilized with a Pulsafeeder controller, such as the DLC, DLCM, or
MPC, consult the appropriate Pulsafeeder IOM for further motor wiring instructions.
6. STARTUP PROCEDURE
6.1 OUTPUT ADJUSTMENT
Figure 12
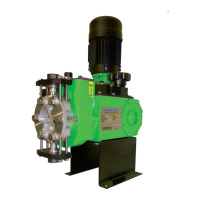
All PULSAR pumps have a hand-wheel for manual stroke length adjustment. Mounted atop the
eccentric box, the hand-wheel can be adjusted at any point (from 0 to 100% stroke setting) by
pressing down and then rotating the hand wheel as required. Stroke length is locked during
operation to prevent drift: pressing the hand-wheel down temporarily disengages the lock for
adjustment; release after adjustment automatically resets the lock at the new setting. An
indicator adjacent to the hand-wheel displays the output setting. Adjustments can be made
while the pump is at rest or operating, although operating adjustments are easier to make.
Manual adjustment serves as a backup for pumps provided with an optional DLC stroke length
controller. If the control cover is removed and replaced, the bolts should be tightened to 20-24
In-lb (225 – 270 N-cm).
If the pump is equipped with a pressure leak detection system, the system must
remain sealed at all times during pump operation, whether or not leak detection is
required. If the seal is broken, decreased flow and/or diaphragm damage will occur.
See Appendix I on page 33 for further information.
 Loading...