9
ASSEMBLY
• Attach the support leg using M8 screws (2) and nuts.
Installing Support Leg (See fig 2)
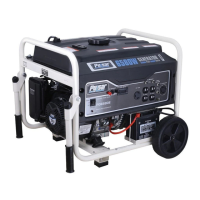
• Parts needed - 2 wheels, 2 axles, 2 hair pins, and 2 washers.
• Raise or tilt generator so you can slide the wheel axle pin into the wheel, the washer, the wheel mounting hole located
on the side of the frame.
• Secure the wheel assembly by inserting a hair pin through hole at the end of the wheel axle clevis pin and pressing until
it locks into place.
• Repeat process on the other side of the generator to install the second wheel.
Attaching Wheels (See fig 1)
Fig 1
Fig 2
• Parts needed - Support Leg(2) & M8 screw (2) and 2 nuts.
•
•
Raise the front end of the generator high enough to gain access to the bottom of the frame. Securely position
props
underneath to support.
Line up holes on the support leg bracket to the holes on the front of the generator frame.