10
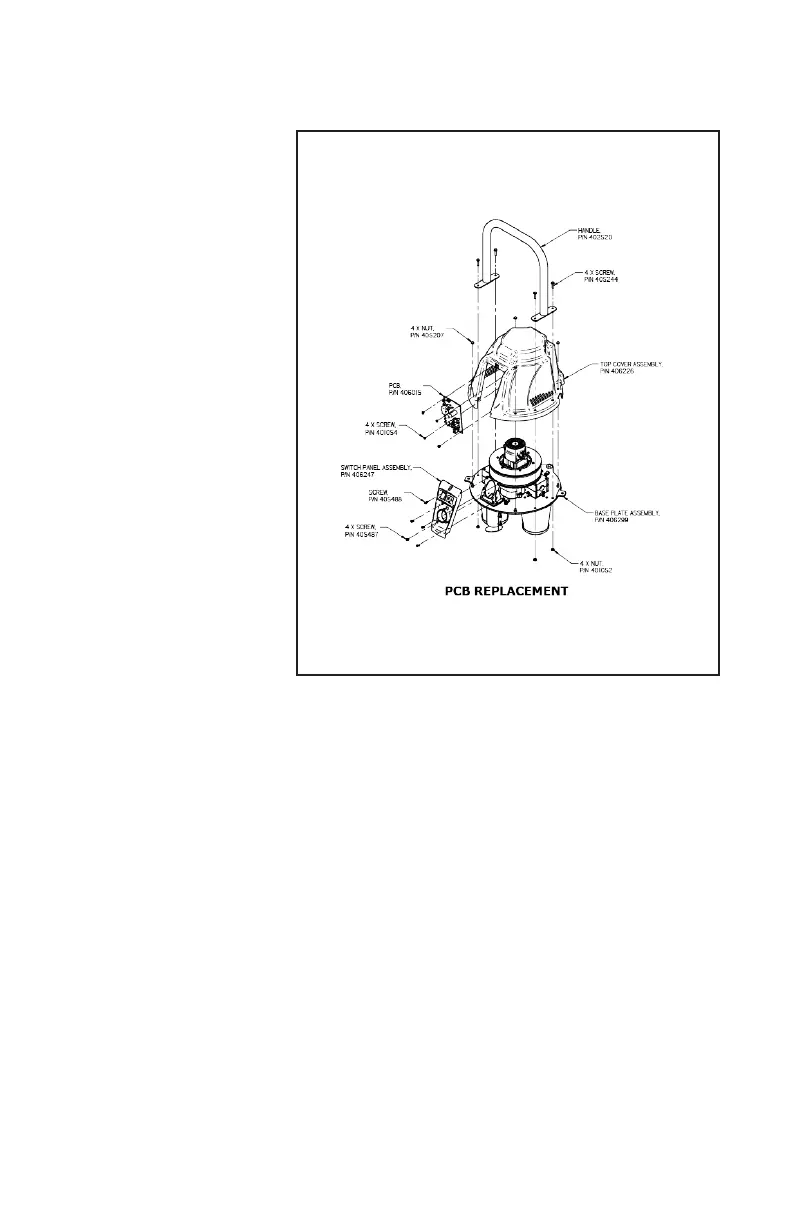
Step 1. Disconnect the Pulse-
Bac® from the electrical power
source.
Step 2. Remove the top cover
assembly by removing the 4 1/4“-
20 Cap Nuts and the 4 screws
(405487) holding to Switch Panel
to remove the Top Cover.
Step 3. Remove the 4 screws
(401054) holding the PCB on the
PCB Mounting Plate.
Step 4. Install the new PCB by
aligning the four mounting holes
with the mounting bosses on the
electrical panel and secure the PCB
with four screws.
PRINTED CIRCUIT BOARD REPLACEMENT
Figure 6
TROUBLESHOOTING
• Unit will not start: Check the power source at the electrical outlet. Check cord cap for proper connection.
Check to see the switch is in the ON position and light is on.
• Unit’s Lift & CFM are low: Check to see if vacuum head is properly aligned on the tank and the seal is in
good condition. Check to see if lters have become saturated with debris. Check to see if Pulse Bac® lter
cleaning system is operating correctly. Check inlet and hose for obstructions.
• Dust coming out of head: Check to see if lters are Installed properly and seals are in good condition. Check
lters for tears or cuts. Check to see if lters are saturated.
• Motor is not working: Check power to unit. Check power switch, Check motor.