30
QSC, LLC
6.6 Fan
To replace the fan, remove the metal cover from the heatsink to gain access to the fan hardware.
Removal
1. Follow removal steps 1 — 7 in “6.2 AMP/PSU board”.
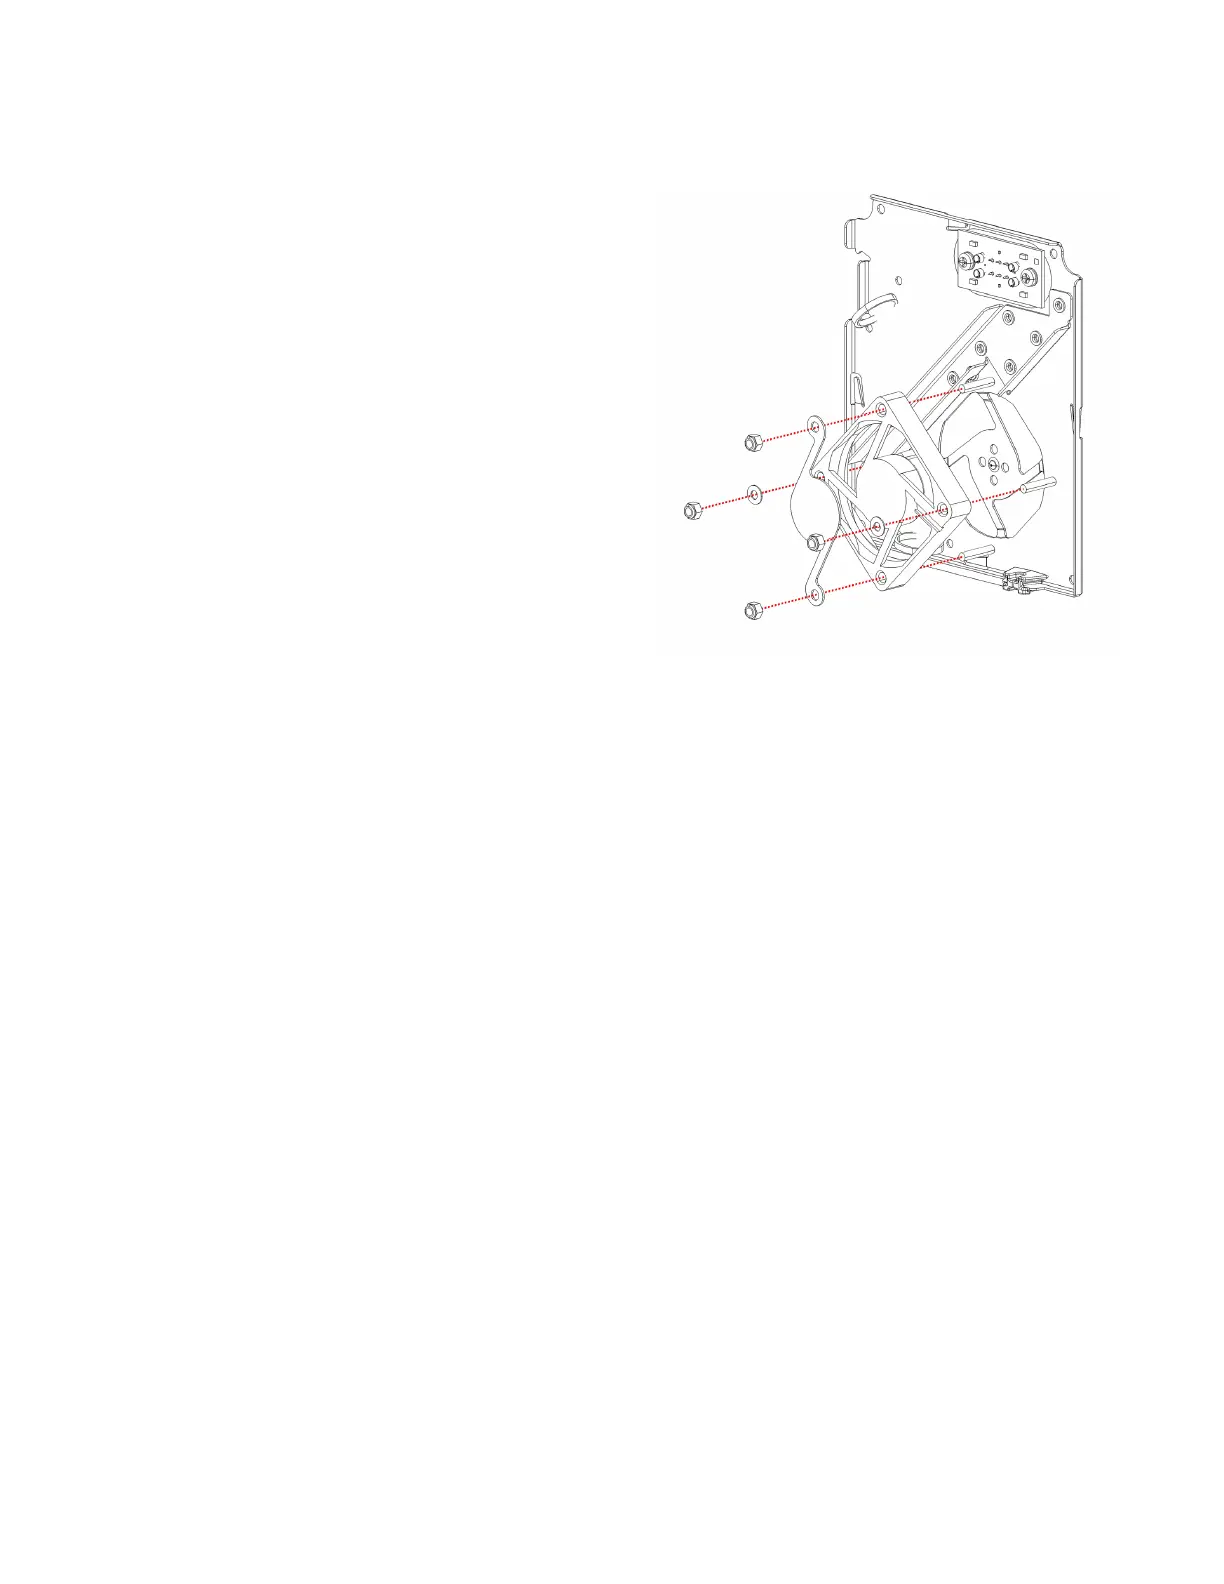
2. With the metal cover up, remove the 4 hex nuts that
secure the fan to the metal cover standoffs. Use a 5mm
wrench or nut driver. See Figure 6.6.1.
3. Remove the 2 washers and custom fan bracket.
4. Remove the fan from the standoffs and set aside.
Installation
1. Install the new fan over the standoffs, noting the wire
position in Figure 6.2.8.
2. Place the 2 washers and custom fan bracket over the
standoffs.
3. Fasten the 4 hex nuts using a 5mm wrench or nut driver
using a torque of 8 kgf-cm (7 in-lbs). Do not over-torque.
4. Follow installation steps 6 — 16 in “6.2 AMP/PSU board”
on page 24 to reassemble the amplifier module.
Figure 6.6.1 - Fan assembly to metal cover.

 Loading...