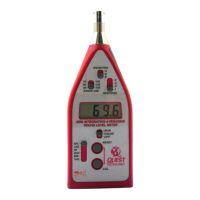
At this point, pressing either the CAL or RESET button will toggle the
Exchange Rate between 'Er3' and 'Er5'.
When the desired Exchange Rate is displayed, store the selection by
pressing both the CAL and RESET buttons simultaneously. This completes
the selection.
3.2.2 Changing the Calibration Level:
NOTE: The calibration level is the decibel level that is produced by
your calibrator.
Turn on the meter.
When the current calibration level is displayed, press and hold both the
RESET and CAL buttons until dashes appear. The meter is now in the
calibration level set mode.
To edit the level, use the RESET key to increase the value and the CAL key
to decrease to value. Edit the value to match your calibrator's output.
When the desired calibration level is displayed, press and hold both the
RESET and CAL buttons until dashes appear on the display. The new
calibration level is now stored in the instruments memory and will not have
to be changed again unless an alternate calibrator is used.
3.3 Calibration:
The model 1200 may be calibrated in any range based on your calibrator's
output. There is no warm up period required, but for maximum accuracy
calibration should be performed at the temperature of the environment to be
measured. To calibrate, perform the following procedure using a Quest
Calibrator.
It is recommended that calibration be performed before each use.
1. Check that the LOBAT indicator is not on.
2. Check to see that the calibrator SPL output matches the calibration
level stored in the meter. If it does not, use procedure outlined in
section 3.2.
NOTE: Failure to match calibrator output level to calibration level stored
in the 1200 will result in erroneous SPL readings.
3. Turn to calibrator ON. If optional, set the frequency to 1 KHz.
4. Place the black adapter ring fully onto the microphone.
5. Set the model 1200 to SPL, PAUSE, SLOW or FAST, and A or C
weighting. Set the measuring range so that the calibration level falls
within it.
6. If the 1200 has data in the memory, it must be cleared before
calibration is possible. To do this, press and hold the RESET button.
For more details see (RESET Button, section 2.2.6).
7. Press and hold the CAL button until 'CAL' appears in the display.
Release the button. Three dashes will appear and then disappear one at
a time as the meter calibrates. A final message of 'PAS' or 'BAD' will
appear in the display. If 'BAD', review steps one though five.
3.3.1 Calibration Check:
It is a good idea to check calibration after use. To do so, perform the
previous steps 1 through 5. Observe the meter display, it should read the
calibrator level +/-0.5 dB. If out of tolerance, run calibration procedure in
section 3.3.
3.4 Switch Settings to Select Measurement:
To Measure
: Set Switches to : Display:
SPL SPL, A,C or Z, 1 second update
RUN or PAUSE,
RESPONSE of
interest
LEQ LEQ, A,C or Z, Holds LEQ until RESET
RUN, RESPONSE of or Meter SETTING is
FAST, SLOW OR changed IMPULSE
MAX HOLD MAX, A,C or Z, Holds MAX until RESET
RUN RESPONSE of or Meter SETTING is
interest changed

 Loading...