BTR Series
EN
QUICK BTR Series INSTALLATION AND USER’S MANUAL - REV 001C
14
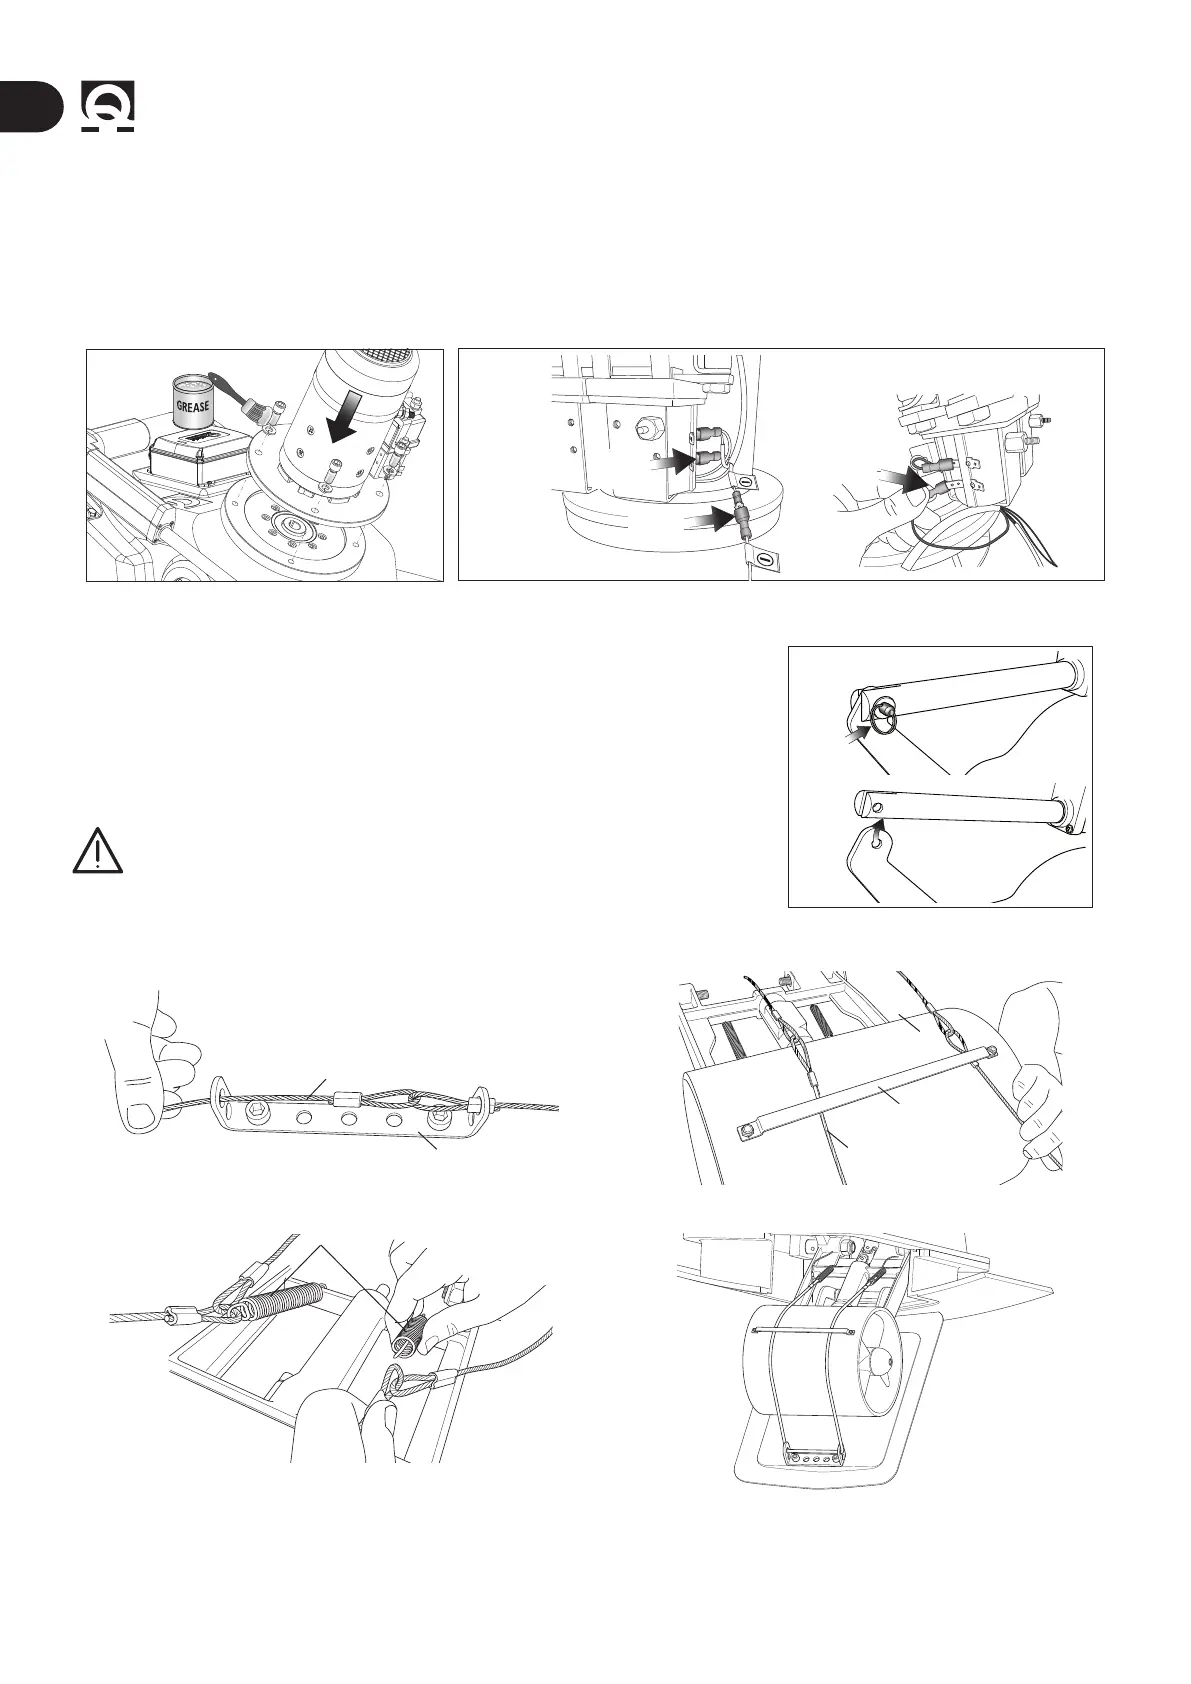
4.4 - Motor installation
Fig. 15
• Grease the drive shaft and make sure the key is properly positioned.
• Insert the motor and x it with the suitably greased 4 screws and 4 growers supplied (g. 15A).
• Connect the fastons respecting the polarities (g. 15B).
CABLE
NO.5
CABLE
NO.7
CABLE
NO.6
Fig. 15A Fig. 15B
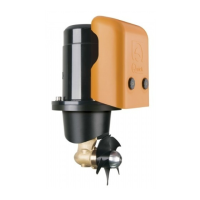
4.5 - Check and mechanical adjustment of the system
Fig. 16
• The retractable thruster should not be powered.
• Remove the ring and the pin (ref. A).
• Release the actuator from the lever (ref. B), make sure the system can be opened
and closed smoothly without mechanical hindrance.
Warning:
when manually releasing the actuator the thruster with its weight
comes out completely, hence make sure that no one is within its operating range.
Fig. 16
A
B
Follow the sequence below to check hatch opening:
4.6 - Installing the cable in the hatch
HATCH BRACKET
STEEL WIRE ROPE
A
GUIDE
STEEL WIRE
ROPE
TUNNEL
B
• Insert one end of the cable into the hatch bracket (ref. A). • Run the cable under the guide attached to the tunnel (ref. B)
SPRINGS
C
D
• Hook the ends of the cable to the two springs (already
positioned on the tilting body) (ref. C).
• Final installation of the cable in the hatch (ref. D).
Fig. 17
4 - Installation