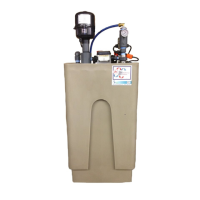
Bubble‐Up®JrInteractive™RadonRemovalSystem
9
stressontheplumbingandcauseleaks.Inthiskindofsituation,apressureregulatorshouldbeinstalledontheoutlet
sideoftheunitanddrawdowntank.
7. TheBubble‐Up®JrInteractive™requiresaquadplexoutletwiredtoadedicated20Acircuit.Usea20ampduplex
GFCI
receptaclefortheyellowfloatswitchcordforUL(SeeFigure8).Thiscircuitshoulduse#12AWGwiring.
8. Installthe2.1gallonwaterexpansiontankontheoutletsideoftheunit.SeeFigure11.Thistankisincludedto
preventthepumpfromstartingandstoppingquickly
(“shortcycling”)whenthereareshort‐termdemandsfor
smallamountsofwater.
9. Installapre‐filterontheinletsidetoprotectthesolenoidfromsedimentclogging.Seefigure11.Thepre‐filter
shouldbeasediment‐typefilterwitha5micronrating.Donotuseacarbon
‐typefilter.
10. Attachtheredhandledbypassvalve.
11. Thebypassvalveisincludedsothattheunitcanbetakenoutofserviceeasilywithoutinterruptingthewater
supply.Plumbtheinletlineandoutletlinesothatthewatercancontinuethewaterdemandifthebypass
valve
issettothebypassposition.
12. Pouroneounceofbleachintotheblowerattachmentnippletodisinfecttheunit.SeeFigure6forlocationof
blowerattachmentnipple.
13. Firmlysliptheblowerontotheblowerattachmentnippleandtightenclamptosecureblowertonipple.
Caution!
DonotusePVCpipecementonthisconnection.
Note:Ifblowerinletisconnectedtodrawairfromanoutdoorsource,makesurethatnomoisturecangetintoablower
motor.Ifanoutdoorsourceisdesired,adryerventkitcanbemodifiedbyremovingtheflap
checkandreplacingitwith
ascreen.BesuretoinstallthekitasdirectedandrunthehosedowntothefloorintheareaoftheBubble‐Up®Jr.
Interactive.
14. Pluginthefollowingcords.Refertofigures6,7,&8.
• Plugblowercordinto
duplexoutlet.
• Plugsolenoidcordintoduplexoutlet.
• Plugfillpiggy‐backfloatswitchcordintoyellowfloatswitchcord
• Plugduplexoutletcordintofillpiggy‐backfloatswitchcord
15. Plugyellowfloatswitchcord,metercontrolcord,andwateralarmvalvecordintodedicated20
ampquadplex
outlet.SeeFigure8.
Importantnote:DonotpluginpumpcontrolcorduntilBubble‐Up®JrInteractive™tankisfilledtonormal operating
waterdepth.
16. Runtheventlineoutdoorsusing2”PVCpiping.Trytomakethislineasshortanddirectaspossible*.
Makeallof
thepipeconnectionsairtightusingproperPVCpipecement.
Importantnoteaboutventlinepiping:Use¼”per footpitchtowardstheBubble‐Up®JrInteractive™.
*Caution!Donotinstallaventoutletlinewhichislongerthan50’ ,andincludesmorethanfiveelbows.
Thiscancreate
excessivebackpressureandinterferewiththeoperationoftheunit.Onlongerruns,uselargerpipe.Callthefactoryfor
detailsonspecificapplications.IfthisisdonetheblowerunitoftheBubble‐Up®Interactive™cancreatepressurewithin
themaintank.Thiscancausewaterfrom
themaintanktobeforcedupthroughtheoverflowpipeandspillontothe
watersensorterminalblockthusactivatingthewateralarmvalve,shuttingdowntheunit.Thiscanalsooccurifthevent
outletlineisplugged.
Caution!Donotinstalltheventopeningatalocation
wheretheventgassescouldbeblownbackintoanoccupied
space.
 Loading...