Radial Engineering Ltd. Headbone User Guide
True to the Music
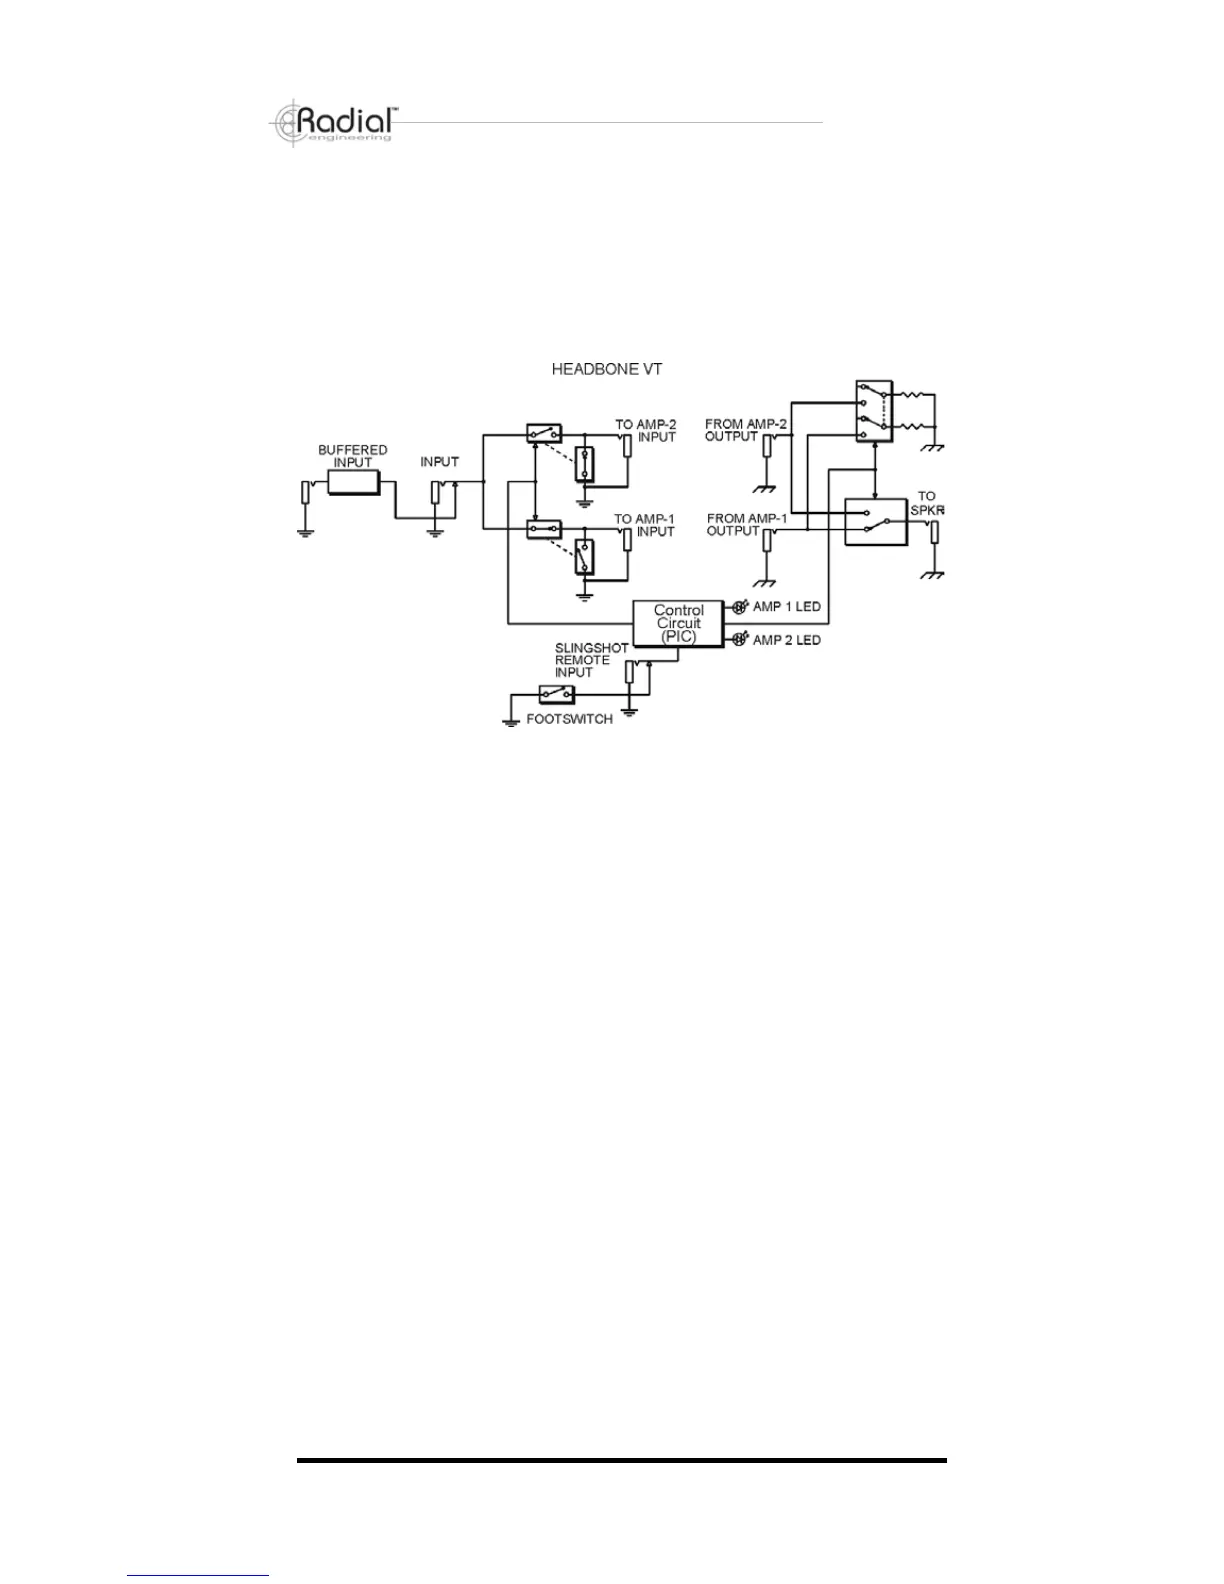
GETTING TO KNOW YOUR HEADBONE
To best explain the workings of the Headbone, take a minute to study
the block diagram. Reading from left to right, you can see the inputs, the
high-impedance guitar switching, the control circuitry and the speaker
level switching.
The Input Signal Path
The Radial Headbone’s input signal path is 100% discreet Class-A.
This means that it employs a whole bunch of parts such as resistors and
capacitors instead of a transistor to buffer (amplify) the guitar signal to a
manageable level. Class-A circuits are preferred over integrated circuits
(IC chips) as they are more natural sounding.
Buffered and Direct Inputs
The Headbone gives you the choice of two inputs: one buffered and one
direct or unbuffered. The reason we do this is that when you are driving
a pre-buffered signal, there is no advantage to buffering the signal again.
In some cases, two buffers in series could add distortion or noise.
If you are connecting the guitar directly to the Headbone, use the Buff-
ered Input. If you use a buffering device (pre-amp), such as the Radial
Loopbone or Switchbone, you would plug the output of the device into
the unbuffered Direct Input. Some effect pedals use a buffering stage
in their design, some do not. If you are connecting an effect pedal before
the Headbone, the best way to decide which input to use is to let your
ears choose the one that sounds best to you.
Switching Guitar Signals
The Headbone simultaneously switches the inputs to the amps as well
as the outputs from the amps. It is important that the input going to the
unused head be disconnected so that, while in standby, it is not trying
to amplify a signal with nowhere to go. The Headbone performs silent
6
Continue Next Page >>