Do you have a question about the Radio Shack Add-On 2.4 GHzWireless Color Camera and is the answer not in the manual?
Captures audio from the camera's environment.
Ensures high-quality image resolution for clear visuals.
Allows selection of transmission channels to match the receiver.
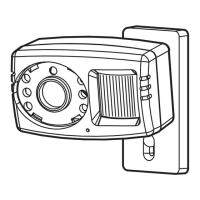
Facilitates precise positioning of the camera for optimal viewing angles.
Choose a clear, dust-free spot away from direct light for best performance.
Ensure cables are routed away from power lines or interfering equipment.
Install camera in temperatures between -4°F (-20°C) and 122°F (50°C).
Use a 100-watt incandescent lamp to enhance the camera's low-light visibility.
Camera can be permanently mounted or placed on a movable platform.
Steps for marking, drilling, and securing the camera to a wall.
Attach camera to a tripod by screwing it into the bottom mounting hole.
Set camera channel (A-D) to match the receiver's channel.
Position the camera head for the desired viewing angle.
Align antenna's flat side towards the TV or monitor.
Plug camera's power adapter into the Plug 'n Power adapter.
Set UNIT and HOUSE on adapter to match control system settings.
Plug the Plug 'n Power adapter into a standard wall outlet.
Keep camera dry, clean, and operate in normal temperature environments.
Avoid modifications; they can cause malfunction and void the warranty.
Captures audio from the camera's environment.
Ensures high-quality image resolution for clear visuals.
Allows selection of transmission channels to match the receiver.
Facilitates precise positioning of the camera for optimal viewing angles.
Choose a clear, dust-free spot away from direct light for best performance.
Ensure cables are routed away from power lines or interfering equipment.
Install camera in temperatures between -4°F (-20°C) and 122°F (50°C).
Use a 100-watt incandescent lamp to enhance the camera's low-light visibility.
Camera can be permanently mounted or placed on a movable platform.
Steps for marking, drilling, and securing the camera to a wall.
Attach camera to a tripod by screwing it into the bottom mounting hole.
Set camera channel (A-D) to match the receiver's channel.
Position the camera head for the desired viewing angle.
Align antenna's flat side towards the TV or monitor.
Plug camera's power adapter into the Plug 'n Power adapter.
Set UNIT and HOUSE on adapter to match control system settings.
Plug the Plug 'n Power adapter into a standard wall outlet.
Keep camera dry, clean, and operate in normal temperature environments.
Avoid modifications; they can cause malfunction and void the warranty.
| Camera Type | Wireless |
|---|---|
| Frequency | 2.4 GHz |
| Color | Yes |
| Image Sensor | CMOS |
| Category | Security Camera |